
Introduction
You water on time, add fertilizer each spring, and still watch your tomatoes turn yellow before they fruit. I spent 3 frustrating years stuck in that same spot before I learned how to test soil. That one move showed me the real problem hiding under my feet. A guide like How to Test Soil: 7 Essential Steps for Healthy Gardens would have saved me so much cash back then.
Think of soil testing like a medical checkup for your garden. You wouldn't guess which pills to take without seeing a doctor first. Your dirt deserves that same care and attention before you dump products on it. My first sample cost just $12 at the county extension office and came back in 10 days. The report showed a pH of 5.1, which is far too acidic for most vegetables. That low number meant my plants couldn't grab nutrients no matter how much I fed them each week. One small change in my routine fixed years of confusion.
Most garden soil health issues come from imbalances that a $10 to $15 extension report can spot and fix fast. Without real data, you just toss bags of fertilizer and hope things get better on their own. That blind approach costs real money at the register every single spring and fall. It also sends extra nutrients into local streams as runoff, which harms fish and plant life in those waters. More people started growing food at home after 2020, but most of them still skip this simple first step that makes everything else work better.
A basic soil test kit or lab report gives you the facts behind every choice you make in your beds. Below you will find 7 clear steps for checking your ground and reading what the numbers mean. Each step builds on the last one and gives you hard data that beats guesswork every time. You will know exactly what your dirt needs and what it has plenty of before you spend another dollar at the garden center this season.
7 Steps to Test Your Soil
The soil test procedure matters just as much as the test itself. I ruined my first 2 samples because I used a brass trowel that added copper to the dirt. You need stainless steel tools and a clean bucket to collect soil samples the right way. Grab a ruler too so you can nail the correct sampling depth for each zone.
Penn State Extension says you should collect from 8 to 15 random spots across each garden area. One scoop from a single spot won't give you the full picture. These 7 steps cover soil sampling from zone planning all the way to reading your final extension service report.

Plan Your Testing Areas
- Why it matters: Different parts of your garden may have different soil types, drainage patterns, and amendment histories that affect test results and planting decisions.
- What to do: Walk your property and divide it into distinct zones based on how you use each area, such as vegetable beds, flower borders, lawn sections, and areas near structures.
- Key detail: Keep each testing zone under 1,000 square feet (93 square meters) for the most accurate results, because larger areas often contain mixed soil types.
- Avoid this mistake: Never mix samples from a vegetable bed with samples from your lawn or flower garden because they have different nutrient demands and pH targets.
- Expert tip: Sketch a simple map of your property marking each zone and label your sample bags to match, so you can apply the right amendments to each area later.
- Timing guidance: Plan your testing 2 to 4 weeks before you intend to apply amendments, giving the lab time to process results and you time to source the right products.

Gather the Right Tools
- Essential tools: You need a stainless steel or chrome-plated trowel, a clean plastic bucket, resealable plastic bags, a permanent marker, and a ruler or tape measure.
- Why material matters: Brass, bronze, and galvanized tools leach zinc and copper into your sample, producing fake high readings that lead to wrong amendment recommendations.
- Bucket preparation: Rinse your collection bucket with distilled water before use, and never use a bucket that once held fertilizer, soap, or other chemicals.
- Cost consideration: County extension offices and universities often provide free or low-cost sample bags with prepaid shipping labels, saving you the trouble of sourcing containers.
- Measurement aid: Mark 6 inches (15 centimeters) and 8 inches (20 centimeters) on your trowel handle with tape so you can check the correct sampling depth in the field fast.
- Clothing note: Wear gloves to prevent skin oils and sunscreen from contaminating the sample, even more so if you plan to test for heavy metals in urban garden sites.
Collect Samples at Proper Depth
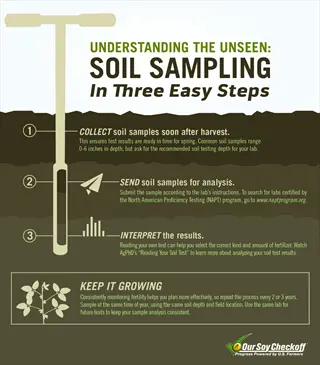
- Sampling depth matters: Vegetable gardens require samples taken at 6 to 8 inches (15 to 20 centimeters), lawns at 4 inches (10 centimeters), and trees or shrubs at 6 to 10 inches (15 to 25 centimeters).
- Technique: Push your trowel straight down to the correct depth, then take a thin vertical slice of soil from the side of the hole rather than scooping from the bottom.
- Avoid surface debris: Scrape away the top half inch (1.3 centimeters) of mulch, grass, or leaf litter before inserting your tool, because organic surface material skews results.
- Random pattern: Collect from 8 to 15 random locations across each testing zone, walking a zigzag or W-shaped pattern rather than clustering samples near one spot.
- Consistency is key: Keep every sample at the same depth within a zone, because mixing surface and deep samples blends topsoil chemistry with subsoil chemistry and masks problems.
- Wet soil warning: Avoid sampling when the ground is waterlogged or frozen, because saturated soil compresses in the bag and frozen ground prevents you from reaching the correct depth.
Mix Your Composite Sample
- What is a composite: A composite sample combines all 8 to 15 individual cores from one zone into a single representative mixture that reflects the average soil conditions.
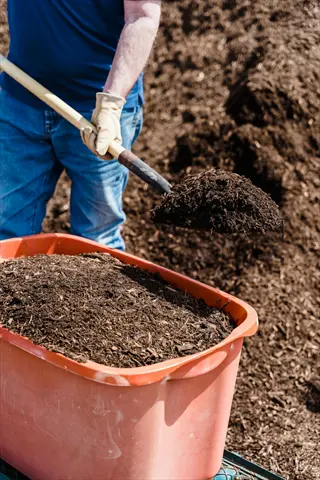
- Mixing method: Place all cores from one zone into your clean plastic bucket, break up any clumps by hand, and stir well until the color and texture look even throughout.
- Remove debris: Pick out stones larger than a marble, root fragments, mulch pieces, and any visible insects before mixing, because these do not represent the mineral soil being tested.
- Final amount needed: After mixing, fill a resealable bag with about 2 cups (473 milliliters) of the blended soil, which is enough for most standard laboratory analyses.
- Label each bag: Write the zone name, date, and your contact info on each bag with permanent marker so the lab can match results to the right garden area.
- Keep zones separate: Never combine samples from different zones into one bag, even if they look similar, because each area may have different nutrient needs and pH levels.
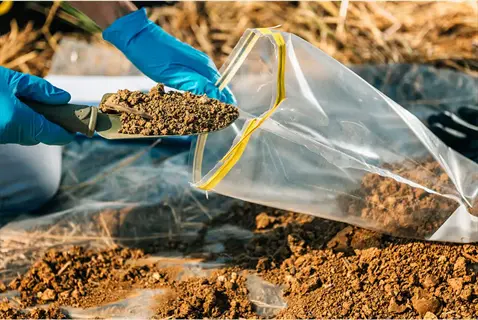
Choose Your Testing Method
- Extension service labs: County cooperative extension offices offer the most affordable professional analysis, often free or $10 to $15, and include customized amendment recommendations for your region.
- Private laboratories: Independent labs charge $20 to $50 and often provide faster turnaround times, plus options for specialized tests like heavy metal screening for urban gardens.
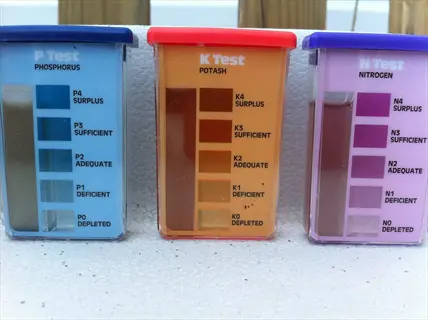
- Home test kits: Store-bought kits from garden centers cost $10 to $30 and provide rough estimates of pH, nitrogen, phosphorus, and potassium within minutes at home.
- Accuracy comparison: Lab tests use standardized methods like the Mehlich 3 extraction to measure plant-available nutrients, while home kits rely on color-matching that varies with lighting and user experience.
- When to use each: Start with extension service testing for new gardens or major problems, use home kits for quick seasonal spot-checks, and choose private labs for contamination concerns.
- Turnaround times: Extension labs take 1 to 3 weeks depending on season, with peak demand in late fall and early spring causing the longest waits, so plan your timing around those busy periods.
Submit and Wait for Results
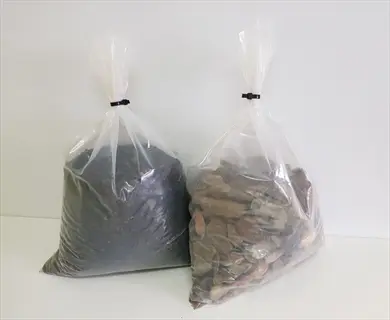
- Shipping tips: Ship samples early in the week so they do not sit in a hot mailbox or warehouse over the weekend, which can alter the chemical composition of wet samples.
- Drying option: Many labs prefer air-dried samples, so spread your soil on a clean newspaper in a shaded area for 24 to 48 hours before sealing the bag for shipping.
- Fill out all forms: Include your garden type, current plants, and any amendments you have applied in the past year, because the lab uses this information to tailor recommendations.
- Peak season delays: Submit samples in late summer or early fall to avoid the rush period, when extension labs receive the highest volume and processing times can stretch to several weeks.
- Digital options: Many university labs now offer online submission forms and email delivery of results, making it easier to store and reference your soil history over multiple years.
- Cost saving: Some extension offices allow you to submit multiple zones on one order form, reducing the per-sample cost when testing several garden areas at the same time.
Review and Act on Results
- Priority order: Address pH correction first because it controls the availability of every other nutrient, then tackle individual deficiencies identified in the report.
- Reading the numbers: Most labs use a nutrient index where below 25 means too low for healthy growth, 26 to 50 is medium, and above 50 is high or sufficient.
- pH correction timeline: Lime starts reacting with soil moisture right away but takes 6 to 12 months to reach full effect, so apply it well before your planting season.
- Maximum lime rate: Never apply more than 50 pounds (22.7 kilograms) of lime per 1,000 square feet (93 square meters) in a single application to avoid shocking soil biology.
- Keep records: Store each test report in a dedicated garden journal or digital folder, because tracking nutrient trends over time reveals whether your management practices are improving or depleting the soil.
- Retest schedule: Plan your next test based on soil type, with sandy soils needing retesting in 2 to 3 years and clay soils in 3 to 4 years to monitor changes.
Following this soil test procedure from start to finish takes about 30 minutes of field work and a short wait for lab results. The payoff is a clear map of what each zone in your garden needs and what it already has in good supply.
Soil Testing Methods Compared
You have 6 main ways to check your dirt, and each one tells you something different about what is going on below the surface. The hand grab test and mason jar test cost nothing but give you texture info and not much else. A home soil test kit bumps up the detail with pH and basic nutrient readings for about $10 to $30 at your local garden center.
Professional soil testing through a lab gives you the most complete picture of your ground. Labs use the Mehlich 3 method to pull out nutrients like phosphorus, potassium, and calcium from your sample. I tried a DIY soil test kit first and got confused by the vague color charts. My extension lab report gave me exact numbers and told me what to add. That small extra cost was worth every penny.
The table below lines up all 6 methods side by side for your soil test accuracy needs. No single method wins in every case. Most smart growers combine a quick home check with a full lab report every few years for the best results.
Reading Soil Test Results
Your soil test report shows up full of numbers, charts, and lab terms that look like a foreign language at first. I stared at my first soil test results for 20 minutes before I figured out what any of it meant. The good news is that reading soil test data gets simple once you know what each section tells you about your dirt.
Most labs use a nutrient index system where below 25 means that nutrient is too low for strong plant growth. A score of 26 to 50 falls in the medium range and works fine for most crops. Above 50 means you have plenty and should stop adding more of that nutrient. Your report also shows cation exchange capacity, which tells you how well your soil holds onto nutrients between rains. Think of it as a grade for how sticky your dirt is with the good stuff. Below you will find a breakdown of the main sections on a standard soil test report with the optimal nutrient ranges you want to see.
Soil pH Reading
- What it shows: The acidity or alkalinity of your soil on a scale from 0 to 14, where 7.0 is neutral, below 7.0 is acidic, and above 7.0 is alkaline.
- Optimal range: Most vegetables and flowers grow best at pH 6.0 to 6.5, which maximizes the availability of nitrogen, phosphorus, potassium, and most micronutrients in the soil.
- Why it matters most: A pH that is even one full point off the target can lock out critical nutrients, meaning your plants starve even when those nutrients are present in the soil.
- What to do if low: A reading below 6.0 calls for lime, with your report stating pounds per 1,000 square feet (kilograms per 93 square meters) needed to reach the target.
- What to do if high: A reading above 7.0 may need elemental sulfur or acidifying fertilizers, though this is less common in gardens east of the Mississippi River.
Macronutrient Levels
- The big three: Phosphorus, potassium, and sometimes nitrogen appear as index values or parts per million, showing how much of each nutrient is available for plant roots to absorb.
- Index reading: A nutrient index below 25 means that element is lacking and your plants will show symptoms like yellowing leaves, stunted growth, or poor fruit set.
- Medium range (26 to 50): Nutrient levels in this range are fine for most plants, but heavy feeders like tomatoes and corn may still benefit from targeted feeding.
- High range (above 50): A high reading means you should avoid adding more of that nutrient, since excess phosphorus in particular causes harm through runoff into waterways.
- Nitrogen exception: Most labs skip nitrogen because its levels change fast with rainfall and temperature, making a single snapshot test unreliable for long-term planning.
Secondary Nutrients and Micros
- Calcium and magnesium: These appear on most reports and affect soil structure on top of plant nutrition, with their ratio shaping whether your soil feels loose or compacted.
- Micronutrients tested: Labs measure manganese, copper, zinc, boron, and sulfur, all of which plants need in small amounts but which cause toxicity when levels get too high.
- Reading the units: Results may appear in parts per million or pounds per acre, and your report should note which unit it uses so you can compare against known optimal ranges.
- Iron and aluminum at low pH: When soil pH drops below 5.5, iron and aluminum become very soluble and can reach toxic levels that damage root growth in your plants.
- When to worry: Micronutrient issues are rare in soils with proper pH and organic matter, so fixing pH often solves what looks like a micronutrient problem without extra products.
Organic Matter Percentage
- What it measures: The share of broken down plant and animal material in your soil, which serves as a slow-release nutrient bank and boosts how much water your dirt can hold.
- Target range: Most productive garden soils contain 3% to 5% organic matter, with values below 2% showing a need for regular compost or cover crop additions.
- Connection to biology: Higher organic matter supports greater numbers of helpful soil organisms including earthworms, fungi, and bacteria that cycle nutrients for plant roots.
- Rate of change: Building organic matter takes time, with most gardens gaining about 0.1 to 0.2 percentage points per year when you add compost and avoid too much tilling.
- Regional variation: Sandy soils hold less organic matter than clay soils by nature, so compare your results to regional averages rather than national targets for the best context.
Lime Requirement and Buffer pH
- Buffer pH explained: This separate reading estimates how resistant your soil is to pH change, helping the lab figure out how much lime you need instead of giving a generic guess.
- Why regular pH is not enough: Two soils can both read pH 5.5 but need very different amounts of lime because their clay content and organic matter create different buffering power.
- Reading the lime rate: Your report will list a lime rate in pounds per 1,000 square feet (kilograms per 93 square meters) based on both your current pH and your buffer pH.
- Lime type matters: Some reports suggest calcitic lime for soils with good magnesium and dolomitic lime for soils low in magnesium, because dolomitic lime adds both calcium and magnesium.
- Max per application: Never exceed 50 pounds (22.7 kilograms) of lime per 1,000 square feet (93 square meters) at once, splitting larger amounts across fall and spring instead.
Once you get used to reading soil test reports, you can spot problems and fix them before your plants ever show signs of stress. Keep every report in a folder so you can track changes over time and see if your soil care plan is working.
Soil pH and Nutrient Balance
Soil pH acts like a gatekeeper for your garden. It controls which nutrients can pass through to your plant roots and which ones get locked away in the dirt. Cornell research found that a pH of 6.5 is the sweet spot for nutrient availability in most garden soils. When your pH drifts too far from that number, your plants go hungry even when food sits right next to their roots.
The pH scale is not a straight line. It works on a log system, which means pH 5.0 is ten times more acidic than pH 6.0. A jump from 6.5 down to 5.5 sounds small but it makes a huge difference in how your dirt behaves. That one point drop cuts phosphorus availability and slows the helpful microbes in your beds. In acidic soil below 5.5, aluminum and iron flood the root zone at toxic levels that stunt growth and kill young plants fast.
Alkaline soil above 7.5 causes its own set of problems by locking away iron, zinc, and manganese from your plants. I grew blueberries in pH 7.2 dirt for a whole season and watched them turn yellow no matter what I fed them. The optimal pH range for most vegetables sits between 6.0 and 6.5. That is where all the major and minor nutrients stay open for roots. The table below shows you what happens at each pH level so you know what to fix first.
Fix your soil pH first before you spend money on any other product. I have seen gardens bounce back in a single season just from getting the pH into that 6.0 to 6.5 window. Everything else works better once that gate is open.
Amendments After Testing
Your test results tell you what is wrong, and now you need to pick the right soil amendments to fix each problem. I used to dump compost on everything until my test showed phosphorus levels through the roof from years of blind adding. The key is to match each product to a specific number on your report, not just guess at what your dirt might need.
The list below breaks soil improvement fixes into groups based on the most common problems your test report will flag. Fix pH first with lime application or sulfur application. Then fill nutrient gaps with the right organic fertilizer for each reading. Always use the exact rates your report suggests. Using calcitic lime or dolomitic lime in the wrong amount can cause new problems just as bad as the old ones.
Low pH (Below 6.0)
- Primary fix: Apply agricultural lime (calcium carbonate) at the rate your soil test report lists, often 5 to 50 pounds (2.3 to 22.7 kilograms) per 1,000 square feet (93 square meters).
- Lime type choice: Use calcitic lime when your magnesium levels test adequate or high, and choose dolomitic lime when your report shows both low pH and low magnesium readings.
- Timing: Spread lime in fall and work it into the top 4 to 6 inches (10 to 15 centimeters) of soil, allowing 6 to 12 months for the full reaction before spring planting.
- Split large doses: If your report calls for more than 50 pounds (22.7 kilograms) per 1,000 square feet (93 square meters), split the dose into two rounds applied 3 to 6 months apart.
- Pelletized versus powdered: Pelletized lime is easier to spread with a broadcast spreader, while powdered lime reacts faster but creates dust and is harder to spread in an even layer.
High pH (Above 7.0)
- Primary fix: Apply elemental sulfur at 1 to 2 pounds (0.5 to 0.9 kilograms) per 100 square feet (9.3 square meters) to lower pH by about half a point over several months.
- How sulfur works: Soil bacteria convert elemental sulfur into sulfuric acid, a process that requires warm soil temps above 55°F (13°C) to get started.
- Faster option: Iron sulfate works quicker than elemental sulfur because it does not depend on microbes, but it requires about six times more product by weight for the same result.
- Avoid overcorrection: Lower pH over one or two seasons rather than all at once, because rapid pH swings shock the helpful organisms living in your soil.
- Acidifying mulches: Pine needle mulch and composted oak leaves provide a mild ongoing acidifying effect that works well alongside sulfur application for long-term pH control.
Low Phosphorus or Potassium
- Phosphorus sources: Bone meal gives slow-release phosphorus at about 3 to 5 pounds (1.4 to 2.3 kilograms) per 100 square feet (9.3 square meters) for a moderate gap.
- Potassium sources: Greensand, kelp meal, and wood ash all supply potassium, but wood ash also raises pH, so use ash only when your pH sits below the target range.
- Balanced organic fertilizer: A complete organic fertilizer with balanced NPK numbers fixes multiple gaps at once but may oversupply nutrients that are already adequate in your soil.
- Phosphorus and pH link: Phosphorus drops fast below pH 6.0 because aluminum and iron bind with phosphate, so fixing pH first may solve an apparent phosphorus problem on its own.
- Runoff caution: Never add phosphorus unless your test confirms a gap, because excess phosphorus washes into waterways and feeds algae blooms that harm fish and water quality.
Low Organic Matter
- Primary fix: Spread 1 to 3 inches (2.5 to 7.6 centimeters) of finished compost over garden beds each year and work it into the top 6 inches (15 centimeters) of soil before planting.
- Cover crops: Plant clover, rye, or buckwheat in off-season beds, then cut and turn the plants into the soil 2 to 3 weeks before planting to add organic matter and fix nitrogen.
- When compost is not ideal: If your phosphorus levels already test high, switch to aged leaf mold or straw instead of compost to avoid pushing phosphorus even higher.
- Patience required: Organic matter builds at about 0.1 to 0.2 percentage points per year with steady additions, so plan on a 3 to 5 year process to see major change.
- Reduce tillage: Too much tilling exposes organic matter to air and speeds its breakdown, so limit deep digging to once per year and use surface mulching to protect what you have built.
Every amendment you add should tie back to a number on your report. This approach stops you from wasting money on products your soil doesn't need and keeps excess nutrients out of local waterways where they cause real harm.
Seasonal Soil Testing Calendar
Knowing when to test soil matters just as much as knowing how. I learned this the hard way when I sent samples in November. I waited 8 weeks for results because every other gardener in my county did the same thing. The best time to test is early fall, when labs have shorter lines and you still have time to apply lime before the ground freezes.
Think of seasonal soil care as a cycle with 4 phases: test, amend, plant, and review. Fall soil testing gives lime 6 to 12 months to react before your spring crops go in the ground. Spring preparation works for new beds or areas you missed in the fall. Your testing frequency depends on your soil type. Sandy soils lose nutrients fast and need checks every 2 to 3 years, while clay soils hold steady for 3 to 4 years between tests.
Test new beds every year until your numbers settle into a stable range. After that, follow the 2 to 4 year cycle based on your soil type. This calendar keeps you ahead of problems before they show up in your plants.
5 Common Myths
Dark soil is always fertile and ready to plant in without any testing or amendment needed.
Dark color shows organic matter content but reveals nothing about pH, nutrient balance, or possible contamination. A soil test is the only way to confirm fertility.
Home soil test kits from garden centers are just as accurate as professional laboratory analysis.
Home kits provide rough estimates useful for screening, but laboratory tests using standardized methods like Mehlich 3 deliver far more precise and comprehensive nutrient readings.
Adding more fertilizer always produces bigger and healthier plants regardless of current soil conditions.
Excess fertilizer causes nutrient toxicity, root burn, and environmental damage through runoff. Soil testing shows exactly what your garden needs and prevents over-application.
You only need to test your soil once and the results will remain accurate for many years afterward.
Soil chemistry changes with rainfall, amendments, plant uptake, and organic matter breakdown. Sandy soils need retesting every 2 to 3 years and clay soils every 3 to 4 years.
All garden soils should be adjusted to a perfectly neutral pH of 7.0 for the best plant growth.
Most garden plants thrive at a slightly acidic pH of 6.0 to 6.5, which maximizes nutrient availability. Some plants like blueberries need even more acidic conditions around pH 4.5 to 5.5.
Conclusion
Soil testing is not a one-time chore you check off a list. It is the start of an ongoing soil care practice that makes your healthy garden stronger with each passing year. That $10 to $15 extension test saves you hundreds in wasted fertilizer. It also keeps your local waterways clean from nutrient runoff. I have tested my beds for 5 years now and every season gets better because I know exactly what my dirt needs.
Each round of soil test results adds to a bigger picture of your garden soil health over time. You start to see patterns in how your dirt changes from season to season. Maybe your pH drifts down after heavy rains, or your potassium runs low after a big tomato harvest. That kind of year-over-year knowledge turns guesswork into a real plan that saves you time and money at the garden center.
The USDA calls soil health the continued ability of soil to function as a living ecosystem. Testing is how you protect and build that ecosystem in your own backyard. Three moves will get you started on the right path today. Order a test kit from your county extension office. Mark your calendar for early fall sampling when labs have the shortest wait times. Start a soil journal to track every result and amendment you apply so you can look back and see real progress over the years.
Your garden deserves better than guesswork. A simple test gives you the answers your plants have been waiting for, and it costs less than a bag of fertilizer you might not even need. Start testing this season and watch your beds come alive with the right soil care behind every choice you make.
External Sources
Frequently Asked Questions
Which soil testing method for gardens is most reliable?
Professional laboratory analysis through a county extension service provides the most reliable results, testing for pH, phosphorus, potassium, calcium, magnesium, and micronutrients with standardized methods like the Mehlich 3 test.
Could DIY soil tests replace laboratory analysis?
DIY tests like the hand grab test, mason jar test, and pH strips provide useful physical and texture information but cannot match the precision of laboratory chemical analysis for nutrient levels.
How frequently should I test my garden soil?
Sandy soils should be tested every 2 to 3 years, while clay soils hold nutrients longer and need testing every 3 to 4 years. New garden beds should be tested before planting.
Which soil problems can a test detect?
Soil tests detect pH imbalances, nutrient deficiencies or excesses in phosphorus, potassium, calcium, and magnesium, plus issues like high salinity and heavy metal contamination.
Will soil color indicate quality?
Soil color offers clues about organic matter content and drainage, with dark brown or black soils typically richer in organic matter, but color alone cannot confirm nutrient levels or pH.
What is the best time to add lime to my soil?
Add lime in fall after a soil test confirms your pH is below the target range, giving it 6 to 12 months to fully react before spring planting.
Can earthworms be a guaranteed sign of healthy soil?
Earthworms indicate good biological activity and organic matter, but their presence alone does not guarantee balanced pH or adequate nutrient levels, which require chemical testing to confirm.
Is it better to test container garden soil differently than in-ground soil?
Container and raised bed soils break down faster and lose nutrients more quickly than in-ground beds. Test container soil annually, sample from multiple pots, and ask your lab if they offer a separate container media test for more accurate interpretation.
Could soil tests prevent plant diseases?
Soil tests help prevent nutrient-related disorders and can identify conditions that favor disease, like overly acidic soil that slows beneficial microbial activity, but they do not directly test for pathogens.
What should come first after getting soil test results?
Compare your results to the optimal ranges for your specific plants, then prioritize correcting pH before addressing individual nutrient deficiencies since pH controls nutrient availability.