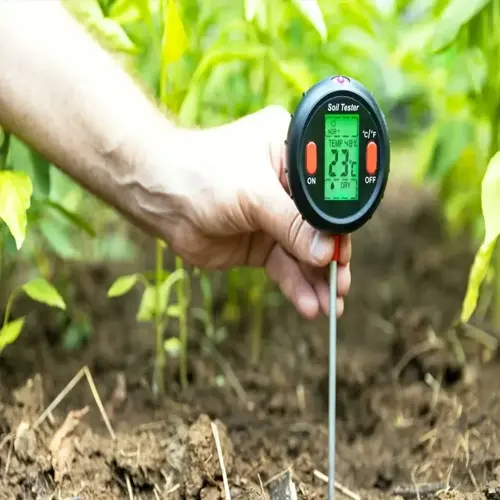

Introduction
This Lasagna Gardening Method: 10 Essential Steps for Success guide shows you how to build rich soil from waste you already have at home. About 33% of global soils are now damaged according to EPA data. That crisis reaches right into your own backyard garden too. But you can fix your patch of ground starting today with nothing more than cardboard, leaves, and kitchen scraps sitting in your trash.
I picked up this no-dig gardening trick about 7 years ago when my back gave out from turning clay each spring. The first bed I built looked like trash on my lawn and my neighbors gave me strange looks. But 4 months later it became the darkest, richest soil I had ever grown plants in. That single bed changed how I garden for good.
Think of it like making a real lasagna in your kitchen. Each layer does a job, just like noodles, sauce, and cheese all work together. Sheet mulching with brown and green scraps creates the balanced mix your soil craves. This soil improvement composting trick lines up with USDA advice. Cover the ground, stop digging, keep roots alive, and grow a range of plants in the same spot.
You won't need a tiller, a gym membership, or a huge bank account to make this work. Anyone with access to free yard waste and a few weekends can build a bed that puts store bought soil to shame. The method works in raised beds, flat ground, and even containers on a patio.
This guide gives you 10 proven steps to build your first bed, pick the best materials, and grow strong crops in soil you made from scratch. You don't need fancy tools or a big budget to get your hands dirty this weekend.
10 Lasagna Gardening Steps
These 10 lasagna garden steps show you how to build lasagna garden beds from bare ground in one afternoon. I've built over 20 beds using this exact process and each one grew strong, healthy crops. You don't need garden experience to follow along with this guide.
Getting your layer thickness depth right matters most. MU Extension recommends a 2:1 ratio of carbon to nitrogen materials by volume. Your bed starts at about 24 inches tall and shrinks to around 6 inches of rich compost over time. You'll lay a cardboard base layer first, then keep alternating layers garden style with browns and greens. Watering lasagna garden beds between each layer speeds up the whole process and gets your soil ready faster.
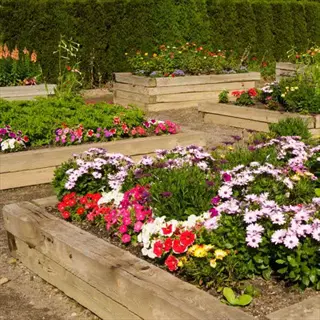
Choose Your Garden Location
- Sunlight: Select a spot that receives at least 6 to 8 hours of direct sunlight per day for vegetables, or 4 hours for leafy greens and herbs.
- Drainage: Avoid low-lying areas where water pools after rain, as excess moisture slows decomposition and creates anaerobic conditions in your layers.
- Access: Position your bed within easy reach of a water source and close enough to your kitchen for convenient composting and harvest trips.
- Size: Start with a manageable area of about 4 by 8 feet (1.2 by 2.4 meters) for your first lasagna bed to learn the technique without feeling overwhelmed.
- Ground Prep: You do not need to remove existing grass or weeds because the layering process will smother them naturally over the coming weeks.
- Level Surface: Choose ground that is relatively flat so your layers stack evenly and water distributes across the entire bed rather than running off one side.
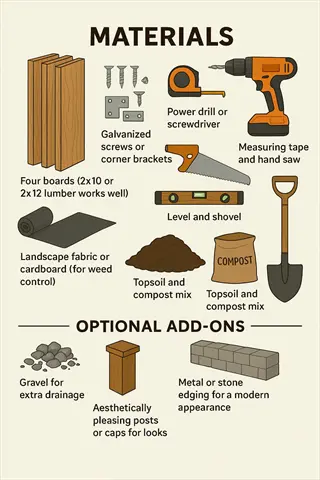
Lay the Cardboard Base
- Material: Use plain, uncoated corrugated cardboard with all tape, staples, and glossy labels removed to prevent chemicals from leaching into your garden soil.
- Overlap: Lay 4 to 6 layers of cardboard with at least 8-inch (20 centimeter) overlaps between pieces so aggressive weeds cannot push through the gaps.
- Soaking: Wet each cardboard layer thoroughly with a garden hose until completely saturated, which speeds decomposition and helps the sheets conform to the ground surface.
- Coverage: Extend cardboard at least 6 inches (15 centimeters) beyond your planned bed edges to prevent weeds from creeping in from the sides of the garden.
- Alternative: Newspaper works as a substitute if you stack at least 10 pages thick, though cardboard provides better weed suppression for persistent grasses.
- Purpose: The cardboard creates a dark, moist environment that attracts earthworms from below while blocking sunlight to smother existing vegetation underneath.
Add Your First Brown Layer
- Materials: Spread 2 to 4 inches (5 to 10 centimeters) of dried leaves, shredded newspaper, straw, or sawdust as your first carbon-rich brown layer.
- Purpose: Brown materials provide carbon that feeds soil microorganisms and creates air pockets within the bed for proper oxygen circulation during decomposition.
- Shredding: Break materials into smaller pieces whenever possible because shredded leaves and torn newspaper decompose two to three times faster than whole pieces.
- Thickness: Aim for twice the depth of your upcoming green layer since the practical ratio recommended by the University of Missouri Extension is 2 parts carbon to 1 part nitrogen.
- Sourcing: Collect free brown materials from neighborhood leaf piles, local coffee shops offering used grounds bags, or tree service companies dropping off wood chips.
- Even Spread: Distribute the material evenly across the entire cardboard base without compacting it, as loose layers allow better airflow and faster microbial activity.
Add Your First Green Layer
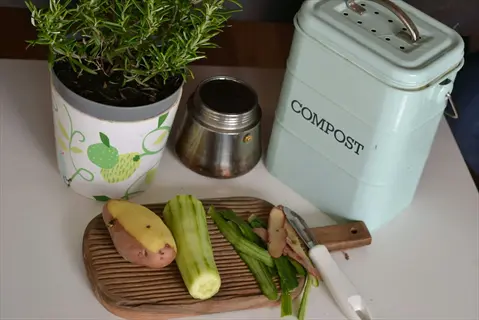
- Materials: Layer 1 to 2 inches (2.5 to 5 centimeters) of nitrogen-rich green materials like fresh grass clippings, vegetable kitchen scraps, or coffee grounds.
- Nitrogen Role: Green materials supply nitrogen that accelerates microbial reproduction, creating the heat and biological activity needed to break down carbon layers above and below.
- Kitchen Scraps: Include fruit peels, vegetable trimmings, eggshells, and tea bags, but never add meat, dairy, oils, or cooked foods that attract pests and create odors.
- Fresh Grass: Spread grass clippings in thin layers no thicker than 2 inches (5 centimeters) to prevent matting, which blocks airflow and can create slimy, foul-smelling pockets.
- Manure Option: Well-aged herbivore manure from cows, horses, or chickens works as an excellent nitrogen source, but verify the animals were not fed herbicide-treated hay.
- Balance Check: If your green layer looks thick and wet, add a thin dusting of brown material on top to maintain proper moisture balance and prevent anaerobic conditions.
Continue Alternating Layers
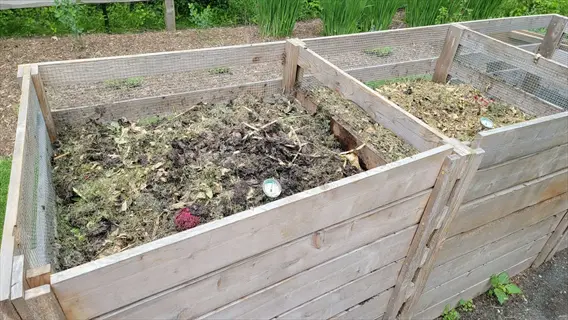
- Pattern: Repeat the brown-green-brown-green pattern until your bed reaches 18 to 24 inches (46 to 61 centimeters) in total height, which compresses to about 6 inches (15 centimeters).
- Ratio: Maintain approximately twice as much brown material as green by volume in each alternating pair of layers for proper carbon-to-nitrogen balance.
- Variety: Use different materials in each layer rather than the same item throughout, because varied inputs create a wider range of nutrients in the finished compost.
- No Packing: Resist the urge to step on or compress the layers because air pockets between materials allow oxygen to reach decomposing microorganisms throughout the bed.
- Moisture Test: Squeeze a handful of material from the middle layers to check moisture content, which should feel like a wrung-out sponge with no dripping water.
- Layer Count: Most successful lasagna beds contain 6 to 8 alternating layers total, though the exact number matters less than reaching the recommended height with proper ratio.
Water Each Layer Thoroughly
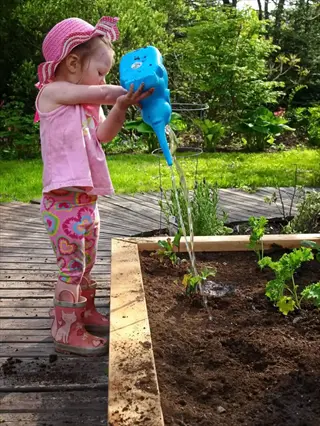
- Timing: Water each layer as you build rather than soaking everything at the end, because dry pockets in the middle will decompose much slower than properly moistened areas.
- Amount: Apply enough water so the materials glisten but do not create puddles, roughly equivalent to a gentle rain shower lasting 10 to 15 minutes per layer.
- Method: Use a garden hose with a gentle spray nozzle or a watering can to distribute moisture evenly without displacing lightweight materials like shredded newspaper.
- Importance: Water activates the microbial communities that drive decomposition, and dry materials can sit unchanged for months without sufficient moisture to support biological breakdown.
- EPA Data: Each 1% increase in soil organic matter helps soil hold 20,000 gallons more water per acre, which means your finished bed will need less irrigation long term.
- Dry Climate Tip: In arid regions, add slightly more water than feels necessary because exposed organic materials lose moisture quickly through evaporation in low-humidity environments.
Cap With a Carbon Top Layer
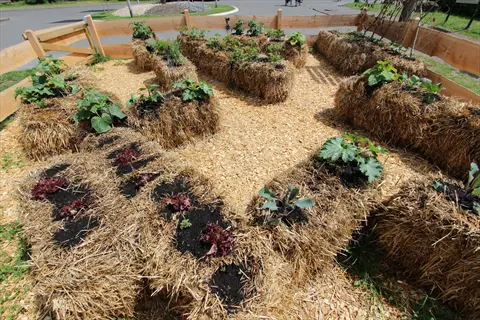
- Requirement: Always finish your bed with a 3 to 4 inch (7.5 to 10 centimeter) brown layer on top, as Oregon State University Extension specifically recommends carbon on top to discourage insects.
- Best Materials: Straw, dried leaves, or wood chips make excellent top layers because they break down slowly and protect the nitrogen-rich layers beneath from drying out.
- Weed Barrier: The thick carbon cap blocks sunlight from reaching weed seeds that might blow onto the surface, reducing maintenance during the decomposition waiting period.
- Insulation: This top layer acts as a thermal blanket, regulating temperature swings inside the bed and protecting active decomposition from extreme heat or freezing cold.
- Appearance: A neat straw or leaf top layer looks tidy in your yard and prevents the exposed-food-waste appearance that might concern neighbors in urban or suburban settings.
- Research Support: Peer-reviewed research shows thick mulch layers can reduce weed emergence by up to 90%, making this final cap one of the most important steps.
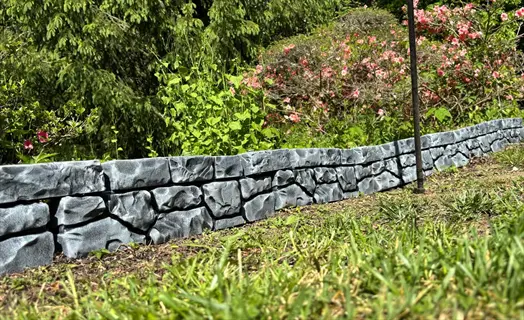
Install Temporary Edging
- Purpose: Border materials keep your neat layers from spilling outward as they settle and decompose, maintaining the bed shape throughout the waiting period.
- Options: Use untreated lumber boards, stacked cinder blocks, reclaimed bricks, or even logs and thick branches to frame the perimeter of your garden bed.
- Height: Edging should stand at least 12 inches (30 centimeters) tall to contain the initial pile height, and you can lower it later as the bed compresses naturally.
- Spacing: Press edging materials firmly against the outer cardboard layer to eliminate gaps where materials can wash out during heavy rain or wind.
- Raised Bed Option: Building your lasagna layers inside an existing raised bed frame creates a contained, organized garden that works especially well in urban and small-space settings.
- Temporary Nature: Some gardeners skip edging entirely for ground-level beds and simply mound materials higher in the center, allowing natural settling to define the bed boundaries.
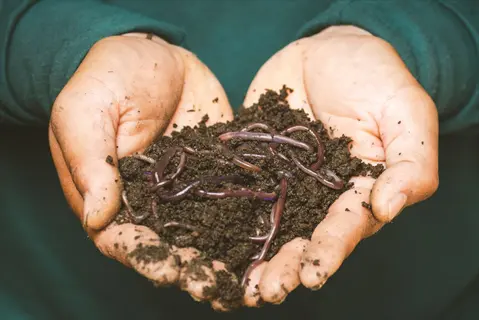
Wait for Decomposition
- Timeline: Expect 4 to 6 months for substantial decomposition when starting in fall, or up to 12 months in cooler climates, as lasagna gardening uses a slow cold composting process.
- Ready Signs: The bed is ready for planting when individual materials are unrecognizable and the finished product has a dark color with a fresh, sweet, earthy aroma.
- Temperature: Decomposition slows significantly below 40 degrees Fahrenheit (4 degrees Celsius) and speeds up in warm, moist conditions between 55 and 75 degrees Fahrenheit (13 to 24 degrees Celsius).
- Hands Off: Avoid turning or mixing the layers during this period because undisturbed decomposition supports the development of beneficial fungal networks throughout the bed.
- Check Progress: After 3 months, gently pull back the top layer to inspect the interior and look for dark, crumbly material forming between the original layers as a sign of healthy activity.
- Critical Fact: Unlike hot composting, this cold process will not kill weed seeds or plant disease organisms, as confirmed by Cornell Cooperative Extension research.
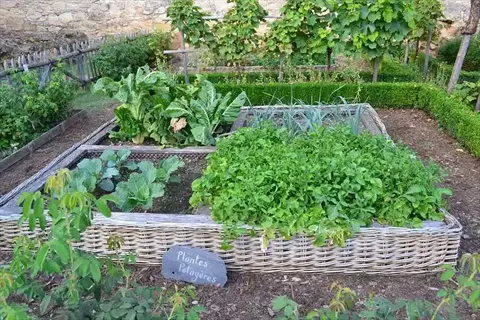
Plant Your Garden
- Seedlings First: Transplants perform better than direct-seeded crops in newly finished lasagna beds because the loose texture may shift around tiny seeds during watering.
- Seed Depth: If direct sowing, plant seeds no deeper than a quarter inch (6 millimeters) in lasagna beds, as recommended by the University of Missouri Extension for best germination rates.
- Top Dress: Add a 2 to 3 inch (5 to 7.5 centimeter) layer of finished compost on top of your decomposed bed to create an ideal seed-starting surface before planting.
- Best Crops: Tomatoes, peppers, lettuce, spinach, and root vegetables perform exceptionally well in lasagna beds according to university extension research and experienced practitioners.
- Spacing: Follow standard plant spacing recommendations because lasagna beds provide the same growing area as traditional garden beds once fully decomposed and settled.
- Ongoing Layers: After each harvest, add new brown and green materials on top of the bed to continue building soil fertility for the next growing season without any digging.
Watering your lasagna garden at each stage is the step most beginners skip. Dry layers sit untouched for months while moist layers break down fast. Take the extra time to soak each layer as you stack it and your bed will reward you with rich soil much sooner.
Soil Science Behind the Layers
Your lasagna bed isn't just a pile of scraps sitting on the ground. There's a whole city beneath your feet that makes the magic happen. The soil food web is a network of billions of tiny organisms that eat, grow, and build the rich soil your plants need to thrive.
Think of fungi as highways that connect plant roots to nutrients deep in the soil. Bacteria act as factories that break raw materials into plant food. Earthworm activity composting the layers creates tunnels for air and water flow. These beneficial microorganisms soil teams do work that no store bought fertilizer can copy.
Getting your carbon nitrogen ratio composting balance right feeds this underground crew. Brown materials give soil microbes the carbon they need for energy. Green materials provide the nitrogen those same microbes use to grow and multiply. When you stack these layers in a 2:1 ratio by volume, you create the perfect dining table for billions of hungry organisms.
Research shows that undisturbed soil grows more mycorrhizal fungi no-till gardens depend on. These fungi guard your plants against disease. They also help roots reach water and nutrients far beyond their own length. A review of 43 studies found that skipping the tiller boosts bacterial variety in your soil.
The long game is where things get exciting. One 18-year study found no-till plots had 18.3% more organic matter than tilled ground. Those same plots had 30.4% more nitrogen and 65.8% more phosphorus too. The organic matter decomposition process adds more richness each year. I've watched my oldest beds get better year after year without any chemical inputs at all.
You don't need a science degree to make this work. Just trust the process, stack your layers, and let the billions of organisms in your soil do what they've done for millions of years. Your job is to feed them and stay out of their way.
Best Materials for Your Layers
Picking the right brown materials carbon sources and green materials nitrogen sources makes or breaks your bed. I learned this the hard way when my first lasagna bed sat untouched for 8 months. I used too many wood chips and not enough greens. The ratio matters more than the total amount you stack up.
The science behind it is simple. OSU Extension puts the ideal ratio at 30:1 carbon to nitrogen at the chemical level. MU Extension makes that easier: just use 2 parts brown to 1 part green by volume. You can judge that with your eyes instead of doing math outside. Dried leaves, straw hay, and shredded cardboard count as brown. Grass clippings, kitchen scraps, coffee grounds, and aged manure count as green.
One warning that most guides skip: watch your manure sources. USDA NRCS and MU Extension both flag aminopyralid as a big risk. This herbicide survives in cattle manure and can ruin your crops. Always ask the farmer if their animals ate treated pasture before you haul anything home.
I keep a running list of free material sources in my area. Tree services drop off wood chips for free. Coffee shops bag up their spent grounds. Neighbors bag leaves every fall and leave them on the curb. You can build an entire lasagna bed without spending a dollar if you plan ahead.
Crops That Thrive in These Beds
Figuring out what to plant lasagna garden beds with makes a big difference in your first harvest. I tried growing 12 different crops in my first bed and some did far better than others. The best vegetables lasagna garden growers pick tend to be ones that love loose, rich soil.
You can grow great herbs lasagna garden beds support with ease since basil and parsley love soft ground. Root vegetables lasagna garden soil produces grow long and straight because there are no rocks or clay in the way. Companion planting lasagna garden style works great too since the loose ground lets all roots spread out. Try putting your tomatoes next to basil and your beans next to squash for the best results in your new bed.
Warm Season Vegetables
- Tomatoes: Thrive in the nutrient-rich, well-drained soil of decomposed lasagna beds and benefit from the consistent moisture retention that organic layers provide throughout summer.
- Peppers: Both sweet and hot varieties grow well in lasagna beds because the loose soil lets their short root systems spread out in all directions with no resistance.
- Squash and Cucumbers: These heavy feeders appreciate the steady nutrient release from decomposing organic matter and produce larger yields compared to traditional garden soil.
- Beans: Fix their own nitrogen while growing, which adds fertility back into the bed for next season and makes them perfect companions for heavy-feeding crops planted nearby.
Cool Season Greens
- Lettuce: Grows rapidly in the loose, moisture-retentive texture of lasagna beds and can be planted earlier in spring because the dark soil absorbs warmth from sunlight faster.
- Spinach: Appreciates the high nitrogen content of recently decomposed green layers and produces larger, more tender leaves compared to plants grown in compacted garden soil.
- Kale: Deep roots penetrate easily through the fluffy decomposed layers and this cold-hardy green can be planted in fall for winter harvesting in mild climates.
- Swiss Chard: Colorful stems and large leaves thrive in the consistent moisture environment of a lasagna bed and produce harvests from spring through the first hard frost.
Root Vegetables
- Carrots: The loose, rock-free texture of decomposed lasagna beds allows carrots to grow long, straight roots without the forking caused by compacted or stony traditional garden soil.
- Potatoes: Can be harvested by simply lifting the mulch layer without any digging required, which is one of the most satisfying advantages of the lasagna gardening approach.
- Radishes: Mature in as few as 25 days in lasagna beds and serve as excellent indicator crops to test whether your bed has decomposed enough for direct sowing.
- Beets: Appreciate the balanced nutrients in composted lasagna layers and develop sweeter, more tender roots when grown in soil rich in organic matter.
Herbs and Perennials
- Basil: Grows lush and productive in the warm, nutrient-dense environment of a lasagna bed and pairs perfectly with tomatoes as both a garden companion and kitchen partner.
- Parsley: Biennial herb that establishes strong roots in the loose soil texture and returns for a second year of growth without any replanting effort from the gardener.
- Asparagus: When established in a lasagna bed, asparagus crowns can produce spears for twenty years or longer, making them one of the best long-term investments for layered gardens.
- Strawberries: Spread with ease through the soft, decomposed layers and benefit from the natural weed suppression that the mulch provides around their short root systems.
My biggest tip for first-time growers is to start with tomatoes lasagna garden beds. Tomatoes love the rich, loose soil and you'll see results fast. Plant seeds no deeper than a quarter inch and use transplants in new beds where the soil is still settling.
Seasonal Planning Calendar
The question of when to start lasagna garden beds comes up more than any other. The short answer is fall is your best bet. These seasonal gardening tips break down what you should do in each part of the year so your bed is ready to grow when spring arrives.
I build my fall lasagna garden beds in October because leaves are free and plentiful. The winter decomposition period gives the bed 5 to 6 months to break down before spring. Spring planting lasagna beds works too if you're in a rush. Just add finished compost on top and use transplants instead of seeds. Summer maintenance keeps your beds healthy between harvests. Year round planting with cover crops helps you build soil even during the off season.
Fall: Build and Layer
- October Start: This is the ideal month to build your lasagna garden because fallen leaves give you free carbon material and winter gives the bed months to decompose on its own.
- Leaf Collection: Gather and shred fallen leaves from your yard and neighborhood to create a massive stockpile of brown material for both current bed building and future top-ups.
- Full Construction: Build your complete bed to 18 to 24 inches (46 to 61 centimeters) tall and soak it well before the first hard freeze locks moisture out of the frozen layers.
- Cover Crop Option: Plant a fall cover crop like winter rye or crimson clover on top of your new bed to add living roots, prevent erosion, and add nitrogen through the cold months.
Winter: Let Nature Work
- Freeze-Thaw Cycles: Cold weather helps decomposition by breaking down tough plant fibers through repeated freezing and thawing, which opens material to microbial access in spring.
- Snow Insulation: Leave snow cover on the bed as natural insulation that keeps the interior warmer than air temperature and provides slow-release moisture as it melts over time.
- Add Kitchen Scraps: Continue placing vegetable kitchen scraps under the top brown layer throughout winter to maintain nitrogen inputs even when the decomposition process slows down.
- Inspect Monthly: Check the bed once a month for settling and add fresh brown material on top if green layers become exposed, which prevents odors and keeps the appearance tidy.
Spring: Prepare and Plant
- Assess Readiness: Pull back the top layer in early spring to check if interior materials have become dark, crumbly, and earthy-smelling, which signals the bed is ready for planting.
- Top Dress: Spread 2 to 3 inches (5 to 7.5 centimeters) of finished compost over the entire surface to create a smooth, fine-textured planting bed for seeds and transplants.
- Start Cool Crops: Plant lettuce, spinach, peas, and radishes first since these cold-tolerant crops thrive in early spring temperatures and the nutrient-rich lasagna bed environment.
- Warm Crop Timing: Wait until soil temperature reaches 60 degrees Fahrenheit (15.5 degrees Celsius) before transplanting tomatoes, peppers, and squash into the bed for best results.
Summer: Grow and Maintain
- Mulch Renewal: Add a fresh 2 to 3 inch (5 to 7.5 centimeter) layer of straw or dried grass on top of the bed after planting to retain moisture and suppress any new weed seeds.
- Water Monitoring: Check soil moisture twice weekly during hot weather by pushing a finger 2 inches (5 centimeters) into the bed surface, and water deeply if the soil feels dry at that depth.
- Succession Planting: As you harvest early crops like lettuce and radishes, replant those spaces right away with warm-season crops or a second round of greens for continuous harvests.
- Collect Materials: Stockpile brown and green materials throughout summer including grass clippings, pruning waste, and cardboard so you have supplies ready for fall bed rebuilding.
Troubleshooting Common Issues
Even the best beds run into lasagna garden problems from time to time. I've dealt with every issue on this list across my own beds over the years. The good news is that most fixes take less than an hour and cost nothing extra.
A lasagna garden not decomposing is the most common issue new builders face. It almost always comes down to too little water or too much carbon. Pests lasagna garden growers report often show up when green layers sit exposed. Odor lasagna garden beds produce signals too much nitrogen or poor air flow. Weed seeds cold composting can't kill will also sneak through the layers. Herbicide residue manure contains is a hidden danger that can stunt your plants for a full growing season.
The table above covers the 6 most common issues I've seen in my own beds and in those of people I've helped. Most problems come from one of two causes: the bed is too wet or too dry. Get your moisture right and most other issues take care of themselves.
5 Common Myths
Lasagna gardening requires expensive specialty materials that you cannot find at home or in your neighborhood.
Most materials are free household and yard waste like cardboard boxes, dried leaves, grass clippings, and kitchen vegetable scraps.
You must wait a full year before planting anything in a new lasagna garden bed.
You can plant immediately by adding a 3 to 4 inch (7.5 to 10 centimeter) topping of finished compost and transplanting seedlings directly into it.
Lasagna gardens attract rats, mice, and other rodents because of the food scraps buried in the layers.
Burying food scraps under thick carbon layers and avoiding meat or dairy products keeps rodents away just like standard composting practices.
The cardboard base layer permanently blocks water from reaching the soil underneath and kills earthworms.
Cardboard decomposes within a few months and actually attracts earthworms that feed on the moist, dark material beneath the layers.
Cold composting in lasagna gardens kills weed seeds and plant diseases just like traditional hot compost piles.
Cold composting does not generate enough heat to destroy weed seeds or disease organisms, so avoid adding diseased plants or seedy weeds.
Conclusion
The lasagna gardening method comes down to a few key choices that set you up for years of easy, productive growing. Pick a sunny spot, stack your brown and green layers in a 2:1 ratio, choose clean materials, and give the bed time to break down. That's the whole process in one sentence.
The science backs up what gardeners like me have seen in our own yards. Each 1% increase in soil organic matter holds 20,000 more gallons of water per acre according to the EPA. A review of 43 studies confirmed that no-dig gardening grows healthier soil microbes. Your soil health gets stronger each season you keep using this organic gardening no-till approach.
What no other guide tells you is that lasagna beds get better every year with simple lasagna garden maintenance. Add new brown and green layers each fall. Top off your beds with compost in spring. These small steps create a garden that feeds itself and needs less work from you as it grows older. I've kept beds going for over 5 years and the soil just keeps getting darker and richer without any tilling at all.
Your first bed is the start of a new way to garden. Once you see how well plants grow in soil you built from scraps and leaves, you won't want to go back to the old way. Grab some cardboard and get stacking this weekend. Your back and your garden will both thank you for making the switch.
External Sources
Frequently Asked Questions
Is it possible to plant immediately in a lasagna garden?
You can plant right away by adding a 3 to 4 inch layer of finished compost on top and transplanting seedlings into that layer.
Which materials should never be used in lasagna gardening?
Avoid diseased plants, weed seed heads, glossy coated cardboard, treated lumber scraps, and manure from herbicide-treated pastures.
How do lasagna gardening and traditional raised beds compare?
Lasagna gardening costs less and builds soil from waste materials, while raised beds offer more structure and immediate planting depth.
Could this method work in areas with heavy rainfall?
It works well in rainy climates because organic layers absorb moisture, though you may need extra drainage and thicker brown layers.
Can lasagna gardening be suitable for perennial plants?
Perennials thrive in lasagna beds once decomposition finishes, especially deep-rooted plants that benefit from loose, rich soil.
What is the best way to accelerate decomposition in cold climates?
Shred materials smaller, add extra nitrogen layers, cover with black plastic, and insulate with straw bales during freezing months.
Can lasagna gardens attract beneficial insects?
The diverse organic layers create habitat for earthworms, ground beetles, and other beneficial organisms that improve soil and reduce pests.
Could apartment dwellers practice lasagna gardening?
Apartment gardeners can use the lasagna method in large containers, balcony raised beds, or community garden plots.
What is the best way to troubleshoot foul odors?
Bad smells usually mean too much nitrogen or poor airflow, so add more brown materials and fluff the layers with a garden fork.
Can lasagna gardens be fire hazards in dry regions?
Dry organic material can be a fire risk, so keep beds moist, avoid placing them near structures, and use green materials on top.