
A handful of low-cost tools diagnose plant health problems faster than guessing and googling ever will. You can build a solid home kit for under $50 that covers the most common issues. Start with a hand lens, a soil pH probe, and a moisture meter, and you have enough gear to solve most garden mysteries on your own.
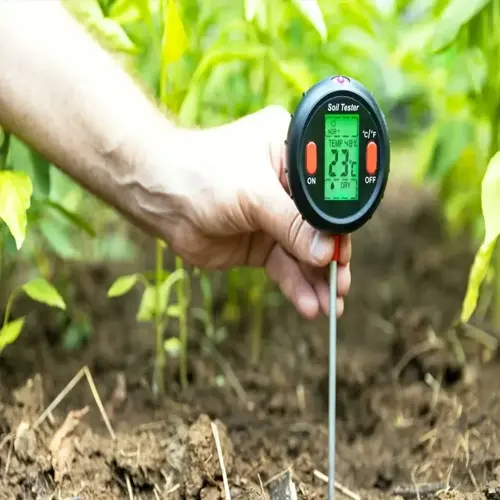
I put together my own kit three years ago after killing a row of peppers because I guessed wrong about what was hurting them. My first purchase was a $12 hand lens at 10x power. The week after I got it, I found tiny fungal spores on the underside of a squash leaf that I never would have seen with bare eyes. Then I picked up a $20 soil pH probe and found out my raised bed sat at 5.2 pH. My brassicas had been fighting clubroot all along because the soil was too acidic. These plant diagnostic tools paid for themselves in one season.
The smart way to diagnose plant problems is to work in tiers. Start with the simple stuff first. Your hand lens and soil meters rule out the most common causes like nutrient gaps, pH issues, and moisture stress. Most of the time, one of these basic checks reveals the answer. If your plant still looks sick after two weeks of fixing the obvious cause, then you move up to the next level.
Home plant disease testing covers more ground than most people expect. Your pH probe tells you if soil conditions are feeding a disease. Your moisture meter shows if you are overwatering and creating root rot conditions. A good hand lens lets you spot insect eggs, mold threads, and early fungal growth before they become visible to the naked eye. Together, these three tools handle about 80% of common garden health checks.
Field Observation Aids
- Hand lens (10x): Costs $10-30 and lets you see spores, mites, and early fungal threads that hide on leaf undersides and stems.
- Soil pH probe: Runs $15-25 and shows you the acidity level of your soil so you can match it to what your plants need for best growth.
- Moisture meter: Priced at $10-20 and takes the guesswork out of watering by showing you how wet the root zone is below the surface.
Sample Collection Supplies
- Zip bags and labels: Keep a box of small bags and a marker near your garden so you can grab and label samples while the symptoms are fresh.
- Rubbing alcohol: Use it to wipe your pruners and knife between cuts to avoid spreading whatever you just touched to the next plant.
- Phone camera: Snap photos of each stage of damage from multiple angles to build a visual record that helps track how fast things change.
Lab Testing Services
- Extension lab submission: Costs $10-50 per sample with results back in one to two weeks and includes specific treatment advice from trained experts.
- Pathogen screening: Some labs test for specific fungi like Verticillium and Fusarium, which helps when you need to know the exact cause before replanting.
- When to send samples: Mail a sample when your home tools can't explain the problem or when a high-value perennial or fruit tree is at stake.
Your best approach follows a clear workflow. Check the plant with your hand lens first and look at both sides of every leaf. Test the soil pH and moisture next. Photograph what you see and note the date. If the problem clears up after you adjust watering or pH, you found your answer. If it doesn't improve in two weeks, bag a fresh sample and send it off for extension lab plant analysis. That step-by-step process keeps you from spending money on lab tests for problems you could have solved at home.
One last thing I wish someone had told me sooner: label everything and date your photos. When you send a sample to a lab, the more detail you give, the better your results come back. Write down what you grew in that spot last year, what you fed the soil, and how long the symptoms have shown. This extra info helps the lab narrow things down fast and give you a plan that works for your exact setup.
Read the full article: Identify Plant Diseases: 8 Types & Control Plan