
Introduction
You want a warm season vegetable that thrives when your tomatoes wilt and lettuce bolts in the heat. This How to Grow Okra: Complete Step-by-Step Guide shows you how to harvest fresh pods for 8 to 10 weeks straight from your own backyard beds. The process is simple once you know the key steps to take for best results in your home patch.
I started growing okra five years ago when my summer garden kept dying in the July heat waves. This African native became my top producer once I learned the right methods. Utah State research shows 4 to 5 plants can feed a whole family all season long. Those few plants give you plenty of fresh tender pods for dinner each night.
Think of your okra garden as a summer workhorse that keeps on giving back to you. As long as temps stay warm and you keep picking the pods, these plants make more and more for your meals each week. The global seed market has hit USD 352.7 million as home gardeners turn to this heat loving crop. More people now grow it for summer harvests than ever before in history.
Below you will find every step to raise strong okra plants from seed to harvest at home. You will learn which varieties work best for your area and climate zone. You will also learn when to pick pods at peak tenderness for great flavor in all your dishes and recipes.
Best Okra Varieties to Grow
Picking the right okra varieties makes the biggest impact on your harvest success at the end of the season. A 50 day variety works great in zone 5 or 6 where frost comes early. A 60 day type gives you more pods in zones 7 through 10 with longer warm weather.
The best okra varieties fall into a few main groups based on what you need from them. Clemson Spineless okra leads the pack as the most trusted choice for home gardens across the country. Burgundy okra and other red okra types add color to your beds and plates. Dwarf okra works best for small spaces and okra for containers on patios.
Spineless okra types now dominate the market because they make picking so much easier on your hands and arms. I learned this lesson the hard way with my first spiny variety that left my forearms red and itchy for hours after each harvest. These 8 picks below offer proven results for home growers in most climate zones.
Clemson Spineless
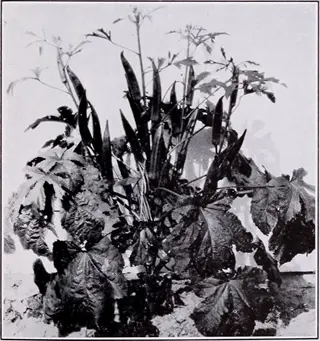
- Days to Maturity: 55-60 days from transplanting, making it one of the most reliable mid-season varieties available for home gardeners across most growing regions.
- Plant Height: Grows 4-5 feet (1.2-1.5 m) tall with a sturdy central stem that seldom needs staking even in windy conditions.
- Pod Characteristics: Produces straight, spineless green pods that harvest easily without causing skin irritation from tiny hairs found on traditional varieties.
- Best Uses: Excellent all-purpose variety suitable for frying, grilling, pickling, gumbo, and freezing due to its tender texture when harvested at 3-4 inches (7.5-10 cm).
- Disease Resistance: Shows good tolerance to common okra diseases and performs consistently across various soil types and growing conditions.
- Why Grow It: The most widely recommended variety by university extension services and the standard by which other okra varieties are measured for home garden performance.
Burgundy Okra
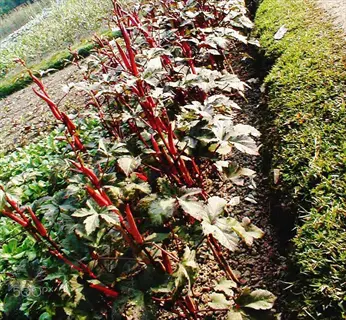
- Days to Maturity: 55-60 days from transplanting, producing deep red-purple pods that add striking visual interest to vegetable gardens and dinner plates.
- Plant Height: Reaches 4-6 feet (1.2-1.8 m) with red-tinged stems and leaf veins that create ornamental value beyond the edible harvest.
- Pod Characteristics: Pods maintain their burgundy color when eaten raw or pickled but turn green when cooked, providing unique presentation options for fresh preparations.
- Best Uses: Ideal for fresh eating, salads, and pickling where the color remains vibrant, though cooking transforms pods to standard green coloration.
- Growing Notes: Requires the same heat and care as green varieties but offers dual-purpose value as both a productive vegetable and an attractive garden specimen.
- Why Grow It: Perfect for gardeners wanting visual variety in their vegetable patch while keeping the same flavor and nutritional benefits as green types.
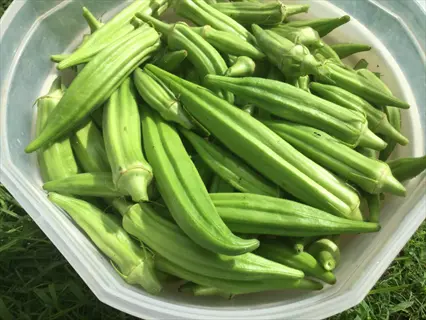
Cajun Delight
- Days to Maturity: 50-55 days from transplanting, one of the fastest-maturing varieties available and excellent for northern gardens with shorter growing seasons.
- Plant Height: Compact growth habit reaching 3-4 feet (0.9-1.2 m) tall, suitable for smaller garden spaces and easier harvesting without bending or reaching.
- Pod Characteristics: Produces medium-green spineless pods with excellent tenderness when harvested at the recommended 3-inch (7.5 cm) size for optimal texture.
- Best Uses: Versatile culinary applications from frying to stewing, with the early maturity allowing multiple successions in long-season areas.
- Productivity: High-yielding variety that begins producing quickly and continues steadily throughout the growing season with regular harvesting every 1-2 days.
- Why Grow It: The go-to choice for gardeners in zone 5-6 or anyone wanting the earliest possible harvest of tender okra pods.
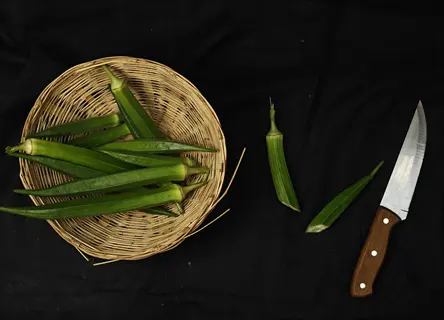
Jambalaya Okra
- Days to Maturity: 50 days from transplanting, the quickest option for gardeners seeking rapid production in limited growing windows.
- Plant Height: Medium height of 4-5 feet (1.2-1.5 m) with sturdy growth that handles typical summer conditions without supplemental support.
- Pod Characteristics: Bright green spineless pods with slightly ribbed texture that maintains tenderness even when pods reach 4 inches (10 cm) in length.
- Best Uses: Named after the famous Louisiana dish, this variety excels in gumbo, jambalaya, and other stewed preparations where okra's thickening properties shine.
- Heat Tolerance: Bred for performance in hot, humid conditions typical of Gulf Coast summers, thriving when temperatures exceed 90°F (32°C).
- Why Grow It: Outstanding choice for southern gardeners wanting authentic Cajun cuisine ingredients or anyone needing the fastest path from seed to harvest.
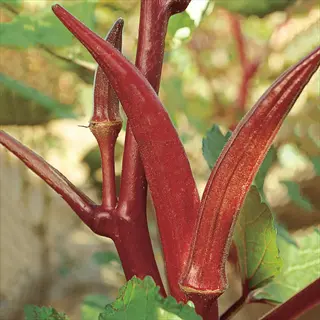
Red Velvet Okra
- Days to Maturity: 55-60 days from transplanting, producing stunning deep red pods on red-stemmed plants throughout the growing season.
- Plant Height: Vigorous grower reaching 5-6 feet (1.5-1.8 m) with burgundy stems and green leaves that create an attractive backdrop for the colorful pods.
- Pod Characteristics: Rich red exterior with green interior flesh, retaining red color better during light cooking compared to Burgundy variety.
- Best Uses: Excellent for quick-cooking methods like sauteing, grilling, and roasting where the red color remains visible on the finished dish.
- Ornamental Value: One of the most decorative okra varieties with its combination of red pods, burgundy stems, and creamy yellow hibiscus-like flowers.
- Why Grow It: Combines productive harvests with landscape appeal, making it perfect for edible landscaping and front-yard vegetable gardens.
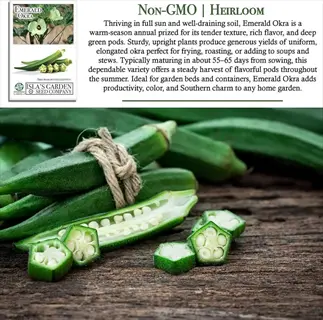
Emerald Okra
- Days to Maturity: 58-60 days from transplanting with consistent production of smooth, round pods throughout the harvest season.
- Plant Height: Medium to tall at 5-7 feet (1.5-2.1 m), requiring occasional staking in exposed locations but standing well in protected garden beds.
- Pod Characteristics: Distinctive round cross-section unlike the typical ridged pods, with smooth dark green skin and spineless texture for comfortable harvesting.
- Best Uses: Round shape makes uniform slices ideal for frying and pickling, holding their circular presentation throughout cooking and preservation.
- Flavor Profile: Slightly sweeter and more delicate flavor than angular varieties, preferred by many okra enthusiasts for fresh eating applications.
- Why Grow It: The preferred choice for gardeners who want round okra slices for presentation focused dishes and traditional fried okra.
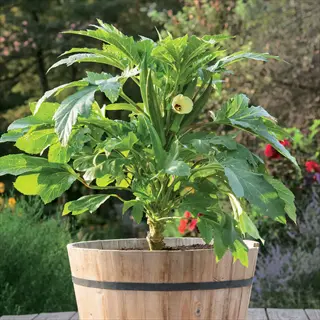
Annie Oakley II Dwarf
- Days to Maturity: 52-55 days from transplanting with compact growth ideal for containers and small-space vegetable gardens.
- Plant Height: Stays compact at 3-4 feet (0.9-1.2 m) tall, making it the best choice for container growing in a minimum 12-inch (30 cm) pot.
- Pod Characteristics: Standard green spineless pods with tender texture when harvested young, identical quality to full-size varieties.
- Best Uses: All standard okra preparations work well, with the compact size making this variety accessible to apartment balcony and patio gardeners.
- Container Success: Royal Horticultural Society recommends pots at least 30 cm (12 inches) wide and deep, and Annie Oakley II thrives in these conditions.
- Why Grow It: The premier choice for urban gardeners, balcony vegetable gardens, and anyone with limited growing space who still wants productive okra harvests.
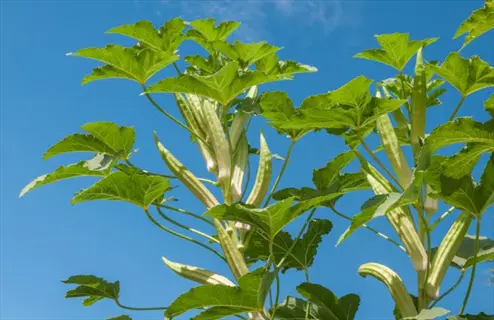
Perkins Long Pod
- Days to Maturity: 56-60 days from transplanting, producing extra long pods up to 8 inches (20 cm) while maintaining tenderness.
- Plant Height: Tall vigorous plants reaching 6-8 feet (1.8-2.4 m) that may benefit from staking in windy locations or when loaded with many pods.
- Pod Characteristics: Distinctive elongated pods remain tender even at longer lengths, allowing flexibility in harvest timing without sacrificing quality.
- Best Uses: Long pods excel for slicing into soups, stews, and gumbo where larger pieces add substantial texture and thickening properties.
- Historical Significance: An heirloom variety dating back over a century, prized by gardeners who save seeds and value genetic variety in their vegetable selections.
- Why Grow It: Perfect for those who prefer larger okra pods or occasionally miss a harvest day, as pods stay tender longer than most modern varieties.
Your local frost dates should guide your variety choice more than any other factor. Match the days to maturity with your growing season length and you set yourself up for a great harvest from summer into fall.
Preparing Your Garden for Okra
Getting your okra soil requirements right makes all the difference at harvest time. Think of soil prep like preheating an oven before you bake. Rushing the okra temperature means poor results and wasted seeds that rot in cold ground.
I test my soil temperature okra beds with a cheap probe from the hardware store every spring. Seeds need ground temps of at least 65°F (18°C) just to sprout. Clemson research shows 70 to 95°F (21 to 35°C) gives you the best germination rates for strong seedlings.
Your site also needs full sun okra can soak up for 8 or more hours each day. Check your okra pH level with a home test kit and aim for 6.0 to 6.8 range. Add lime if your soil tests below 5.8 to raise the pH before planting time in the spring. Texas A&M suggests working in 2 to 3 pounds of 10-10-10 fertilizer per 100 square feet to build a good nutrient base.
Well-drained soil okra roots can breathe in prevents the rot problems that kill young plants fast. If your ground stays soggy after rain, build raised beds at least 8 inches (20 cm) tall to give roots the drainage they need for healthy growth all summer long.
Planting Okra Seeds and Seedlings
Planting okra seeds takes good timing and the right technique to get strong sprouts in your garden beds. You can grow okra from seed two ways: direct sow okra right in the ground or start okra seedlings indoors first. Both methods work well when you follow the steps below.
Okra germination takes 5 to 14 days when soil temps stay in the right range. I always soak my seeds overnight to soften the hard coat and speed things up by a day or two. This step is optional but it gives me better results in my experience over the years.
Knowing when to plant okra depends on where you live and your local frost dates. Clemson data shows May 15 to July 15 works for Piedmont areas while coastal zones can start May 1 to June 30. Transplanting okra lets northern growers get a head start on the short season.
Testing and Warming Your Soil
- Soil Temperature Check: Insert a soil thermometer 2-4 inches (5-10 cm) deep in the morning for several days, waiting until readings reach 70°F (21°C) or higher before planting.
- Warm Soil Faster: Lay black plastic mulch over the planting area 2-3 weeks before your target planting date to raise soil temperature by 5-10°F (3-6°C).
- Timing by Region: Plant after all frost danger passes. Late May works for northern zones, late April for central regions, and March through April in the Deep South and Southwest.
- Soil Test Benefits: Submit a soil sample to your local extension office 4-6 weeks before planting to receive pH and nutrient recommendations specific to your garden site.
Sowing Seeds Right in the Garden
- Seed Depth: Plant okra seeds 3/4 to 1 inch (2-2.5 cm) deep in prepared soil, pressing down to ensure good seed contact for consistent moisture uptake.
- Initial Spacing: Place seeds 2 inches (5 cm) apart in rows spaced 3-6 feet (0.9-1.8 m) apart, depending on your variety size and your cultivation method.
- Optional Soaking: Soak seeds in room temperature water for 12-24 hours before planting to soften the hard seed coat and speed germination by 1-2 days.
- Hill Planting Alternative: Plant 2-3 seeds per hill with hills spaced 12-18 inches (30-45 cm) apart, thinning to the strongest seedling after emergence.
Starting Seeds Indoors
- Timing: Begin seeds indoors 4-6 weeks before your last expected frost date, giving seedlings time to develop before transplanting into warm garden soil.
- Container Choice: Use biodegradable peat pots or paper pots that can be planted in the ground, since okra has fragile taproots that resent transplant disturbance.
- Heat Mat Use: Place containers on a seedling heat mat set to 75-80°F (24-27°C) to ensure the consistent warmth okra needs for reliable germination.
- Hardening Off: Expose indoor seedlings to outdoor conditions over 7-10 days before transplanting, starting with 1-2 hours of filtered light and increasing each day.
Thinning and Transplanting Seedlings
- Thinning Timing: When seedlings reach 3-4 inches (7.5-10 cm) tall with 2-3 true leaves, thin to one plant every 12-18 inches (30-45 cm) by cutting extras at soil level.
- Transplant Depth: Set transplants a bit deeper than they grew in containers, planting up to the first set of leaves to encourage extra root development along the buried stem.
- Transplant Care: Water transplants deep right after planting and provide shade cloth protection for 2-3 days if temperatures exceed 90°F (32°C).
- Root Protection: Avoid disturbing okra roots during thinning or transplanting. Cut unwanted seedlings at soil level rather than pulling them to protect neighboring root systems.
Give your new plants a deep drink of water right after you finish planting or transplanting them. The first two weeks are critical for root growth, so keep the soil moist but not soggy during this key establishment period in your garden beds.
Caring for Okra Plants
Good okra plant care comes down to two main tasks: watering okra the right way and fertilizing okra at the right times. Get these basics down and your plants will reward you with pods for months on end. I check my beds twice a day during hot spells to make sure the soil stays moist.
Your okra water requirements depend on the weather and your soil type. Texas A&M suggests 1 to 2 inches (2.5 to 5 cm) per week for best results. Utah State research shows 1.5 to 2 inches every 7 to 10 days gives you the highest yields at harvest time. Deep watering okra roots beats light sprinkles every day.
Okra fertilizer timing matters just as much as the type you use. Too much nitrogen early on makes plants grow big leaves but few pods. Clemson recommends sidedressing at 3 to 4 weeks after emergence. Add more again at 6 to 8 weeks for balanced growth and fruit set.
Fish emulsion okra feeding works great for organic growers who want to skip the synthetic options. Apply it once a month at the rate shown on your bottle. The smell fades after a few hours and your plants will thank you with strong growth through the summer heat.
Okra Pests and Disease Control
Okra pests and okra diseases can ruin a good harvest if you let them get out of control. The good news is that most problems have simple fixes when you catch them early in the season. I walk through my rows every morning with my coffee and spot trouble before it spreads.
Aphids on okra rank as the most common pest you will see on your plants. They cluster on new leaves and stems, leaving sticky residue behind them. Okra pest control starts with a strong blast of water from your hose to knock them off. Organic pest control okra growers also use soap sprays made from castile soap.
Fusarium wilt okra and verticillium wilt cause bigger headaches because no spray can cure them once they infect your plants. These soilborne fungal diseases block water flow in the stems and kill plants in hot weather. Prevention through crop rotation works best against these okra diseases.
Aphids on Okra Plants
- Identification: Small soft-bodied insects in green, black, or yellow that cluster on undersides of leaves and new growth, often with sticky honeydew residue and sooty mold.
- Damage Signs: Curled or distorted new leaves, stunted growth, yellowing foliage, and sticky coating on leaves that may attract ants farming the aphid colonies.
- Organic Control: Blast aphids off plants with a strong spray of water from the garden hose, repeating every 2-3 days until populations decline.
- Soap Spray Option: Mix 1 tablespoon (15 ml) of pure castile soap per quart (liter) of water and spray on aphids, coating all leaf surfaces including undersides.
- Prevention: Encourage beneficial insects like ladybugs and lacewings by planting companion flowers, and avoid excess nitrogen fertilizer that promotes tender growth aphids prefer.
Japanese Beetles and Flea Beetles
- Identification: Japanese beetles are metallic green with copper wings, while flea beetles are tiny black or bronze insects that jump when disturbed from leaves.
- Damage Signs: Japanese beetles skeletonize leaves by eating tissue between veins; flea beetles create numerous small round holes giving leaves a shot-hole look.
- Hand Removal: Pick Japanese beetles off plants in early morning when they are sluggish, dropping them into soapy water to prevent them from flying away.
- Row Cover Protection: Cover young okra plants with floating row covers until well-established and they can tolerate some leaf damage without affecting production.
- Prevention: Clean up garden debris where beetles overwinter and rotate crops each year to disrupt pest life cycles and reduce populations over time.
Wilt Diseases in Okra
- Types: Fusarium wilt and verticillium wilt are soilborne fungal diseases that block water movement within okra stems, causing plants to wilt despite adequate soil moisture.
- Symptoms: Lower leaves yellow first, followed by wilting on one side of the plant, then entire plant collapse. Symptoms worsen during hot weather when plants need water most.
- Prevention Focus: No chemical cure exists for wilt diseases. Prevention through crop rotation for 3-4 years away from that spot is essential for control.
- Soil Solarization: In infected areas, cover moist soil with clear plastic for 4-6 weeks during hot summer months to kill soilborne pathogens through heat.
- Resistant Varieties: Some okra varieties show improved tolerance to wilt diseases. Check seed catalogs for resistance ratings when planning future plantings.
Root Knot Nematodes
- Identification: Microscopic roundworms that attack okra roots, causing distinctive swollen galls or knots on the root system that interfere with water and nutrient uptake.
- Above-Ground Symptoms: Stunted plants, yellowing leaves, wilting during hot afternoons despite adequate watering, and poor pod production throughout the season.
- Diagnosis: Pull up a poor plant and examine roots. Nematode damage shows as irregular swellings or knots rather than the smooth fibrous roots of healthy plants.
- Management: Plant marigolds (Tagetes species) as a cover crop or interplant with okra. Marigold roots release compounds toxic to many nematode species.
- Long-Term Solution: Build soil health with regular organic matter additions and maintain beneficial soil organisms through minimal tillage and varied plantings.
Caterpillars and Armyworms
- Identification: Corn earworms, armyworms, and other caterpillars may feed on okra foliage and developing pods, leaving ragged holes and frass in their path.
- Pod Damage: Caterpillars often bore into developing pods, making them unmarketable and introducing rot organisms that cause further damage to nearby pods.
- Organic Control: Apply Bacillus thuringiensis (Bt) spray according to label directions. This biological insecticide affects only caterpillars and is safe for beneficial insects.
- Inspection Routine: Check plants every 1-2 days during harvest, looking on leaf undersides and around pods for eggs, small caterpillars, or feeding damage.
- Physical Removal: Hand-pick larger caterpillars and drop them into soapy water, checking plants in early morning or evening when pests are most active.
Stay on top of pest checks and your plants will produce healthy pods all season long. Most problems resolve with simple fixes like water sprays or hand picking when you catch them early enough in your daily garden walks.
Harvesting and Storing Okra
Harvesting okra at the right time makes all the difference between tender pods and tough woody ones you have to toss. When to harvest okra depends on how fast your pods grow after the flowers fade away. Most pods reach the ideal okra harvest size of 3 to 4 inches (7.5 to 10 cm) just 3 to 4 days after each flower opens on the plant.
I learned the hard way that picking okra every single day during peak season keeps production going strong. Skip just two days and your okra pod size can double while the texture turns tough and stringy. How often to pick okra matters more than any other task during the hot summer months when plants produce at full speed.
Storing okra right keeps your harvest fresh for up to 7 to 10 days at 45 to 50°F (7 to 10°C) with high humidity. Your home fridge runs colder than this, so quality drops faster in there. Use pods within 2 to 3 days from the refrigerator for the best texture and taste.
Clemson shares a great trick called ratooning that gives you a second harvest in fall. Cut your plants down to 6 to 12 inches (15 to 30 cm) above the soil in mid July or August. New shoots will grow back and produce more tender pods before the first frost hits your garden.
5 Common Myths
Okra only grows well in the Deep South and cannot be grown successfully in northern gardens or cooler climates.
Okra grows in USDA hardiness zones 4-11 when soil temperatures reach 70F (21C). Northern gardeners can start seeds indoors 4-6 weeks before the last frost and use black plastic mulch to warm soil.
You must soak okra seeds overnight before planting or they will not germinate properly.
Soaking seeds is optional and only speeds germination by 1-2 days. Seeds planted 1 inch (2.5 cm) deep in warm soil at 70-95F (21-35C) germinate reliably within 5-14 days without soaking.
Okra plants need constant watering every day to produce well in hot summer weather.
Overwatering damages okra roots and promotes disease. Okra performs best with 1-2 inches (2.5-5 cm) of water per week through deep watering every 7-10 days rather than daily shallow watering.
Spineless okra varieties produce less flavorful pods than traditional spiny varieties.
Spineless varieties like Clemson Spineless offer identical flavor and nutrition to spiny types while making harvesting easier and preventing skin irritation from the tiny hairs on traditional pods.
Okra pods become bitter and inedible once they grow longer than 3 inches (7.5 cm).
Larger pods become tough and fibrous but not bitter. Pods up to 5 inches (12.5 cm) remain usable in soups and stews where longer cooking softens fibers. Harvest at 2-4 inches (5-10 cm) for tender eating.
Conclusion
Successful okra gardening comes down to a few key basics you can master in your first season. Wait for soil temps above 70°F (21°C) before planting. Give your okra plants full sun and space them 12 to 18 inches (30 to 45 cm) apart in well drained beds.
Your home garden okra patch pays off big with very little effort once plants get going. Just 4 to 5 plants can keep an average family in fresh pods all summer long. The okra harvest keeps coming week after week as long as you pick pods every 1 to 2 days before they get tough.
Pick the right variety for your growing zone to set yourself up for the best results this season. Fast maturing types work great in northern climates with shorter summers. Standard varieties give you more pods in warmer regions where frost comes later in the fall.
Growing okra gives you a reliable producer when summer heat shuts down your other vegetables. With proper care you can expect 8 to 10 weeks of steady harvests from each plant in your beds. Now you know how to grow okra from seed to table in your own backyard garden. This tough plant will reward your efforts with tender pods for all your favorite summer recipes.
External Sources
Frequently Asked Questions
What matters most for growing okra?
The secret to growing okra successfully is providing consistent heat above 75°F (24°C), full sun exposure for 6-8 hours daily, and regular harvesting every 1-2 days to encourage continuous pod production.
Which plants should stay away from okra?
Avoid planting these near okra:
- Squash and pumpkins (attract similar pests)
- Tomatoes (compete for nutrients and space)
- Brassicas like cabbage and broccoli (prefer cooler temperatures)
What is the typical timeline for growing okra?
Okra takes 50-70 days from transplanting or 60-90 days from direct-seeded planting to produce harvestable pods, depending on variety and growing conditions.
Is a trellis needed for okra?
Most okra varieties do not require a trellis since they have sturdy stems. However, tall varieties reaching 6-8 feet (1.8-2.4 m) may benefit from staking in windy areas to prevent toppling.
Can Miracle-Gro be good for okra?
Miracle-Gro can work for okra, but balanced fertilizers like 10-10-10 applied before planting and nitrogen sidedressing during growth are recommended by university extension services for optimal results.
Which natural enemies affect okra?
Common okra pests include:
- Aphids (suck sap from leaves and stems)
- Japanese beetles and flea beetles (chew foliage)
- Corn earworms and armyworms (damage pods)
- Root knot nematodes (attack root systems)
Does okra require a tomato cage?
Okra does not typically need a tomato cage because its thick central stalk provides natural support. Dwarf varieties under 4 feet (1.2 m) never need support, while taller varieties may only need a single stake in windy locations.
Is it possible to plant okra too close together?
Yes, planting okra too close together reduces air circulation, increases disease risk, and limits each plant's pod production. Maintain 12-18 inches (30-45 cm) between plants for healthy growth.
Which benefits come from eating okra?
Okra provides these nutritional benefits per 100g serving:
- 3.2g of dietary fiber for digestive health
- 303mg potassium for heart and muscle function
- 57mg magnesium for bone health
- Antioxidant compounds with potential antidiabetic properties
Will okra come back every year?
Okra is an annual plant that completes its life cycle in one growing season and does not return the following year. You must plant new seeds each spring after the last frost date.