
Introduction
You want fresh herbs for your morning tea but don't know where to start with your first aromatic plant. This guide on how to grow mint: expert tips for thriving plants turns your windowsill into a steady source of leaves all season long. Just 1 or 2 plants give you enough fresh cuttings for daily use at home in the kitchen. You'll be amazed at how easy this rewarding herb makes gardening feel from day one.
I killed three basil plants before I tried this forgiving herb over a decade ago in my kitchen window by the sink. The plant became my confidence builder in the garden because it asks for so little water and attention from you. It thrives with minimal attention every single day of the year. Other culinary herbs need constant care, but this one succeeds even when you forget about it for a week or two at a time.
Most guides on growing mint cover the basics but skip two things that matter for real success. Climate tips help you pick varieties that survive your winters without extra work. Companion planting lets your plants protect nearby vegetables from common pests. These details help you build a garden that flourishes in your yard each season with less effort from you.
This guide covers mint plant care from variety picks to winter prep based on real results I've seen at home and at friends' gardens. You'll learn techniques for containers and outdoor beds that keep your herbs strong for many seasons to come. The tips come from research and my personal tests in several states over the past ten years of trial and error in my own backyard. Beginner herb gardening starts here with a plant that wants to grow for you no matter what happens.
8 Expert Tips for Mint Success
Good mint care tips matter because small changes in your routine can double or triple your harvest each year. I tested dozens of mint cultivation methods on my own plants to find what works best for home growers. These 8 mint gardening tips come from that testing plus research from state university programs.
You can grow mint at home with less effort than most other culinary herbs demand from you each week. The plant thrives in temperatures between 59 to 77°F and needs just 1 to 2 inches of water each week. These basic numbers give you the foundation, but the tips below show you how to get the best results.
Choose the Right Location
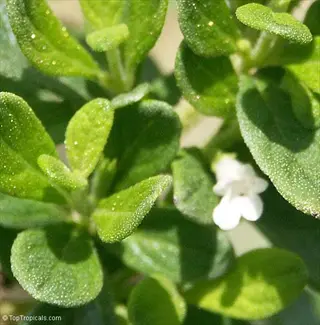
- Sunlight Needs: Mint thrives in full sun to partial shade, requiring 4-6 hours of direct sunlight daily for optimal flavor development and bushy growth patterns.
- Shade Tolerance: Plants adapt to shadier conditions better than most herbs, making mint ideal for partially shaded garden spots where other culinary herbs struggle.
- Temperature Range: Maintain temperatures between 59-77°F (15-25°C) for best results, with plants tolerating brief periods outside this range.
- Air Circulation: Position plants where air moves freely to reduce fungal disease risk and keep foliage dry between waterings.
- Protection Needs: In hot climates above USDA Zone 8, afternoon shade prevents leaf scorching and extends the harvest season through summer months.
- Indoor Placement: For windowsill growing, south-facing windows provide the strongest light, though east or west exposures work with supplemental grow lights.
Prepare Rich Moist Soil
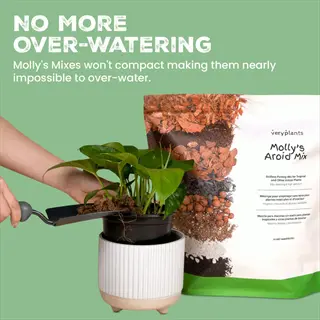
- Soil pH Level: Target a pH between 6.0-7.5 for optimal nutrient uptake, testing soil before planting and amending with lime or sulfur as needed.
- Soil Texture: Fertile loam to sandy loam provides the ideal balance of drainage and moisture retention that mint roots prefer.
- Organic Matter: Work 1 inch (2.5 cm) of compost per 100 square feet (9.3 square meters) into planting beds to improve soil structure and fertility.
- Drainage Requirements: Ensure soil drains within 4-6 hours after heavy rain to prevent waterlogged conditions that cause root rot.
- Moisture Retention: Mint prefers consistently moist soil unlike Mediterranean herbs, so adding organic matter helps maintain even moisture levels.
- Container Mix: Use quality potting soil with added perlite for containers, avoiding garden soil that compacts and restricts root growth.
Water Consistently Each Week
- Weekly Amount: Provide 1-2 inches (2.5-5 cm) of water weekly depending on temperature and humidity, increasing during hot dry periods.
- Watering Frequency: Water deeply 2-3 times per week rather than daily light sprinkles to encourage deep root development.
- Morning Timing: Water in early morning to allow foliage to dry before evening, reducing fungal disease risk on leaves.
- Drought Signs: Watch for wilting leaves and stems as the first sign of water stress, though mint recovers quickly once watered.
- Container Needs: Potted mint dries faster than garden plants and may need daily watering during summer heat waves.
- Mulching Benefits: Apply 2-3 inches (5-7.5 cm) of organic mulch around plants to conserve soil moisture and reduce watering frequency.
Fertilize Sparingly in Spring
- Annual Application: Apply a single spring application of balanced 16-16-16 slow-release fertilizer at one teaspoon per plant for the entire season.
- Nitrogen Caution: Avoid high-nitrogen fertilizers that produce lush growth with diminished essential oil content and weaker flavor.
- Organic Options: Side-dress with compost or aged manure in early spring as an alternative to synthetic fertilizers.
- Over-Fertilizing Signs: Excessive leafy growth with pale color and weak stems indicates too much nitrogen in the soil.
- Container Feeding: Potted mint benefits from diluted liquid fertilizer every 3-4 weeks during active growth periods.
- Soil Testing Value: Test soil every 2-3 years to avoid unnecessary fertilization that can reduce flavor quality in harvested leaves.
Harvest Regularly for Bushier Growth
- Harvest Timing: Pick mint late in the morning on dry sunny days when essential oils reach peak concentration for strongest flavor.
- Cutting Technique: Harvest stems by cutting just above a leaf node to encourage two new branches to grow from that point.
- Amount to Take: Remove up to one-third of the plant at each harvest without stressing growth, allowing quick recovery.
- Frequency Benefits: University of Maryland research confirms that frequent cutting improves overall growth rather than depleting plants.
- Flower Removal: Pinch off flower spikes as they appear to direct energy toward leaf production and maintain flavor quality.
- Season Length: Begin harvesting 30 days after transplanting and continue through first frost for 2-3 full harvests per season.
Control Spreading with Barriers
- Rhizome Behavior: Mint spreads aggressively through underground rhizomes that can travel several feet per season into neighboring garden beds.
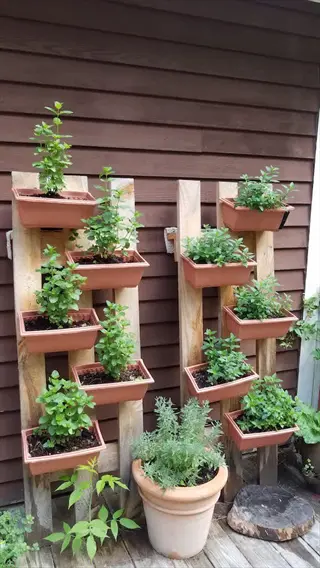
- Container Method: Plant in 12-16 inch (30-40 cm) diameter containers with drainage holes as the simplest containment approach.
- Buried Barrier: Sink bottomless containers 10-15 inches (25-38 cm) deep with 3-4 inches (7.5-10 cm) remaining above soil level.
- Material Options: Use plastic, metal, or terracotta barriers at least 12 inches (30 cm) deep to stop lateral rhizome spread.
- Annual Inspection: Check barrier edges each spring for escaped runners and trim back any rhizomes attempting to breach containment.
- Spacing Needs: Plant individual specimens 12-18 inches (30-46 cm) apart within contained areas for proper air circulation.
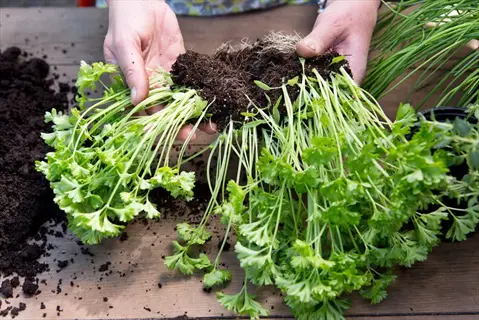
Divide Plants Every Few Years
- Division Timing: Divide established mint clumps every 3-4 years in early spring or fall to maintain plant vigor and productivity.
- Center Die-Back: Older plants develop woody centers with reduced growth while outer edges remain vigorous and productive.
- Division Process: Dig up the entire root ball, discard the woody center, and replant healthy outer sections with fresh roots.
- Replanting Depth: Set divisions at the same soil depth they grew previously, firming soil around roots and watering thoroughly.
- Sharing Plants: Each division produces multiple new plants perfect for expanding your garden or sharing with fellow gardeners.
- Rejuvenation Signs: Reduced leaf size, sparse growth, and declining flavor indicate plants need division for renewed vigor.
Protect Plants Through Winter
- Hardiness Range: Peppermint survives temperatures to -20°F (-29°C) while other varieties need protection below 20°F (-7°C).
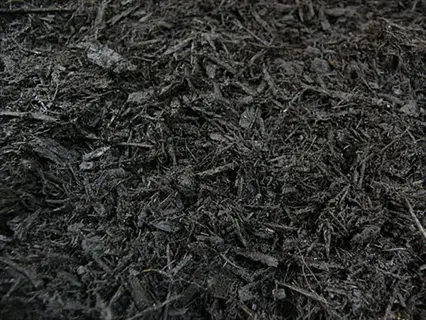
- Mulching Method: Apply 4-6 inches (10-15 cm) of straw or shredded leaf mulch after the first hard frost to insulate roots.
- Container Care: Move potted mint to an unheated garage or protected area where temperatures stay above 20°F (-7°C).
- Die-Back Normal: Above-ground growth dies back naturally in winter while roots remain alive for spring regrowth.
- Spring Cleanup: Remove winter mulch gradually as temperatures warm to prevent rot and allow new shoots to emerge.
- Regional Variation: NDSU research notes that only peppermint reliably survives harsh northern winters without protection.
This mint growing guide works whether you plant mint in the ground or in containers on your patio or deck. Each tip builds on the others to create a complete system for success. Follow these steps and you'll have more fresh leaves than you know what to do with by midsummer each year.
Popular Mint Varieties
The right mint varieties make all the difference in how you use your harvest in the kitchen. About 19 distinct species exist in the Mentha genus. Home growers can pick from close to 2,000 cultivars available around the world. I've grown 12 types of mint over the years and each one brings something unique to my cooking.
Your choice depends on what you want to make with your harvest this season. A peppermint plant gives you bold flavor for teas and desserts while a spearmint plant works better for cooking savory dishes. Chocolate mint adds a sweet twist to drinks and desserts that you won't get from other varieties in your garden.
The best mint for tea differs from the best mint for cooking based on the oil content in each leaf. Tea lovers want strong menthol while cooks need mild fresh flavor that won't overpower other ingredients in recipes. The list below helps you pick varieties that match your kitchen goals and your climate zone.
Spearmint
- Flavor Profile: Classic mild mint flavor with subtle sweetness, making it the most versatile culinary variety for everyday cooking and beverages.
- Growing Habit: Reaches 1-2 feet (30-60 cm) tall with rapid spreading through rhizomes, requiring containment in most garden settings.
- Best Uses: Perfect for mint juleps, tabbouleh, lamb dishes, and fresh summer salads where delicate flavor enhances without overpowering.
- Climate Range: Thrives in USDA Zones 4-9 and prefers temperate climates with moderate summer temperatures and consistent moisture.
Peppermint
- Flavor Profile: Strong menthol content creates an intense cooling sensation ideal for teas, desserts, and medicinal preparations.
- Growing Habit: Grows 2-3 feet (60-90 cm) tall with vigorous spreading, considered the hardiest variety surviving to -20°F (-29°C).
- Best Uses: Excellent for hot and iced teas, chocolate desserts, digestive remedies, and homemade toothpaste or mouthwash recipes.
- Climate Range: The most cold-hardy variety, thriving in USDA Zones 3-8 and tolerating harsh northern winters without protection.
Chocolate Mint
- Flavor Profile: Subtle chocolate undertones blend with mint for a unique flavor resembling thin mint cookies or peppermint patties.
- Growing Habit: Less aggressive spreader than common varieties with attractive dark stems and bronze-tinged leaves reaching 2 feet (60 cm).
- Best Uses: Outstanding in desserts, hot chocolate, ice cream, and baked goods where chocolate-mint combination enhances recipes.
- Climate Range: Grows well in USDA Zones 5-9, preferring afternoon shade in hot climates to maintain rich leaf coloring.
Apple Mint
- Flavor Profile: Fruity apple undertones with mild mint create a refreshing flavor perfect for fruit salads and light summer dishes.
- Growing Habit: Fuzzy rounded leaves on 2-3 foot (60-90 cm) stems with moderate spreading compared to spearmint or peppermint.
- Best Uses: Ideal for fruit-based beverages, jellies, cold soups, and pairing with pork dishes where fruity notes complement meat.
- Climate Range: Performs well in USDA Zones 5-9, tolerating more heat than peppermint while maintaining good flavor quality.
Pineapple Mint
- Flavor Profile: Light pineapple-citrus notes make this variegated variety popular for decorative and culinary applications alike.
- Growing Habit: Compact growth to 12-18 inches (30-46 cm) with attractive cream and green variegated leaves that brighten garden beds.
- Best Uses: Beautiful in fruit salads, cocktails, and as edible garnish where variegated leaves add visual appeal to presentations.
- Climate Range: Less vigorous than solid-colored mints, growing in USDA Zones 5-9 with preference for partial shade.
Moroccan Mint
- Flavor Profile: Sweet spearmint variety with intense aroma used in North African mint tea ceremonies and cuisine.
- Growing Habit: Compact upright growth to 18 inches (46 cm) with smaller leaves packed with essential oils for strong tea flavor.
- Best Uses: The classic choice for authentic Moroccan mint tea, also excellent in Middle Eastern cuisine and Mediterranean dishes.
- Climate Range: Prefers warmer conditions in USDA Zones 5-11, tolerating heat better than peppermint varieties.
Orange Mint
- Flavor Profile: Distinctive citrus-orange aroma with underlying mint creates a refreshing flavor profile unlike other varieties.
- Growing Habit: Rounded purple-tinged leaves on 2 foot (60 cm) stems with moderate spreading and attractive appearance.
- Best Uses: Perfect for citrus-based beverages, fruit desserts, and as aromatic addition to potpourri and bath products.
- Climate Range: Grows in USDA Zones 4-9, tolerating a wide range of conditions while maintaining citrus-scented foliage.
Corsican Mint
- Flavor Profile: Strong peppermint flavor despite tiny leaves makes this groundcover variety ideal for extracts and liqueurs.
- Growing Habit: Low-growing mat only 1 inch (2.5 cm) tall spreading to form fragrant groundcover between stepping stones.
- Best Uses: Ideal as aromatic groundcover, between pavers, and for making creme de menthe liqueur and mint extracts.
- Climate Range: Less cold-hardy in USDA Zones 6-9, preferring moist shaded conditions and protection from hot afternoon sun.
Start with spearmint or peppermint if you've never grown these herbs before. Both forgive beginner mistakes and spread fast enough to give you plenty of leaves. Once you see how easy they grow, try chocolate or orange mint to expand your flavor options in the kitchen.
Controlling Mint Spread
Every gardener learns fast that mint invasive habits can take over a bed in just one growing season. I watched my first spearmint patch escape into the lawn and learned my lesson the hard way about containment. You need a solid plan to contain mint spread before you put your first plant in the ground.
The roots spread through underground stems called rhizomes that can travel several feet per season looking for new soil. A simple mint root barrier keeps those runners in check without much work from you. The key is getting the barrier deep enough that the rhizomes can't sneak underneath it in the soil.
Growing mint in pots gives you the easiest control with no chance of escape into other beds. Buried containers work well if you want an in ground look without the spread risk. The table below helps you pick the right method to control mint growth in your space. Use it to prevent mint spreading into areas where you don't want plants this season.
I use freestanding containers for most of my mint plants because I can move them around the patio as needed. Pick the method that matches how much time you want to spend on upkeep each season in your garden.
Growing Mint Indoors
You can enjoy year-round mint from your kitchen counter with the right setup and a little know how. I keep 3 pots of mint on my mint windowsill through every season and never run out of fresh leaves for cooking. Growing mint indoors works well because the plant adapts to lower light levels better than most other culinary herbs.
An indoor mint plant needs at least 6 hours of bright light each day to stay bushy and flavorful in your home. A south facing window gives you the best results. If your light falls short, a simple grow lamp fills the gap for just a few dollars per month in power costs at your house.
Your indoor herb garden can include mint grown in soil, water, or even a small hydroponic setup on your counter. Each method has its own benefits depending on how much time you want to invest in care. The options below show you exactly what each approach needs so you can pick the best fit for your mint houseplant goals this season.
Soil-Based Container Growing
- Container Selection: Choose pots at least 8 inches (20 cm) in diameter with drainage holes, using terracotta or plastic containers depending on watering habits.
- Soil Requirements: Fill with quality potting mix amended with 20% perlite for improved drainage, avoiding dense garden soil that compacts indoors.
- Light Needs: Position in south-facing windows receiving 6+ hours of bright light, supplementing with grow lights during short winter days.
- Watering Schedule: Water when the top inch of soil feels dry, every 3-5 days depending on humidity and temperature conditions.
- Fertilization: Apply diluted liquid fertilizer at quarter strength every 3 weeks during active growth from spring through fall.
- Temperature Range: Maintain indoor temperatures between 65-70°F (18-21°C) with good air circulation around plants.
Water Propagation Method
- Cutting Selection: Take 4-6 inch (10-15 cm) stem cuttings with several leaf nodes, removing lower leaves that would sit below water level.
- Container Setup: Place cuttings in clean glass jars with fresh water, ensuring nodes stay submerged while leaves remain above waterline.
- Root Development: Roots emerge within 10-14 days in bright indirect light, reaching transplant length of 2 inches (5 cm) in 3-4 weeks.
- Water Maintenance: Change water every 3-4 days to prevent bacterial growth and provide fresh oxygen for developing roots.
- Long-Term Growing: Some gardeners maintain mint forever in water with monthly liquid fertilizer additions for continued growth.
- Transplanting Option: Move rooted cuttings to soil once roots establish, hardening off to prevent transplant shock.
Hydroponic Systems
- System Types: Kratky method, deep water culture, and nutrient film technique all support mint growth with varying complexity levels.
- Nutrient Solution: Use balanced hydroponic nutrients at half strength, maintaining pH between 5.5-6.5 for optimal nutrient uptake.
- Light Requirements: Provide 12-16 hours of grow light exposure daily using full spectrum LED lights positioned 6-12 inches (15-30 cm) above plants.
- Temperature Control: Maintain nutrient solution temperature between 65-75°F (18-24°C) for healthy root function.
- Growth Rate: Hydroponic mint often grows 30% faster than soil-grown plants with year-round harvesting potential regardless of season.
- Maintenance Needs: Monitor nutrient levels and pH weekly, topping off solution and adjusting as plants consume nutrients.
Windowsill Herb Garden Setup
- Window Selection: East or west-facing windows provide 4-6 hours of gentle light ideal for mint, while south windows may need sheer curtains to prevent leaf scorch.
- Tray Systems: Use waterproof trays beneath containers to catch drainage and protect windowsills from moisture damage and staining.
- Humidity Management: Group plants together on pebble trays filled with water to increase humidity around foliage in dry heated or air-conditioned rooms.
- Rotation Practice: Turn containers quarter-turn weekly to ensure even growth and prevent plants from leaning toward the light source.
- Companion Grouping: Pair mint with other moisture-loving herbs like parsley and chives rather than drought-tolerant rosemary or thyme.
- Seasonal Adjustment: Move plants to brighter windows during winter months when daylight hours decrease and supplement with grow lights if needed.
Start with soil-based growing if you've never kept mint inside before. Soil handles watering errors better than the other setups. Move to water or hydroponic methods once you get a feel for what your plants need each week.
Harvesting and Storing Mint
Knowing when to harvest mint makes a big difference in how your leaves taste in the kitchen. The best time to pick is late morning on dry sunny days when the essential oils reach their peak flavor. I learned this trick after years of harvesting mint at random times and getting weak flavor in my teas and dishes.
Watch your plants for the moment when flower buds start to form but haven't opened yet. This timing gives you the strongest oils in each leaf. Snip stems just above a leaf pair and your plant will branch out with two new shoots in that spot within days of your cut.
Storing mint the right way keeps your harvest fresh for days or even months depending on which method you pick. Keeping mint fresh in water works great for short term use while drying mint or freezing mint lets you preserve mint for the whole year ahead. The table below shows each option so you can choose what fits your cooking style.
I prefer freezing leaves in ice cube trays because it locks in that fresh picked taste for months at a time. Drop one cube into a pot of soup or a glass of iced tea and you get instant flavor.
Solving Mint Plant Problems
Why is my mint dying ranks as the most common question I get from gardeners who email me about their herbs each week. In my 10 years of growing, I've seen every mint problem on this list in my own plants at some point. The key is matching what you see to the right cause before you start fixing mint problems in your garden.
Mint yellowing leaves often point to watering issues rather than disease or pests in your garden soil. Check the roots first when your mint plant dying symptoms include yellow or wilted foliage. Mint root rot shows up as brown mushy roots that fall apart when you touch them after pulling the plant from its pot.
Healthy mint plants produce essential oils that repel many common garden pests on their own. When your plant gets stressed from poor care, it loses this natural defense and bugs move in fast. The table below helps you spot what's wrong and fix it before the damage gets worse.
Most problems clear up within 2 weeks once you fix the root cause in your care routine. Start with the simplest fix first and give your plant time to bounce back before trying anything more drastic.
5 Common Myths
Mint grows well from seed and germinates reliably for home gardeners to start new plants.
Mint seeds have poor germination rates and produce inconsistent plants. Stem cuttings or divisions from established plants grow faster and maintain true variety characteristics.
Mint needs full shade because it wilts in sunlight and prefers cool dark growing conditions.
Mint thrives in full sun to partial shade with 4-6 hours of sunlight daily. Plants in full shade become leggy with weaker flavor in the leaves.
Frequent harvesting weakens mint plants and reduces their ability to produce new growth.
Regular harvesting promotes bushier growth and stronger flavor. University research confirms that cutting sprigs frequently improves overall plant health.
All mint varieties spread aggressively and cannot be grown safely near other garden plants.
Some varieties like chocolate mint and variegated mint spread less aggressively. Container planting or buried barriers effectively control all varieties.
Mint plants only last one season and need replacement every year like annual herbs.
Mint is a hardy perennial surviving 5-10 years or longer with proper care. Division every 3-4 years maintains plant vigor and productivity.
Conclusion
You now have everything you need for growing mint success in your garden or on your windowsill at home. The plant rewards minimal effort with abundant harvests when you meet its basic needs for water and containment. Just 1 or 2 plants supply enough fresh cuttings for daily use in any home kitchen.
Mint plant care comes down to a few simple habits that anyone can build into their routine each week. Water when the soil feels dry, harvest often to keep growth bushy, and contain those spreading roots in a pot or barrier. These mint harvest tips and care basics will serve you well for years of productive plants.
Container growing solves the spread problem and lets you move plants inside or out as seasons change in your area. I keep my favorite varieties in pots on the deck all summer. When frost arrives I move them to sunny windows. This approach gives me fresh leaves for beginner herb gardening projects all year round.
Try one new variety next season to expand what you can grow mint for in your kitchen and drinks. Chocolate mint in hot cocoa or orange mint in iced tea will show you why this herb family has so many fans among home cooks. Your first plant is just the start of what could become a lifelong growing habit.
External Sources
Frequently Asked Questions
What is the best way to grow mint successfully long-term?
Provide rich moist soil, 1-2 inches of water weekly, regular harvesting, and divide plants every 3-4 years to maintain vigor.
Will mint require special care compared to other herbs?
Mint needs more water than Mediterranean herbs and requires containment to prevent spreading, but otherwise is very low maintenance.
Which mistakes kill potted mint plants?
Common fatal mistakes include:
- Overwatering causing root rot
- Containers without drainage holes
- Letting soil dry out completely
- Insufficient light indoors
Could mint survive winter outdoors?
Peppermint survives to -20°F (-29°C), while other varieties need mulching or indoor protection in cold climates.
What causes my mint to have small leaves?
Small leaves typically result from insufficient water, poor nutrition, too little light, or overcrowded roots needing division.
What is the best way to revive wilted grocery store mint?
Trim stems at an angle, place in fresh water, and keep in bright indirect light. Healthy stems can root within 2 weeks.
Can mint be safe for pet-friendly gardens?
Mint has low toxicity but can cause vomiting and diarrhea in dogs and cats if consumed in large quantities.
Which companion plants deter mint pests?
Plant mint near:
- Tomatoes to repel aphids
- Cabbage family to deter cabbage moths
- Carrots to mask scent from pests
What is the best way to dry mint without losing flavor?
Air-dry bundled stems in a cool dark room for 2 weeks or use a dehydrator at 95-105°F (35-40°C).
Is it okay to grow mint from store-bought leaves?
Yes, fresh mint stems with nodes can root in water within 10-14 days and transplant to soil once roots reach 2 inches.