
Introduction
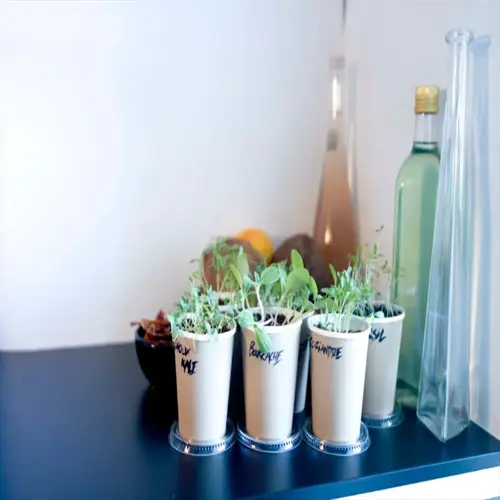
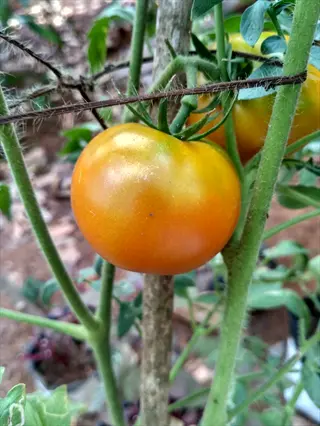
Fresh tomatoes in January sound too good to be true. But growing tomatoes indoors makes it possible no matter where you live. I started my first indoor tomato plants three winters ago. Too many bland grocery store tomatoes pushed me to try something new.
The timeline surprised me at first. Research from PMC shows that indoor tomatoes take just 60 to 100 days from seed to harvest. In my experience, ripe tomatoes appear within three months of planting your first seeds.
Indoor gardening does require more hands on care than tossing plants in your backyard. I learned you need to manage lighting and temperature. Containers and pollination need your attention as well. Skip any one of these factors and your plants will struggle.
This guide walks you through everything you need for year-round tomatoes from your own home. You will learn which varieties work best indoors and how to set up your growing space. I share the care techniques that turn seedlings into productive plants.
Best Varieties for Indoor Growing
Your choice of variety matters more than any other factor when growing tomatoes indoors. I tested over a dozen types in my spare bedroom before finding the ones that produce real harvests. The wrong variety will grow tall and leafy but give you almost no fruit.
MDPI research tested 20 cultivars under indoor conditions at 72°F (22°C) with a 14 hour light cycle. Sweet Sturdy Grace came out on top at 615.9 grams per plant. Little Bing followed at 563.4 grams and Yellow Canary at 541.4 grams. These numbers gave me a clear target when picking compact tomato varieties for my setup.
Think of determinate tomatoes like sprinters. They give you a big burst of fruit over 4 to 6 weeks then stop. Indeterminate types run a marathon and keep going for months. I pick determinate and dwarf tomato varieties for my indoor setup. They stay compact and give you a solid harvest.
Micro tomatoes and cherry tomatoes indoors work best for most home growers. They need less light than full sized types and fit on a windowsill or small shelf. The varieties below have proven track records in controlled indoor tests.
Sweet Sturdy Grace
- Yield Performance: Research-proven top performer producing 615.9 grams total fruit with approximately 97 tomatoes per plant in controlled indoor conditions.
- Growth Habit: Compact determinate variety reaching 12 to 18 inches (30 to 46 centimeters) tall making it ideal for limited indoor spaces.
- Container Size: Thrives in 2 to 3 gallon containers with standard potting mix and consistent moisture throughout the growing season.
- Light Requirements: Performs well under 11 mol per square meter daily light integral with 14-hour photoperiod from grow lights.
- Harvest Timeline: Expect first ripe fruits 65 to 75 days from transplant with concentrated harvest over 4 to 6 weeks.
- Flavor Profile: Sweet cherry-type tomatoes with balanced acidity perfect for fresh eating and salads throughout the year.
Little Bing
- Yield Performance: Second-highest indoor performer in research trials producing 563.4 grams of fruit per plant under controlled conditions.
- Growth Habit: Compact cherry tomato variety with dense foliage reaching approximately 12 to 15 inches (30 to 38 centimeters) in height.
- Container Size: Performs well in 2 gallon containers with well-draining potting mix and drainage holes at the bottom.
- Light Requirements: Thrives with supplemental LED or fluorescent lighting providing consistent 14 to 16 hour photoperiod daily.
- Harvest Timeline: Produces ripe fruit within 60 to 70 days from transplant with multiple clusters ripening progressively.
- Flavor Profile: Intensely sweet small fruits with thin skin that burst with flavor making them excellent for snacking.
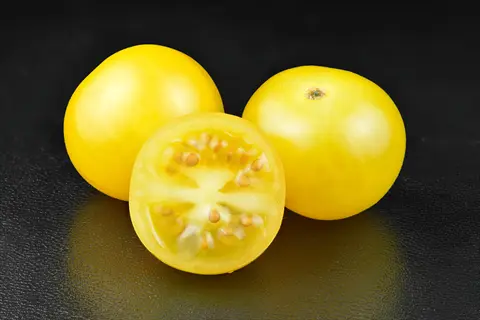
Yellow Canary
- Yield Performance: Strong indoor performer producing 541.4 grams per plant ranking third in controlled environment research trials.
- Growth Habit: Compact determinate plant with attractive yellow fruits and manageable size for windowsills or grow light setups.
- Container Size: Grows successfully in 2 to 3 gallon containers with proper drainage and quality potting mix for root development.
- Light Requirements: Adapts well to indoor lighting conditions with standard grow light setups providing adequate photosynthetically active radiation.
- Harvest Timeline: Fruits mature in approximately 65 to 70 days from transplant with attractive bright yellow color when ripe.
- Flavor Profile: Mild sweet flavor with lower acidity than red varieties making them popular with those who prefer gentler taste.
Tiny Tim
- Yield Performance: Classic dwarf variety producing abundant small cherry tomatoes on extremely compact plants suited for limited spaces.
- Growth Habit: Reaches only 6 to 12 inches (15 to 30 centimeters) tall making it one of the smallest tomato varieties available.
- Container Size: Thrives in just 1 gallon containers making it perfect for windowsills, countertops, or small grow light stations.
- Light Requirements: Tolerates lower light levels better than larger varieties while still producing fruit with basic supplemental lighting.
- Harvest Timeline: Quick to mature at 45 to 55 days from transplant providing the fastest harvest among popular dwarf varieties.
- Flavor Profile: Produces abundant three-quarter inch fruits with classic tomato taste that works well fresh or in cooking applications.
Micro Tom
- Yield Performance: Ultra-compact variety bred for container growing producing small but numerous fruits on miniature plants.
- Growth Habit: World's smallest tomato variety reaching only 5 to 8 inches (13 to 20 centimeters) making it ideal for tight spaces.
- Container Size: Grows successfully in containers as small as 4 to 6 inches (10 to 15 centimeters) or roughly half a gallon.
- Light Requirements: Performs well on sunny windowsills or under basic grow lights making it accessible for beginner indoor gardeners.
- Harvest Timeline: Matures rapidly in 50 to 60 days from transplant with concentrated fruit production over several weeks.
- Flavor Profile: Small but flavorful fruits with good tomato taste considering the compact plant size and quick maturity period.
Patio Choice Yellow
- Yield Performance: Exceptional producer capable of generating up to 100 tomatoes per plant under optimal indoor growing conditions.
- Growth Habit: Compact determinate variety reaching 18 to 24 inches (46 to 61 centimeters) with sturdy stems needing minimal support.
- Container Size: Requires 3 to 5 gallon containers for optimal root development and sustained production throughout the season.
- Light Requirements: Needs consistent 14 to 16 hours of quality grow light exposure to achieve maximum fruit production potential.
- Harvest Timeline: Fruits mature in 65 to 70 days with extended harvest period compared to smaller micro varieties available.
- Flavor Profile: Sweet yellow cherry tomatoes with mild flavor and attractive appearance that brightens indoor garden displays.
Lighting Requirements
Light makes or breaks your indoor tomato harvest. I learned this the hard way when my first plants grew tall and leggy but made zero fruit. Grow lights for tomatoes need to hit specific numbers or your plants will just survive instead of thrive.
Two numbers matter most when you pick LED grow lights for your setup. PPFD tells you how much light hits your plants each second. Daily Light Integral adds up all that light over 24 hours. Think of PPFD like rainfall rate and DLI like total rain for the day.
PMC research found that seedlings do best at 240 PPFD with a 7 to 3 red to blue LED ratio. Fruiting plants need much more at 600 to 1000 PPFD to set and ripen fruit. Your tomato light requirements change as plants grow through each stage.
Most homes lack the supplemental lighting tomatoes need without help. Even a sunny south window gives far less light than outdoor sun. The table below shows exact PPFD for tomatoes at each growth stage so you can match your setup to your plants.
Containers and Soil Setup
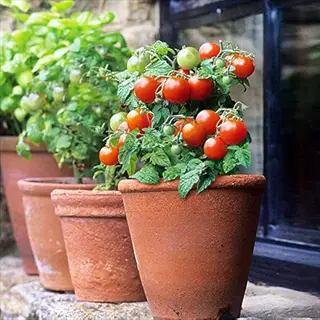
Your container tomato growing success starts with the right pot. In my experience, bigger pots beat smaller ones every time. A cramped pot stresses your plants the same way a tiny apartment would stress you.
Tomato container size depends on what variety you grow. Micro types like Micro Tom fit in 1 gallon pots. Dwarf varieties need 2 to 3 gallons. Larger determinate plants want 5 gallons or more to spread their roots and produce well.
Drainage holes matter more than the container material itself. I have grown tomatoes in plastic, fabric, and ceramic pots with equal results. What killed plants was forgetting to check that water could flow out the bottom. Self-watering containers work great for busy growers who forget to water.
Potting mix for tomatoes needs to drain well while holding enough moisture. University of Minnesota Extension says to aim for pH 5.5 to 7.0 in your mix. Never use garden soil in containers. It packs too tight and brings in pests. Good container depth lets you bury stems deep for stronger root systems.
Micro and Dwarf Varieties
- Container Size: Choose 1 to 2 gallon containers (4 to 8 liters) for the smallest varieties like Micro Tom and Tiny Tim plants.
- Drainage Requirements: Ensure at least 3 to 4 drainage holes in the bottom to prevent waterlogged roots and root rot issues.
- Material Options: Plastic containers retain moisture longer while terracotta allows soil to breathe but requires more frequent watering.
- Soil Depth: Provide minimum 6 to 8 inches (15 to 20 centimeters) of soil depth for adequate root development and plant stability.
Compact Determinate Varieties
- Container Size: Select 2 to 3 gallon containers (8 to 12 liters) for medium-sized compact varieties like Sweet Sturdy Grace.
- Drainage Requirements: Include drainage tray underneath to catch excess water while preventing roots from sitting in standing water.
- Material Options: Fabric grow bags provide excellent drainage and air pruning of roots while preventing circling root patterns.
- Soil Depth: Ensure 8 to 10 inches (20 to 25 centimeters) of soil depth to support healthy root systems and plant growth.
Standard Determinate Varieties
- Container Size: Use 5 gallon containers (19 liters) or larger for full-sized determinate varieties with higher yield potential.
- Drainage Requirements: Elevate containers on pot feet or blocks to ensure drainage holes work right and water flows out.
- Material Options: Self-watering containers work well for larger plants to maintain consistent moisture that prevents blossom end rot.
- Soil Depth: Provide 10 to 12 inches (25 to 30 centimeters) of soil allowing deep planting with buried stems for stronger roots.
Potting Mix Requirements
- Mix Composition: Use quality potting mix containing peat moss, perlite, and vermiculite rather than garden soil which compacts.
- pH Level: Maintain soil pH between 5.5 and 7.0 as recommended by University of Minnesota Extension for optimal nutrient uptake.
- Drainage Additives: Add extra perlite at 20 to 30% ratio if mix seems too dense or holds water too long after watering.
- Avoiding Garden Soil: Never use outdoor garden soil which harbors pests, diseases, and compacts in containers restricting root growth.
Temperature and Humidity Control
Temperature for tomatoes indoors needs more control than most growers expect. I lost an entire crop my first winter because my grow room stayed too warm at night. Your plants need cooler nights just like you sleep better in a cool bedroom.
PMC research shows the ideal growing temperature falls between 64°F to 72°F (18°C to 22°C) during the day. The key is the day night temperature gap. Your plants want nights about 9°F to 13°F (5°C to 7°C) cooler than days. This gap triggers proper growth and fruit set.
Humidity for indoor plants matters too but gets less attention. Aim for 65% to 75% relative humidity in your grow space. I found low humidity stresses plants and brings in spider mites. High humidity above 85% can cause fungal problems on leaves.
Missouri Extension warns about specific triggers that cause flower drop. Nights below 55°F (13°C) kill flowers. Days above 95°F (35°C) stop fruit from setting. Nights above 75°F (24°C) also cause problems. Watch your indoor growing conditions to stay in the safe zone.
Watering and Fertilizing
Tomatoes are heavy feeders that need steady nutrition to produce fruit indoors. I learned the hard way that feeding all plants the same mix leads to problems. Just like babies need different food than adults, your plants need different tomato fertilizer at each growth stage.
Ohio State tested a phased way to feed plants. Your fertilizer schedule should change as plants grow from seedlings to fruit makers. The NPK ratio tomatoes need shifts toward less nitrogen and more phosphorus over time.
Calcium supplementation prevents the dreaded blossom end rot that ruins fruit. UGA Extension says your plant leaf tissue should contain 1.25% to 3.20% calcium at early bloom. The trick is that calcium moves through roots with water. So consistent watering matters as much as adding calcium.
Missouri Extension suggests ratios like 8-32-16 or 6-24-24 for feeding tomatoes. These have low nitrogen and high phosphorus. Too much nitrogen makes your plants grow lots of leaves but few fruits. The schedule below shows what to feed at each phase.
Seedling Phase (Weeks 1-4)
- Nutrient Focus: Use diluted balanced fertilizer at quarter strength focusing on roots before heavy feeding begins.
- Application Rate: Apply liquid fertilizer once a week starting when first true leaves appear above the seed leaves.
- Calcium Importance: Begin building calcium reserves early since calcium moves only through roots and cannot be added later.
- Common Mistakes: Avoid feeding seedlings too much which causes leggy weak growth and salt buildup in the potting mix.
Vegetative Phase (Weeks 4-8)
- Nutrient Focus: Increase nitrogen to support leaf and stem growth while maintaining balanced phosphorus and potassium levels.
- Application Rate: Feed with half strength balanced fertilizer twice a week or full strength once a week based on plant response.
- Calcium Importance: Continue calcium through watering since consistent soil moisture maintains calcium uptake through transpiration.
- Common Mistakes: Excess nitrogen during this phase creates lush foliage but delays flowering and cuts eventual fruit production.
Flowering Phase (Weeks 8-12)
- Nutrient Focus: Shift to lower nitrogen and higher phosphorus formula like 5-10-10 to push flower growth and fruit setting.
- Application Rate: Apply fertilizer at full strength once a week and add extra calcium from first bloom through fruit growth.
- Calcium Importance: UGA Extension says adding calcium from first bloom through golf ball sized fruit prevents blossom end rot.
- Common Mistakes: High nitrogen during flowering sends energy to leaves instead of flowers and can cause flower drop in plants.
Fruiting Phase (Weeks 12 Plus)
- Nutrient Focus: Maintain higher potassium levels with a ratio like 8-32-16 to support fruit growth, flavor, and plant health.
- Application Rate: Continue once a week feeding with fruiting formula and watch plants for signs of too few or too many nutrients.
- Calcium Importance: Keep soil moisture steady since uneven watering stops calcium transport and causes blossom end rot on fruits.
- Common Mistakes: Skipping potassium leads to poor fruit quality while too much nitrogen keeps sending resources to foliage.
Pollination Techniques
Tomatoes are self-pollinating tomatoes with both male and female parts in each flower. But that does not mean fruit happens on its own indoors. I thought my first plants would just make tomatoes without help. I was wrong and got zero fruit for weeks.
Outdoor plants get pollinating indoor plants help from bees and wind that shake pollen loose. Your indoor setup lacks both of these. You need to become a personal matchmaker for your tomato flowers. Hand pollinate tomatoes and you will see fruit form within days.
Indoor tomato pollination means moving pollen from one part of the flower to another. In my tests, both parts sit inside a cone in the flower center. A quick shake knocks the pollen loose and lets it fall where it needs to go.
I test different manual pollination methods every season to see what works best. Flower shaking takes the least effort and works great for most growers. The methods below show you every option from simple to advanced.
Gentle Shaking Method
- Technique: Grasp the main stem or flower cluster stem and shake for 2 to 3 seconds to vibrate pollen loose from anthers.
- Timing: Pollinate during mid morning hours when humidity is moderate and flowers are open for best pollen transfer.
- Frequency: Repeat each day or every other day while flowers are open since new flowers open throughout the flowering period.
- Effectiveness: Simple and effective method that mimics natural wind vibration outdoor plants would get in garden settings.
Electric Toothbrush Method
- Technique: Touch the vibrating toothbrush back to the flower stem or cluster base for 2 to 3 seconds to release pollen.
- Timing: Best done when flowers are at peak openness in mid morning after dew has dried and before afternoon heat.
- Frequency: Apply to each flower cluster once a day during active flowering for steady pollination and fruit set results.
- Effectiveness: Creates stronger vibration than hand shaking and mimics buzz pollination from bumblebees in nature.
Cotton Swab Transfer
- Technique: Twirl a cotton swab inside the flower to collect pollen from anthers then move it to the stigma center.
- Timing: Do this when flowers are open and pollen shows as yellow powder on the cone shaped anther structure.
- Frequency: Use this method for single flowers that seem to not be setting fruit despite other pollination attempts.
- Effectiveness: Provides direct pollen transfer but takes more time than vibration methods for multiple flower clusters.
Small Fan Air Circulation
- Technique: Set up a small fan to create gentle air flow around plants helping spread pollen between flowers.
- Timing: Run the fan during light hours for several hours each day to act like the outdoor breeze tomatoes would get.
- Frequency: Can run all the time or during specific hours to add to but not replace direct hand pollination for best results.
- Effectiveness: Gives passive pollination support and improves plant health through air flow reducing fungal issues.
Indoor Pest and Disease Control
Indoor tomato pests differ from outdoor problems in ways that surprised me at first. You skip most garden bugs when growing inside. But new threats pop up that love the warm, cozy space you create for your plants.
I think of tomato disease prevention like home security. Fix weak spots before trouble shows up at your door. Spider mites indoor plants hate humidity so keeping it up prevents them. Fungus gnats tomatoes love wet soil so letting it dry out stops them.
Blossom end rot and powdery mildew tomatoes are the two diseases I see most often indoors. Neither one comes from bugs. Blossom end rot happens when watering goes up and down. Powdery mildew shows up when air sits still too long around your plants.
The list below shows every pest and disease I battled in three years of indoor growing. Each entry tells you what to look for, why it happens, and how I fixed it.
Fungus Gnats and Larvae
- Identification: Small black flying insects around soil surface with white larvae visible in top inch of moist potting mix.
- Cause: Too much water and wet soil surface create ideal breeding conditions for fungus gnats in indoor containers.
- Prevention: Allow soil surface to dry between waterings and use yellow sticky traps near plants to catch adult gnats.
- Treatment: Apply BTI products to soil to kill larvae without harming plants or use a layer of sand on soil surface.
Spider Mites
- Identification: Tiny red or brown specks on leaf undersides with fine webbing visible between leaves and stems when bad.
- Cause: Low humidity common in heated indoor spaces creates good conditions for spider mite numbers to explode fast.
- Prevention: Keep humidity above 50% and mist plant undersides often or use a humidity tray beneath containers.
- Treatment: Spray plants with neem oil or soap spray covering leaf undersides where mites live and breed.
Aphids and Whiteflies
- Identification: Small soft insects clustering on new growth and leaf undersides leaving sticky honeydew on foliage.
- Cause: Indoor plants from nurseries or outdoor areas often carry aphids that breed fast in warm indoor conditions.
- Prevention: Quarantine new plants for two weeks before placing near indoor tomatoes and check plants often for pests.
- Treatment: Spray with soap spray or neem oil every 5 to 7 days for three rounds to break the breeding cycle.
Blossom End Rot
- Identification: Dark sunken spots on the bottom of growing fruits starting as small water soaked areas that get larger.
- Cause: Uneven watering stops calcium transport to fruits even when soil has enough calcium per University of Georgia research.
- Prevention: Keep soil moisture steady through regular watering times and consider pots that water from the bottom.
- Treatment: Cannot fix damaged fruits but steady watering prevents it on new fruit that develops after you make changes.
Powdery Mildew and Fungal Issues
- Identification: White powdery coating on leaves and stems that spreads fast in still air common in indoor grow spaces.
- Cause: Poor air flow combined with moderate humidity creates perfect conditions for fungal spores to grow on plant surfaces.
- Prevention: Set up a small fan to create gentle air flow around plants and space containers to allow air between foliage.
- Treatment: Remove affected leaves right away and spray baking soda mix at 1 tablespoon per gallon water to stop spread.
5 Common Myths
You need expensive professional grow lights to grow tomatoes indoors successfully for fruit production.
Research shows cool-white fluorescent lights at 100 watt equivalent are sufficient for indoor tomatoes according to Utah State University Extension.
Spraying calcium on tomato leaves will prevent blossom end rot in your indoor tomato plants.
University of Georgia research confirms foliar calcium sprays lack scientific support for preventing blossom end rot since calcium moves through roots not leaves.
Indoor tomatoes need the same amount of light as outdoor tomatoes which is only 8 hours daily.
Indoor tomatoes require 14 to 16 hours of supplemental lighting to compensate for lower light intensity compared to direct sunlight outdoors.
Any container will work for growing tomatoes indoors as long as you water them frequently enough.
Containers must have drainage holes and proper sizing from 1 gallon minimum to 5 gallons for larger varieties to prevent root rot and stunted growth.
Indoor tomato plants will naturally pollinate themselves without any help since they are self-pollinating plants.
While tomato flowers contain both male and female parts, indoor plants need manual pollination through shaking or vibration since wind and bees are absent.
Conclusion
Growing tomatoes indoors works when you get the basics right. You need the right variety, enough light, good temperature control, and hand pollination. Skip any one of these and your plants will not produce the harvest you want.
Indoor tomato plants may not match greenhouse yields pound for pound. MDPI research shows greenhouse plants can produce 45% to 142% more fruit. But indoor gardening still gives you fresh tomatoes when snow covers your yard. That taste makes every bit of effort worth it.
I can still picture picking my first ripe tomato from a plant growing under lights in my spare bedroom. That moment proved to me that year-round tomatoes are possible for anyone willing to learn the basics. Your climate and lack of garden space do not have to stop you.
Start small with a dwarf variety like Tiny Tim and a basic grow light. Learn how your plants respond before you expand. Container tomatoes teach you the skills you need for bigger setups down the road. Your first homegrown winter tomato will make you glad you started.
External Sources
Frequently Asked Questions
Can tomatoes grow indoors?
Yes, tomatoes can grow indoors successfully with proper lighting, temperature control, and hand pollination.
Can you grow tomatoes indoors with grow lights?
Yes, grow lights are essential for indoor tomatoes, providing the 14 to 16 hours of light they need daily.
How long will tomatoes live indoors?
Determinate tomatoes produce for 4 to 6 weeks while indeterminate varieties can produce for many months with proper care.
What type of tomato grows best indoors?
Compact determinate and dwarf varieties like Tiny Tim, Micro Tom, and cherry tomatoes perform best indoors.
Can you grow tomatoes on a windowsill?
Yes, but only micro or dwarf varieties work well on windowsills and may need supplemental lighting.
Can you grow tomatoes indoors without sunlight?
Yes, with quality grow lights providing adequate PPFD levels, tomatoes can thrive entirely without natural sunlight.
What are the best tomatoes to grow indoors?
Sweet Sturdy Grace, Little Bing, Yellow Canary, Tiny Tim, and Micro Tom are research-proven top performers.
Can any LED light be used as a grow light?
No, regular LED lights lack the specific spectrum and intensity tomatoes need, though basic LEDs may work for low-light plants.
Why should you sprinkle baking soda around your tomato plants?
Baking soda creates alkaline conditions on leaves that inhibit fungal spore germination, helping prevent disease.
What does putting salt on tomatoes do?
Table salt harms plants, but Epsom salt provides beneficial magnesium and sulfur nutrients for tomato growth.