
Introduction
You want to know How to Grow Sweet Potatoes: Complete Guide in hand, garden ready to go. One medium tuber packs over 700% of your daily vitamin A plus fiber and potassium in every bite. USDA numbers show per capita use jumped 79% from 2000 to 2015. That shift went from 4.2 lbs to 7.5 lbs per person, and home growers pushed a big part of that trend forward.
I started growing home garden sweet potatoes after years of bland store bought tubers that never had real flavor. The process is a lot like a long term savings plan. You put in patient work with warm soil and steady sunshine through the season. The payoff comes months later with enough food to last through winter. My first harvest taught me what no grocery brand could match in taste or texture.
This sweet potato growing guide covers every stage from sprouting slips to curing and storage. You can expect 1 to 2 lbs per plant with good care and the right soil. A 10 foot row gives you 15 to 30 lbs of fresh tubers at the end of the season. Most varieties mature in 85 to 160 days, so shorter seasons still work fine when you plant sweet potatoes on schedule.
Below you will find the best varieties, soil prep tips, and storage methods I trust from years in my own garden. Whether you use raised beds or patio containers, this guide gives you what you need to pull a strong harvest this year.
8 Best Sweet Potato Varieties
Picking the right sweet potato varieties makes or breaks your harvest. I grew 6 different types over 3 seasons, and some flopped while others filled my storage bins. The best sweet potato for home garden growing depends on your climate zone, how much space you have, and what you plan to cook.
If you live up north, go with short season varieties like Beauregard sweet potato or Georgia Jet sweet potato. Both mature in 90 to 100 days. Warmer zones open the door to longer picks like Jewel and Covington. If you grow in pots, try compact types like Bush Porto Rico in 15 to 20 gallon containers on your patio.
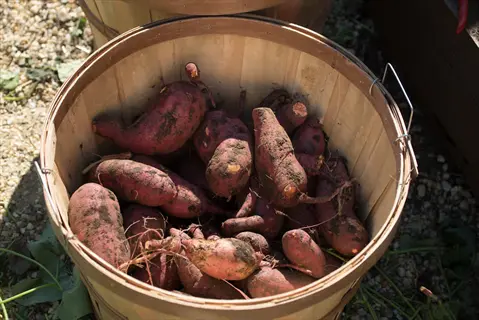
Beauregard
- Days to Maturity: 100 days from transplant, making it one of the fastest-maturing varieties available for home gardens across a wide range of climates.
- Appearance: Light purple-rose skin with deep orange, moist flesh that holds its color well after cooking and baking at high temperatures.
- Best Climate: Thrives in both warm southern gardens and cooler northern zones, recognized by Michigan State University Extension as the top performer in shorter seasons.
- Yield Potential: High-yielding variety producing 1 to 2 pounds (0.45 to 0.9 kilograms) per plant with uniform tuber shape and consistent sizing.
- Flavor Profile: Rich, sweet flavor with a creamy, moist texture that works well for baking, mashing, casseroles, and roasting without added sweeteners.
- Growing Notes: Available as slips from garden centers and online suppliers, making it the easiest variety to source for first-time growers.
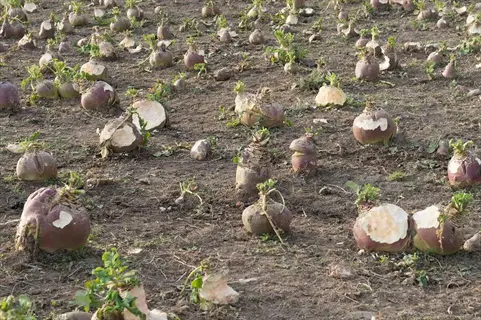
Georgia Jet
- Days to Maturity: 90 to 100 days, one of the earliest-maturing varieties available and a strong choice for northern climates with shorter frost-free windows.
- Appearance: Red skin with deep orange flesh that has a smooth, dense texture suited for both savory and sweet preparations in the kitchen.
- Best Climate: Bred for cold tolerance, performing well in USDA zones 5 through 9 where other varieties may struggle with cooler soil temperatures.
- Yield Potential: Produces generous harvests of medium-sized tubers averaging 1.5 to 2 pounds (0.68 to 0.9 kilograms) per plant under good conditions.
- Flavor Profile: Mild sweetness with a moist, dense texture that holds its shape well during roasting, making it a popular choice for side dishes.
- Growing Notes: Vigorous vine growth requires adequate spacing of 36 to 48 inches (91 to 122 centimeters) between rows to prevent overcrowding.
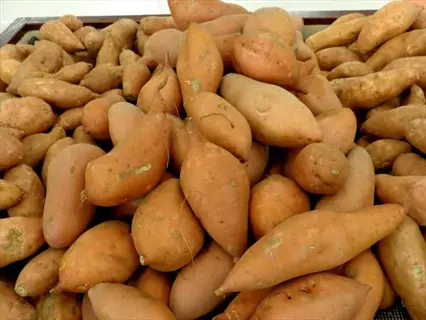
Centennial
- Days to Maturity: 100 days with reliable performance across a wide range of growing conditions, from humid southeastern gardens to drier western climates.
- Appearance: Copper-orange skin with bright orange flesh that deepens in color after curing, creating an appealing presentation for holiday and everyday meals.
- Best Climate: Adaptable across USDA zones 5 through 10 with notable resistance to internal cork disease and wilt, reducing crop loss for gardeners.
- Yield Potential: Moderate to high yields of evenly shaped tubers, making it a dependable choice for gardeners who want consistent results each growing season.
- Flavor Profile: Classic sweet potato taste with a balanced sweetness and smooth texture that works great for pies, soups, and simple roasting.
- Growing Notes: University of Illinois Extension highlights its disease resistance, making it a lower-maintenance option for organic gardens without chemical treatments.
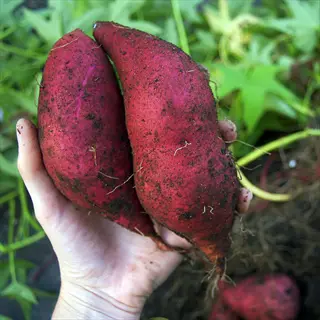
Bush Porto Rico
- Days to Maturity: 110 days with compact, bushy vine growth that stays contained, reaching only 3 to 4 feet (0.9 to 1.2 meters) in spread.
- Appearance: Copper skin with rich orange flesh that has a dense, moist texture ideal for traditional southern sweet potato dishes and holiday recipes.
- Best Climate: Performs well in warm zones 7 through 11 and adapts to container growing because of its compact vine habit.
- Yield Potential: Heavy yields despite smaller vine spread, producing 1.5 to 2 pounds (0.68 to 0.9 kilograms) per plant in well-prepared soil.
- Flavor Profile: Extra sweet with a smooth, creamy texture that caramelizes well during roasting, baking, and grilling preparations.
- Growing Notes: The compact vine growth makes it the top choice for container gardening and raised beds where space is limited in urban settings.
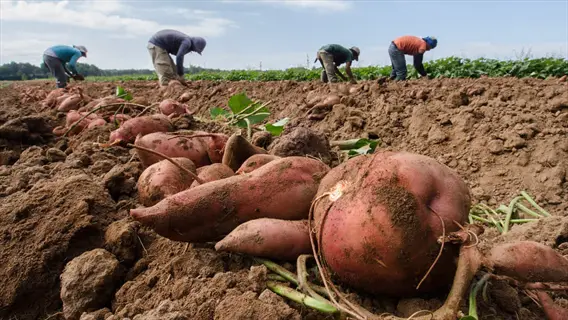
Covington
- Days to Maturity: 110 to 120 days, requiring a longer season but rewarding growers with excellent storage qualities lasting 6 months or more.
- Appearance: Rose-copper skin with vivid orange flesh that maintains a uniform cylindrical shape, making it a favorite at farmers markets and farm stands.
- Best Climate: Developed in North Carolina and bred for the southeastern United States, performing best in zones 7 through 10 with long, warm summers.
- Yield Potential: Commercial-grade yields are common in home gardens, producing large, uniform tubers that store well after proper curing.
- Flavor Profile: Sweet and moist with a smooth texture that performs well across all cooking methods from frying to pureeing for baby food.
- Growing Notes: North Carolina produces over half of all United States sweet potatoes, and Covington is the dominant commercial variety grown in that state.
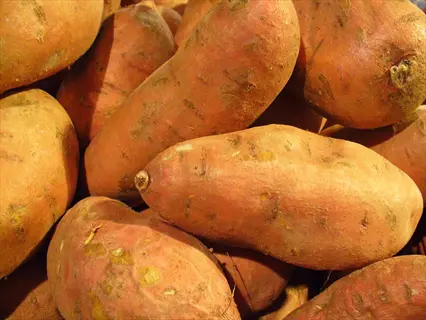
Jewel
- Days to Maturity: 120 to 135 days, requiring one of the longest growing seasons among popular varieties but offering outstanding storage longevity.
- Appearance: Copper skin with deep orange, moist flesh known for its smooth consistency and vibrant color that intensifies during the curing process.
- Best Climate: Best suited for long-season warm climates in zones 7 through 11 where 135 or more frost-free days are available each year.
- Yield Potential: Exceptional yields of large tubers that can reach 3 to 4 pounds (1.4 to 1.8 kilograms) per plant under ideal growing conditions.
- Flavor Profile: Rich, full sweetness with a moist texture that makes it the classic choice for traditional sweet potato pie and marshmallow casserole.
- Growing Notes: Michigan State University Extension notes some varieties can store up to one year with proper curing, and Jewel is among the best for longevity.
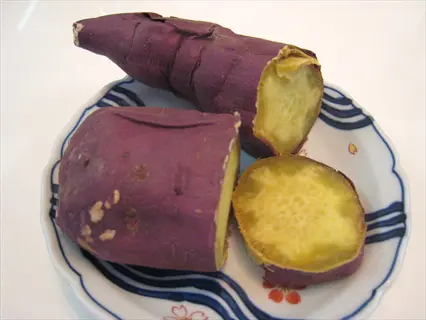
Japanese Sweet Potato
- Days to Maturity: 100 to 120 days with a distinct flavor profile that sets it apart from traditional American orange-fleshed sweet potato varieties.
- Appearance: Deep purple-red skin with creamy white to pale yellow flesh that becomes golden and dry-textured after roasting at high heat.
- Best Climate: Adaptable across zones 6 through 11 and handles cooler conditions better than some tropical sweet potato cultivars.
- Yield Potential: Moderate yields of medium-sized tubers, producing 1 to 1.5 pounds (0.45 to 0.68 kilograms) per plant with good soil preparation.
- Flavor Profile: Nutty, chestnut-like sweetness with a drier, fluffier texture compared to orange varieties, popular for roasting, tempura, and Asian dishes.
- Growing Notes: The drier flesh type stores in a different way than moist varieties. Watch the humidity during curing to prevent too much moisture loss.
Vardaman
- Days to Maturity: 100 to 110 days with ornamental value from its attractive dark purple-green foliage that adds visual interest to garden beds.
- Appearance: Golden-tan skin with deep reddish-orange flesh and compact, bushy growth habit that reaches only 2 to 3 feet (0.6 to 0.9 meters) in spread.
- Best Climate: Developed for southern gardens in zones 7 through 11 but adaptable to northern zones when planted in raised beds with black plastic mulch for warmth.
- Yield Potential: Good yields of small to medium tubers packed under the plant, producing 1 to 1.5 pounds (0.45 to 0.68 kilograms) per plant.
- Flavor Profile: Sweet and moist with rich orange color after cooking, holding its shape well during roasting and performing nicely in gratins and stews.
- Growing Notes: The compact growth habit makes it another excellent container candidate alongside Bush Porto Rico for patios and balconies with limited space.
Your climate and space will point you to the right pick. I'd go with Beauregard or Georgia Jet for your first try. Both handle beginner mistakes well and still produce solid yields at harvest time.
Growing Slips From Scratch
You can grow sweet potato slips at home and save real money over time. Starting slips from organic sweet potatoes works best because store tubers often have sprout blockers on the skin. I wasted a full month once waiting for a treated potato to sprout. Pick organic, untreated tubers from a farmers market or natural food store for the best shot at success.
Sweet potato propagation works two main ways. The water method uses toothpicks to hold half the tuber in a jar of water near a warm window. The soil method buries the tuber on its side in moist potting mix about 2 inches deep. Both methods need a spot with 70 to 80°F to get sprouts going. I've tried both, and the soil method gave me stronger roots almost every time.
Think of starting slips like hatching eggs. You need steady warmth and patience for 4 to 6 weeks before sprouts show up. Once your slips reach 6 to 8 inches tall with 4 to 5 leaves, they're ready for rooting slips in fresh water. Twist each one off the mother tuber and set the base in a cup of water. Roots will form in about a week.
One sweet potato can produce up to 50 slips if you keep it warm and moist through the whole process. The USDA says slips should reach 8 to 10 inches before you transplant them into the garden. I aim for about 18 inches of growth before planting day to give each slip a head start in the soil.
Start your slips about 6 weeks before your last frost date so they're the right size when warm weather arrives. Timing matters more than most growers realize. A slip planted too small will struggle to take off, and one started too late will run out of growing season before tubers bulk up under the ground.
Soil, Spacing, and Planting
Sweet potato soil requirements start with one rule: loose and light. The roots need open ground the way a swimmer needs open water. Any packed dirt forces tubers into narrow, twisted shapes instead of the plump ones you want at harvest. The best soil for sweet potatoes is a sandy loam that drains fast and lets roots push out in all directions.
Aim for a sweet potato soil pH between 5.0 and 6.5 based on Utah State and FAO research. Test your soil a few weeks before planting so you have time to fix it. If you have heavy clay, work in 3 to 4 inches of coarse sand and compost to break it up. I do this step 2 weeks before planting day so the mix can settle and the soil food web can wake up.
Potassium is the star nutrient for sweet potatoes. FAO data shows that a full harvest pulls about 110 kg of potassium from each hectare. Add a dose of wood ash or greensand to boost potassium levels before you set your slips. Well-drained soil matters just as much since soggy roots rot fast and kill your crop before tubers even form.
Wait until your ground hits at least 65°F before you plant. Cold soil stalls growth and can kill young slips in the first week. I stick a cheap soil gauge 4 inches deep each morning until the reading stays steady. Raised beds sweet potatoes work great here because beds warm up faster in spring than flat ground does.
Space your rows 36 to 48 inches apart and set slips 12 inches apart within each row per Utah State Extension. Bury the bottom 2 to 3 nodes of each slip at the right planting depth for strong root growth. I angle mine at about 45 degrees so the buried stem can form roots at each node along its length.
Start soil prep 2 to 3 weeks before planting day so the ground is ready when your slips are. Dig in your sand, compost, and fertilizer, then mound the rows 8 to 10 inches high. These mounds give tubers room to grow and help water drain away from the roots. A little prep work now means a much better harvest later.
Watering and Fertilizing
Watering sweet potatoes and fertilizing sweet potatoes the right way can make or break your crop. The first 50 to 60 days after planting are the most drought sensitive window. UMD Extension research shows this is when roots set up their growth pattern. I water deep once a week at about 1 inch per session and check the soil before adding more.
Think of fertilizing sweet potatoes like seasoning food. Too much nitrogen fertilizer sweet potatoes push into vine growth instead of tubers. You get big green plants with tiny roots under the dirt. A 5-10-10 NPK ratio sweet potatoes love gives them less nitrogen and more potassium for fat tuber growth. Utah State Extension says to side dress with 0.5 lbs of nitrogen per 100 sq ft once during the season.
You also need to stop watering before harvest at the right time. The University of Illinois Extension says to cut off water 4 weeks before you plan to dig. This lets the skins toughen up and lowers moisture in the tubers. I learned this the hard way when my first crop split open from too much late water. The table below shows each feeding stage and what your plants need at each point.
Keep a close eye on your vines during the first 2 months. If they grow fast and look dark green, cut back on feeding. Fat vines with thin roots means too much nitrogen got into the soil. Balance matters more than volume for sweet potato nutrients.
Container and Raised Bed Growing
Growing sweet potatoes in containers works for anyone with a sunny spot outside. A pot acts like a personal greenhouse for roots. You get warmer soil, better drainage, and a wall against bugs. Pots block voles and wireworms from reaching your tubers, which is a big win.
I started patio growing with sweet potatoes in raised beds first. Then I moved to grow bags sweet potatoes after tubers formed better in fabric pots. Small space gardening works well because the vines trail over the edge and the roots stay warm. You just need 6 to 8 hours of direct sun each day and the right size pot.
Container Size and Type
- Minimum Volume: Choose containers that hold at least 15 to 20 gallons to give tubers enough room to spread without getting cramped and misshapen.
- Material Options: Fabric grow bags, plastic pots, and half whiskey barrels all work well, though fabric bags offer better drainage and air pruning of roots for healthier plants.
- Drainage Requirement: Make sure every container has multiple drainage holes in the bottom to prevent waterlogging, which causes root rot and stunts tuber growth.
- Color Tip: Dark containers soak up more heat and warm soil faster, which helps in cooler climates but may overheat roots in hot southern gardens.
Soil Mix for Containers
- Base Recipe: Combine 60% potting mix with 20% compost and 20% perlite or coarse sand to create a loose, fast draining growing medium for tuber growth.
- Avoid Garden Soil: Never use straight garden soil in containers because it compacts hard, drains poor, and may carry diseases that infect sweet potato roots.
- Fertility Boost: Mix in a slow release 5-10-10 fertilizer at planting time to provide steady nutrients through the 100 to 120 day growing period without burning roots.
- pH Target: Aim for a mix between 5.5 and 6.5 pH, which matches the sweet potato's ideal range from Utah State University Extension research.
Raised Bed Setup
- Minimum Height: Build raised beds at least 8 to 10 inches tall per Utah State University to ensure proper drainage and enough depth for tubers to form.
- Width Guidance: Keep beds 3 to 4 feet wide so you can reach the center from either side without stepping on the soil and packing it down around growing tubers.
- Soil Warming: Raised beds warm up faster than ground level soil in spring, giving sweet potatoes a head start in cooler climates with shorter seasons.
- Lining Option: Line the bottom with hardware cloth to stop burrowing rodents like voles from tunneling up into the bed and eating your tubers.
Watering Container Plants
- Check Often: Container sweet potatoes need water more often than ground plants because pots dry out faster, especially during hot summer days above 85°F.
- Moisture Check: Push your finger 2 inches into the soil each day during peak summer and water when the top layer feels dry to the touch.
- Deep Soaking Method: Water until liquid flows from the drainage holes to make sure moisture reaches the bottom where tubers are growing and expanding.
- Pre-Harvest Reduction: Stop watering container plants 3 to 4 weeks before your harvest date to toughen skins and lower moisture for better curing.
Container growing turns even a small balcony into a sweet potato garden. I've pulled 3 to 5 lbs of tubers from a single 20 gallon grow bag on my back deck. The key is to keep the soil warm, water on schedule, and give each plant enough room to produce.
Harvesting, Curing, and Storage
Knowing when to harvest sweet potatoes makes the difference between a great crop and a ruined one. Watch for yellowing leaves and dying vines as your main signal that tubers are ready underground. UMD Extension warns that if frost hits your vines, dig right away because decay in dead vines passes down to the roots. I keep a close watch on the forecast starting in mid September.
Curing sweet potatoes is the step most new growers skip, and it costs them months of sweet potato shelf life. The ideal sweet potato curing temperature sits at 80 to 85°F with 80% to 90% humidity for 10 to 14 days. If you don't have a warm room, set up a box near your water heater or use a bathroom with a damp towel over the box. I've cured mine in a closet with a small space heater and it worked fine.
After curing, storing sweet potatoes at the right sweet potato storage temperature keeps them fresh for months. Move your tubers to a spot that holds 55 to 60°F with good air flow. This 6 to 8 week rest period turns starch into sugar and makes the flavor much richer. The table below breaks down each phase from harvest day through long term storage.
Wrap each cured tuber in newspaper before you stack them in boxes for storage. This keeps them from touching and slows moisture loss over time. With the right setup, some varieties last up to a full year in storage per MSU Extension data.
5 Common Myths
Sweet potatoes and yams are the same vegetable sold under different names at grocery stores.
Sweet potatoes (Convolvulaceae family) and true yams (Dioscoreaceae family) are entirely different species with different origins, nutritional profiles, and growing requirements.
You must live in the deep South or a tropical climate to successfully grow sweet potatoes at home.
Short-season varieties like Beauregard and Georgia Jet mature in 90 to 100 days and grow successfully in northern states with proper soil warming and season extension techniques.
Adding extra nitrogen fertilizer produces the biggest and best-shaped sweet potato tubers.
Excess nitrogen pushes lush vine growth at the expense of tuber size. Potassium is the most critical nutrient for tuber development according to FAO research data.
Sweet potatoes are ready to eat as soon as you pull them from the ground after harvest.
Freshly harvested sweet potatoes taste starchy and bland. Curing at 80 to 85F (27 to 29C) for 10 to 14 days converts starches to sugars and develops full flavor.
Growing sweet potatoes in containers always produces smaller and fewer tubers than in-ground planting.
Containers of 15 to 20 gallons with proper soil, drainage, and feeding produce comparable yields per plant while offering better pest protection and warmer root zone temperatures.
Conclusion
You now have a complete guide to grow sweet potatoes from slip to storage bin. Each plant gives you 1 to 2 lbs of tubers after 85 to 160 days in the ground. The whole process works best when you plan ahead and follow the steps covered in this sweet potato growing guide. People have grown this crop for thousands of years, and modern home garden sweet potatoes make success easier than ever.
The key steps are worth a quick recap. Start slips 6 weeks before your last frost date. Plant them in loose, warm soil with a pH between 5.0 and 6.5 once the ground hits 65°F. Feed with a low nitrogen mix, water well for the first 60 days, and then pull back 4 weeks before harvest. Cure your tubers at 80 to 85°F for 10 to 14 days, then store them at 55 to 60°F for months of fresh eating.
I grow sweet potatoes every season now because few crops give you this much food from this little space. In my experience, a 10 foot row fills a storage box that lasts deep into winter. Even cooler northern climates can pull off a strong harvest with short season picks like Beauregard and Georgia Jet. I've tested both in zone 6 and they produced well.
Start planning your slip timeline today based on your local last frost date. Count back 6 weeks and mark that date on your calendar. That single step sets the whole season in motion, and by fall you'll have home grown food that stores for months with the right care.
External Sources
Frequently Asked Questions
Is it okay to grow sweet potatoes from grocery store tubers?
You can, but grocery store sweet potatoes are often treated with sprout inhibitors that slow or prevent slip production. Organic, untreated tubers from farmers markets or garden centers produce more reliable results.
Which planting time for sweet potatoes is ideal?
Plant sweet potato slips outdoors 2 to 3 weeks after your last frost date, once soil temperatures reach at least 65°F (18°C). In most regions, this falls between late May and mid-June.
Do sweet potato vines require full sunlight?
Sweet potatoes perform best with 8 to 10 hours of direct sunlight per day. They tolerate a minimum of 6 hours, but reduced light leads to smaller tubers and excessive vine growth.
What is the best way to create slips from a sweet potato?
Suspend a healthy sweet potato halfway in water using toothpicks, or bury it in moist potting mix at 70 to 80°F. Slips emerge in 4 to 6 weeks and are ready to plant at 6 to 8 inches tall.
Is it okay to grow sweet potatoes in containers?
Yes, sweet potatoes grow well in containers of at least 15 to 20 gallons. Containers offer excellent drainage, warmer soil temperatures, and physical protection from burrowing pests like voles.
What is the reason to cure sweet potatoes after harvesting?
Curing heals skin wounds from harvesting, converts starch to sugar for better flavor, and extends storage life from weeks to several months. Without curing, sweet potatoes taste bland and spoil faster.
Can yams and sweet potatoes be interchangeable?
No. Sweet potatoes belong to the morning glory family (Convolvulaceae), while true yams are in the Dioscoreaceae family. They differ in taste, texture, nutritional content, and growing requirements.
What causes my sweet potatoes to be long and skinny?
Long, skinny sweet potatoes typically result from compacted or heavy clay soil that restricts lateral root expansion. Excess nitrogen fertilizer also pushes vine growth at the expense of tuber development.
Is it okay to eat freshly dug sweet potatoes immediately?
You can eat them right away, but freshly dug sweet potatoes taste starchy and bland. Curing for 10 to 14 days at warm temperatures converts starch to sugar, producing the familiar sweet flavor.
What is the best way to prevent pests from damaging crops?
Use certified disease-free slips, rotate planting locations annually, grow in containers to block burrowing pests, and inspect leaves regularly for flea beetles and whiteflies.