
Introduction
I picked my first batch of homegrown spinach on a cool spring morning and ate it right there in the garden. That single bite got me hooked on growing my own greens at home. How to Grow Spinach: 7 Essential Steps for Success is what this guide is all about.
Spinach is a cool-season vegetable that grows best between 50 and 60°F. It matures in just 28 to 55 days from seed, which makes it one of the fastest crops in any garden. Research from Food and Function calls it a functional food packed with nutrients that boost your health. That alone makes it worth a spot in any garden bed or pot on your porch.
This spinach growing guide covers how to grow spinach from seed in your backyard or in a few containers. In my experience, it works like a salad bar that restocks itself when you cut the outer leaves. A single 10 foot row can give you 4 to 6 pounds of fresh greens per season. They taste far better than store bought bags that sat on a shelf for days.
You don't need a big yard or fancy tools to get started with this crop. I've tested these steps over 5 seasons in my own garden beds and small containers on my back deck. Below you will find tips on soil prep, planting, and watering. You also get pest control advice and harvest methods so you can enjoy fresh greens on your first try.
Home vegetable gardening keeps growing in appeal, and leafy greens rank among the top crops for first time growers. Spinach stands out because of its fast turnaround and low upkeep needs. Even total beginners can pull off a great crop with these simple and tested steps below.
7 Steps to Grow Spinach
These 7 steps take you from bare soil to a full harvest of fresh spinach. I've used this same order for 5 seasons in my own garden. It works great whether you direct sow spinach in raised beds or plant in pots on a small patio.
Each step uses real data from trusted garden programs. Utah State Extension found that a 10 foot row gives you 4 to 6 pounds of spinach with proper spinach seed spacing. Seeds sprout best at 55 to 65°F and pop up in 7 to 10 days. You also learn when to plant spinach and how to meet your spinach soil requirements. Plus you get tips for thinning spinach seedlings and watering spinach the right way.
Choose the Right Planting Time
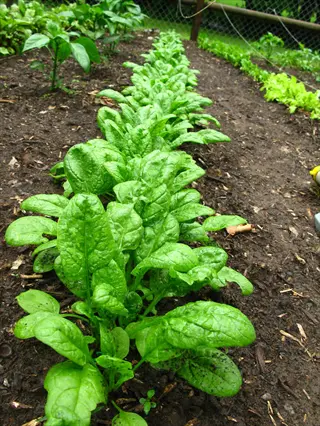
- Spring planting: Sow seeds 4 to 8 weeks before the average last frost date in your area, when soil temperature reaches at least 40°F (4°C) for germination.
- Fall planting: Start seeds 6 to 8 weeks before the first expected frost, as fall crops often produce larger leaves and crowns than spring-planted spinach.
- Succession planting: Sow a new batch of seeds every 10 to 14 days throughout the cool season to maintain a continuous supply of fresh leaves for weeks.
- Temperature check: Use a soil thermometer to confirm temperatures between 45 and 68°F (7 and 20°C) for the best germination rates and fastest emergence.
- Avoid hot weather: Temperatures above 80°F (27°C) cut seed germination rates, so plan your planting calendar around your local frost dates.
- Regional timing: In mild-winter climates (zones 8 and warmer), you can plant spinach in late fall for a winter harvest that extends your growing season by months.
Prepare Rich, Well-Drained Soil
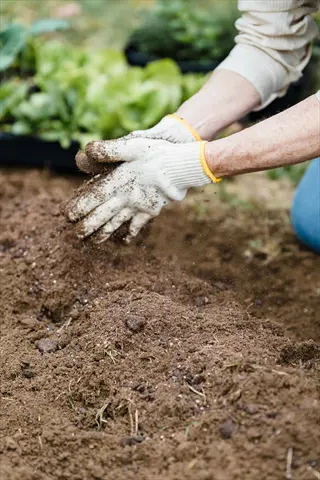
- Ideal pH range: Test your soil and aim for a pH between 6.5 and 7.0, adding garden lime to raise pH in acidic soils or elemental sulfur to lower pH in alkaline soils.
- Organic matter: Mix 2 to 4 inches (5 to 10 centimeters) of compost into the top 6 inches (15 centimeters) of soil before planting to improve drainage and nutrient availability.
- Nitrogen boost: Spinach is a heavy nitrogen feeder, so work in a balanced fertilizer like 5-10-5 at a rate of 1/4 pound per 10 feet (3 meters) of row before sowing seeds.
- Drainage test: Squeeze a handful of moist soil and check if it crumbles apart easily, which indicates good drainage that prevents root rot and fungal problems.
- Soil texture: Sandy loam is ideal for spinach because it drains well while retaining enough moisture, but clay soils work fine when amended with compost and perlite.
- Raised beds: Consider growing in raised beds filled with a mix of topsoil, compost, and perlite for better drainage and easier soil management throughout the season.
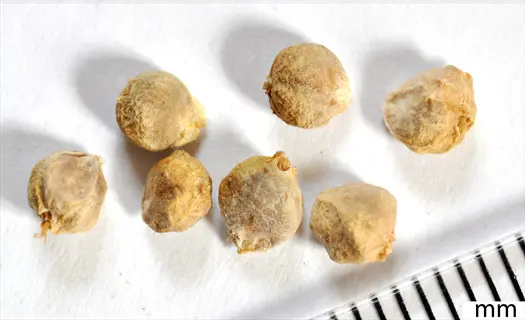
Sow Seeds at the Right Depth
- Planting depth: Sow spinach seeds 1/2 inch (1.3 centimeters) deep in moist soil, pressing the soil gently over the seeds to ensure good seed-to-soil contact for germination.
- Initial spacing: Place seeds about 2 inches (5 centimeters) apart in rows spaced 12 to 18 inches (30 to 46 centimeters) apart for traditional row planting layouts.
- Intensive method: For square foot gardening, plant 9 seeds per square foot (930 square centimeters) to maximize yield from smaller garden beds and raised beds.
- Seed priming: Soak seeds in room temperature water for 24 hours, pat dry, then refrigerate for 5 to 7 days before planting to boost germination rates in cool soils.
- Fresh seeds only: Use seeds purchased within the last year because spinach seed germination rates drop fast compared to many other vegetable seeds in storage.
- Moisture after sowing: Water the planted area with a fine gentle spray to avoid moving seeds around, and keep the soil moist at all times until seedlings emerge in 7 to 10 days.
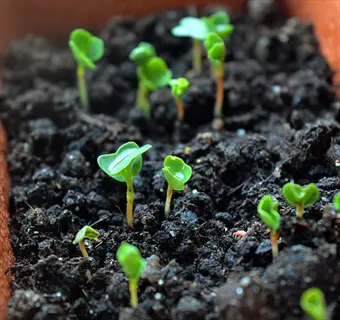
Thin Seedlings for Proper Spacing
- First thinning: When seedlings reach about 2 inches (5 centimeters) tall, thin them to 4 inches (10 centimeters) apart by snipping extra seedlings at soil level with scissors.
- Second thinning: After plants develop 4 to 5 leaves, thin again to a final spacing of 4 to 6 inches (10 to 15 centimeters) apart to allow full-size leaf development.
- Eat the thinnings: Use the removed baby seedlings in salads or smoothies rather than discarding them, turning thinning into an early bonus harvest from your garden.
- Snip instead of pull: Cut unwanted seedlings at the base rather than pulling them out to avoid disturbing the roots of the plants you want to keep growing.
- Crowding consequences: Overcrowded spinach plants produce smaller leaves, attract more fungal disease, and bolt sooner because of competition for light and nutrients.
- Container spacing: In pots and window boxes, thin to 3 to 4 inches (8 to 10 centimeters) apart and choose compact varieties like Space or Little Hero for the best results.
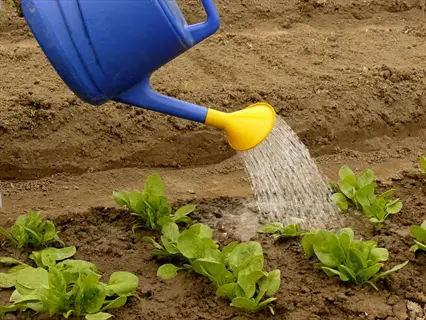
Water Consistently and Mulch Well
- Weekly water target: Provide 1 to 2 inches (2.5 to 5 centimeters) of water per week through rainfall or irrigation, adjusting based on soil type and weather conditions.
- Soil type factor: One inch of water penetrates about 10 inches (25 centimeters) in sandy soil but just 6 inches (15 centimeters) in clay soil, so adjust your watering schedule to match.
- Mulch layer: Apply 2 to 3 inches (5 to 8 centimeters) of straw, shredded leaves, or grass clippings around plants to retain moisture, moderate soil temperature, and suppress weeds.
- Morning watering: Water early in the day so leaves dry before evening, reducing the risk of downy mildew and other fungal diseases that thrive in cool, damp conditions.
- Avoid overhead spray: Use drip irrigation or a soaker hose when possible to send water straight to the soil without wetting the leaves, which helps prevent leaf diseases.
- Check soil moisture: Push your finger 1 inch (2.5 centimeters) into the soil near plants, and if it feels dry at that depth, it is time to water regardless of the watering schedule.
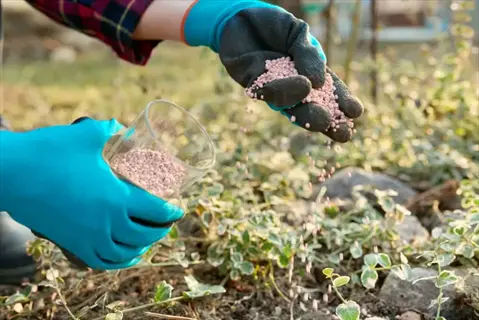
Feed Plants at the Right Time
- Side dressing: Apply 1/4 cup of nitrogen fertilizer (21-0-0) per 10 feet (3 meters) of row about four weeks after seedlings emerge to support rapid leaf growth.
- Organic options: Blood meal, fish emulsion, and alfalfa meal are excellent organic nitrogen sources that feed spinach without the risk of chemical fertilizer burn.
- Compost tea: Brew a batch of compost tea and apply it as a foliar spray every 2 to 3 weeks for a gentle, balanced nutrient boost that supports healthy leaf production.
- Avoid excess phosphorus: Too much phosphorus relative to nitrogen encourages root development over leaf growth, which is the opposite of what you want from spinach plants.
- Signs of hunger: Pale green or yellowing lower leaves often indicate nitrogen deficiency, which is the most common nutrient problem in spinach and the easiest to correct.
- Stop before harvest: Reduce or stop fertilizing about 2 weeks before your planned harvest date to allow plants to concentrate flavors and reduce nitrate accumulation in leaves.
Harvest Leaves the Right Way
- Maturity check: Begin harvesting when plants have at least 6 true leaves and the leaves reach about 3 to 4 inches (8 to 10 centimeters) in length.
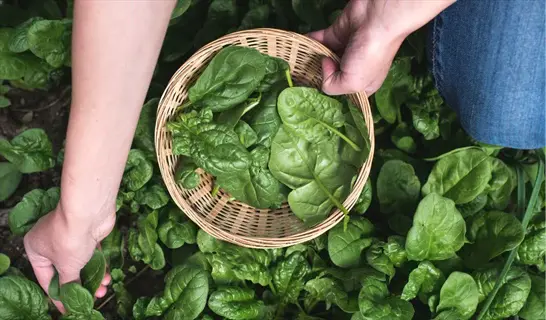
- Cut-and-come-again: Pick outer leaves first while leaving the inner crown intact, which allows the plant to continue producing new leaves for multiple harvests over several weeks.
- Full plant harvest: Cut the entire plant at the soil line when you want a larger batch at once, or if you notice early signs of bolting like a thickening center stalk.
- Morning picking: Harvest in the early morning when leaves are crisp and full of moisture for the sweetest flavor and longest shelf life after picking.
- Baby spinach option: Pick tender young leaves at just 25 to 30 days after planting for baby spinach, which has a milder taste and softer texture than full-grown leaves.
- Yield expectation: A well-maintained 10-foot (3-meter) row can produce 4 to 6 pounds (1.8 to 2.7 kilograms) of fresh spinach across the entire harvest period.
Succession planting spinach every 10 to 14 days is the secret most new growers miss. I start my first row when the soil hits 45°F and keep planting new rows until temps reach 75°F. This method keeps fresh leaves on my table for months instead of just a few weeks.
Best Spinach Varieties to Grow
Your spinach seed selection matters more than most growers think. The best spinach varieties fall into 3 leaf types: savoy, semi savoy, and smooth leaf. Each type has its own texture, flavor, and cooking use that changes how you enjoy your harvest.
I've grown all 6 of these varieties in my own beds over the years. Bloomsdale spinach is the classic that most growers know. But slow bolting spinach varieties like Tyee and Melody gave me weeks of extra harvest in warm spring weather. Savoy spinach types have less oxalic acid than smooth leaf types. That means your body absorbs more calcium from those crinkled leaves.
Melody won the All America Selection award and fights off downy mildew at just 42 days to harvest. Tyee matures in 39 days and resists bolting even as spring heats up. I suggest planting 2 to 3 varieties at once for the best mix of salad greens and cooking leaves.
Soil, Water, and Feeding Guide
Spinach soil requirements trip up more new growers than any other part of the process. Getting the spinach soil pH, watering spinach schedule, and feeding plan right from the start makes your whole grow easier. I lost my first 2 crops before I learned these basics.
This section covers all 3 care pillars for organic spinach growing. You get the best fertilizer for spinach picks and the right compost for spinach mix. You also get a clear plan for fertilizing spinach at every growth stage. University of Minnesota data shows that 1 inch of water goes 10 inches deep in sandy soil. In clay, that same inch only reaches 6 inches down.
Soil Preparation and Testing
- Ideal pH range: Spinach performs best in soil with a pH between 6.5 and 7.0, and you can test your soil using a cheap kit from any garden center or through your local extension service.
- Raising low pH: If your soil tests below 6.5, work garden lime into the top 6 inches (15 centimeters) of soil several weeks before planting to bring the pH into the best range for nutrient uptake.
- Lowering high pH: For alkaline soils above 7.0, mix in elemental sulfur or peat moss according to package directions to lower the pH over the course of a few weeks.
- Organic matter content: Add 2 to 4 inches (5 to 10 centimeters) of finished compost before each planting season to improve both soil structure and the slow release of key nutrients.
Watering Schedule by Growth Stage
- Germination phase: Keep the top inch (2.5 centimeters) of soil moist but not soaked during the 7 to 10 day germination period, watering with a light touch once or twice per day if needed.
- Seedling phase: Cut watering back to every other day as roots take hold, giving about 1 inch (2.5 centimeters) of total water per week through rain or irrigation combined.
- Mature plant phase: Provide 1 to 2 inches (2.5 to 5 centimeters) of water per week with deeper, less frequent soakings that push roots to grow downward for better drought strength.
- Soil type adjustment: Sandy soils drain fast and need more frequent watering in smaller amounts, while clay soils hold moisture longer and need less frequent but deeper watering sessions.
Fertilizing Through the Season
- Pre-planting application: Work a balanced fertilizer such as 5-10-5 into the soil at a rate of 1/4 pound per 10 feet (3 meters) of row before sowing seeds for a strong nutrient base.
- Side dressing at four weeks: Apply a nitrogen rich side dressing like 21-0-0 at 1/4 cup per 10 feet (3 meters) of row about four weeks after seedlings emerge to fuel rapid leaf growth.
- Organic feeding options: Blood meal gives a quick nitrogen boost, fish emulsion delivers balanced nutrition in liquid form, and alfalfa meal offers slow release nitrogen that feeds plants over weeks.
- Avoiding over fertilization: Too much nitrogen can cause rapid but weak growth, making plants more open to pests and disease, so always follow the rates on the label for best results.
Mulching and Moisture Retention
- Mulch benefits: A 2 to 3 inch (5 to 8 centimeter) layer of organic mulch around spinach plants cuts water loss, keeps roots cool, and holds back weed growth through the season.
- Best mulch materials: Straw, shredded leaves, and grass clippings are great mulch picks for spinach beds because they break down over time and add organic matter back into the soil.
- Timing the mulch: Apply mulch after seedlings are 3 to 4 inches (8 to 10 centimeters) tall and the soil has warmed up a bit, keeping mulch 1 inch (2.5 centimeters) away from plant stems.
- Winter protection: In fall and winter plantings, add mulch depth to 4 to 6 inches (10 to 15 centimeters) to insulate roots and protect the plant crown from hard freezes below 15°F (-9°C).
Temperature and Bolting Science
Spinach bolting is the number one problem that ends a harvest too soon. Most growers blame heat, but the real trigger is spinach day length bolting caused by long summer days. Think of spinach like a clock watcher that counts daylight hours instead of checking a thermometer.
To prevent spinach bolting, you need to know the ideal spinach temperature range and how day length plays a bigger role than most people think. Spinach is a cool-season vegetable with spinach frost tolerance down to 15°F. Once the plant senses long days, it shifts from making leaves to making seeds no matter how cool you keep the air.
Photoperiod and Day Length
- Critical threshold: Peer reviewed HortScience research shows the critical photoperiod for spinach bolting falls between 13 and 15 hours of daylight, meaning plants stay in leaf mode below 13 hours but shift to flowering above 15 hours.
- Research data: In controlled studies, bolting hit 0% of plants at 10 hours of daily light but jumped to more than 85% at 16 hours per day, which confirms day length as the main trigger.
- Floral development: Short photoperiod treatments of 8 or 12 hours per day held back floral growth and stem stretch, proving that fewer light hours keep spinach in leaf production mode.
- Practical implication: Spring planted spinach in northern climates faces fast growing day lengths from May onward, so planting 4 to 8 weeks before the last frost gives plants time to mature before the 14 hour mark.
Heat Stress and Temperature Effects
- Optimal range: Spinach grows best between 50 and 60°F (10 and 15°C), with growth slowing above 75°F (24°C) and seed germination dropping above 80°F (27°C).
- Frost tolerance: Young spinach seedlings can survive temps as low as 15 to 20°F (-9 to -7°C), making spinach one of the hardiest vegetables for early spring and late fall planting.
- Heat versus light: While high temps speed up bolting, University of Minnesota Extension research confirms that multiple days above 75°F (24°C) add to the effect of long days rather than acting on their own.
- Shade cloth strategy: Using 30% to 40% shade cloth can lower leaf temperature by 5 to 10°F (3 to 6°C), but shade alone cannot stop bolting if the photoperiod goes past the 13 to 15 hour threshold.
Seasonal Planting Windows
- Spring window: Sow seeds 4 to 8 weeks before the average last frost date so plants reach harvest size during the short day period before summer solstice triggers the bolting response.
- Fall advantage: Fall planted spinach benefits from shorter days and cooler temps, and University of Minnesota Extension confirms that fall crops grow larger leaves and crowns than spring grown plants.
- Overwintering method: In zones 6 and warmer, sow seeds in late September or October, mulch well, and let dormant plants start growing again in early spring for the earliest harvest of the year.
- Succession timing: Plant a new row every 10 to 14 days during the cool season to stagger maturity dates and keep a steady harvest going before the long day bolting window closes your spring growing period.
Bolting Prevention Strategies
- Variety selection: Choose slow bolting types like Tyee (39 days, very high bolt resistance) or Melody (42 days, high bolt resistance) to gain extra days of harvest before the photoperiod triggers flowering.
- Row cover management: Light row covers provide 2 to 4°F (1 to 2°C) of frost protection and can be used to cut effective day length a bit when applied in the late afternoon.
- Harvest before bolting signs: Watch for a thickening center stalk and leaves with pointed tips growing taller than normal, which signal the plant is shifting to seed mode within 3 to 5 days.
- Transition crops: When spinach does bolt in late spring, have heat tolerant alternatives like New Zealand spinach or Malabar spinach ready to transplant into the same beds for summer greens.
Pest and Problem Solutions
Spinach pests and spinach diseases are the top reasons new growers lose their crops before harvest. I dealt with aphids spinach infestations and leaf miners spinach damage in my first year alone. The good news is that organic pest control spinach methods work great when you catch spinach problems early.
Row covers pest protection is the single best tool in my garden shed for keeping bugs off my plants. The University of Maryland Extension confirms that row covers block leaf miners and speed up growth at the same time. Below you will find the most common threats sorted by type. Downy mildew spinach issues are also covered in the disease section at the bottom.
Aphids and Flea Beetles
- Identification: Aphids cluster on leaf undersides as tiny green or black insects, while flea beetles leave small round holes scattered across spinach leaves and are shiny dark colored jumping insects.
- Organic spray control: A strong blast of water from a garden hose knocks aphids off, and neem oil spray applied in the evening controls both aphids and flea beetles without harming helpful insects.
- Row cover prevention: Light floating row covers placed over spinach beds right after planting create a physical wall that blocks both aphids and flea beetles from reaching your plants.
- Companion planting defense: Growing garlic, onions, or chives near spinach pushes aphids away through their strong scent, cutting the need for any sprays or treatments.
Leaf Miners and Cutworms
- Leaf miner damage: Look for winding tan or white trails inside the leaf tissue where larvae tunnel between the upper and lower leaf surfaces, making affected leaves ugly but not toxic.
- Cutworm damage: Cutworms chew through stems at the soil line overnight, and you may find young seedlings cut clean at the base with the tops lying on the ground the next morning.
- Row cover solution: The University of Maryland Extension names row covers as the most effective organic defense against leaf miners because they block adult flies from laying eggs on leaves.
- Cutworm collars: Place cardboard or toilet paper tube collars around each seedling stem, pushed 1 inch (2.5 centimeters) into the soil, to create a barrier that cutworms cannot wrap around.
Slugs and Snails
- Signs of damage: Odd shaped holes with smooth edges in leaves and shiny slime trails on the soil surface or on plant leaves point to slug or snail feeding that happens at night.
- Beer trap method: Sink a small container into the soil so the rim sits level with the surface, fill it halfway with beer, and slugs will crawl in and drown overnight drawn by the yeast.
- Diatomaceous earth barrier: Sprinkle food grade diatomaceous earth in a ring around your spinach plants to create a sharp, drying barrier that slugs avoid crossing due to their soft bodies.
- Habitat reduction: Remove mulch for a while if slug damage is bad, water in the morning instead of evening, and clear debris that gives them hiding spots during the day.
Downy Mildew and Fungal Disease
- Identification: Downy mildew shows up as yellow patches on leaf tops with a fuzzy gray or purple growth on the undersides, and it spreads fast in cool, humid, and overcast weather.
- Resistant varieties: Choose varieties with built in resistance like Melody or Tyee to reduce disease pressure from the start without needing to spray anything at all.
- Air circulation: Space plants at 4 to 6 inches (10 to 15 centimeters) apart and avoid overhead watering to keep leaves dry and cut down the humid zone that fungal diseases love.
- Remove infected leaves: Pull off and toss any leaves showing disease signs right away to stop spores from spreading to healthy plants, and never compost diseased plant material.
Harvesting and Storing Spinach
Knowing when to harvest spinach makes all the difference. In my experience, early morning picks give you the best flavor because the leaves are crisp and full of moisture. Wisconsin Horticulture Extension says to start harvesting spinach once plants have at least 6 true leaves on them.
The cut and come again spinach method is my favorite way to stretch a harvest over weeks. You pick the outer leaves and leave the center crown intact for spinach regrowth after cutting. For a quick baby spinach harvest, you can grab tender young leaves at just 25 to 30 days after planting. Storing fresh spinach the right way keeps your greens crisp for up to 2 weeks in the fridge.
Utah State Extension data shows the ideal storage is 32°F with 95% humidity for the longest fresh life. Freezing is the best way to save large harvests. Blanch the leaves for 30 seconds, dip them in ice water, and freeze flat on a sheet pan before bagging. I freeze 5 to 10 pounds every fall this way and use it in soups and smoothies all winter long.
5 Common Myths
Spinach needs full sun all day long to produce a good harvest of healthy green leaves.
Spinach actually tolerates partial shade with 4 to 6 hours of direct light per day and often performs better with afternoon shade in warm climates.
You must wait until all danger of frost has passed before planting spinach seeds outdoors.
Spinach is extremely frost-hardy with seedlings surviving temperatures as low as 15F (-9C), making it one of the earliest crops to plant.
Spinach bolts because the weather gets too hot, so shade cloth alone will prevent bolting.
Research shows bolting is primarily triggered by day length exceeding 13 to 15 hours, not just heat, so planting timing matters more than temperature control alone.
Fresh spinach loses most of its nutritional value within hours of being picked from the garden.
While fresh spinach does lose some vitamin C over days, most nutrients including iron, vitamin K, and vitamin A remain stable for 1 to 2 weeks when stored at 32F (0C).
You should always start spinach indoors and transplant seedlings into the garden for best results.
Direct sowing outdoors is actually preferred because spinach develops a sensitive taproot that resists transplanting, and cool soil temperatures are ideal for germination.
Conclusion
You now have a full spinach growing guide that covers every step from seed to table. This cool-season vegetable matures in just 28 to 55 days and gives you 4 to 6 pounds of fresh leaves from a single 10 foot row. Few crops reward you this fast or this well for the work you put in.
The 7 step plan you learned here shows you how to grow spinach with real data behind every move. Start with good soil, plant at the right time, keep water steady, and harvest the outer leaves first. In my experience, this approach keeps fresh spinach on your table for months. Just add succession planting every 10 to 14 days through the cool season to keep it going.
Spinach handles frost down to 15°F and does well in both garden rows and small pots. That makes it one of the best crops for new growers who want fast results without a lot of fuss. You can grow spinach from seed in spring, fall, or even winter in mild climates.
Start with one small row or a single container on your porch this season. Once you taste the first harvest, you'll want to expand your patch with every new planting window that comes around. Fresh homegrown spinach is hard to beat, and now you know exactly how to make it happen.
External Sources
Frequently Asked Questions
What is the best way to grow spinach successfully in small spaces?
Spinach grows well in containers as shallow as 6 inches (15 centimeters) deep, making it ideal for balconies, patios, and windowsills with at least 4 hours of sunlight.
What causes my spinach to keep dying?
Common causes include overwatering, underwatering, extreme heat above 75°F (24°C), poor drainage, and fungal diseases like damping off.
Is it okay to regrow spinach from cuttings?
Spinach cannot regrow from stem cuttings like herbs, but harvesting outer leaves while leaving the crown intact allows the plant to produce new leaves repeatedly.
Which companion plants help spinach?
Strawberries, radishes, peas, garlic, and onions grow well alongside spinach by providing shade, repelling pests, or fixing nitrogen in the soil.
What is the best way to prevent bitter-tasting spinach?
Bitter spinach results from heat stress and bolting. Keep plants cool, harvest in the morning, and pick leaves before flower stalks appear.
Can store-bought fertilizer be safe for spinach?
Most store-bought fertilizers are safe for spinach when applied at recommended rates. Choose balanced or nitrogen-rich formulas and avoid over-application.
Could spinach survive winter?
Spinach is one of the hardiest garden vegetables, with young seedlings tolerating temperatures as low as 15°F (-9°C) when protected by mulch or row covers.
What causes my spinach leaves to turn yellow?
Yellow spinach leaves typically indicate nitrogen deficiency, overwatering, poor drainage, or root rot. A soil test can pinpoint the exact nutrient issue.
What is the best way to save seeds from spinach plants?
Allow a few plants to bolt and flower naturally, then wait for seed pods to dry on the stalk before collecting and storing them in a cool, dry place.
Is it okay to grow spinach indoors successfully?
Spinach grows well indoors under grow lights set to 10 to 12 hours daily, with temperatures kept between 50 to 65°F (10 to 18°C).