
Introduction
How to Grow Shallots: Essential Tips for Success begins with the one fact that got me hooked on this crop years ago. You put a single set into the ground and it turns into a cluster of 5 to 15 bulbs before harvest rolls around. That kind of return makes growing shallots feel like investing one coin and getting a whole handful back from the soil.
Clemson University calls these bulbs the gourmet member of the onion family. After 7 seasons of growing them in my own garden beds, I think that title fits right. Their mild, sweet flavor beats a regular onion in sauces and dressings every time I cook. USDA data backs them up too, showing they pack 129% more potassium than common onions.
Home cooks and farmers market fans keep driving up demand for this crop, and I see why that trend keeps building each year. A single pound of sets fills a whole garden row with ease. Each cluster stores for months when you cure it the right way. That gives you fresh gourmet flavor from your own yard at very little cost compared to store prices.
This shallot growing guide walks you through what I wish I knew from my first season in the dirt. You get the best varieties for your zone, tested soil prep methods, and a care schedule that works in the real world. I also cover storage tricks for 6 months of freshness and companion planting tips most guides leave out. Whether you want to plant shallots in raised beds or full garden rows, the steps ahead set you up for a solid harvest this season.
Best Shallot Varieties to Grow
Picking the right shallot varieties matters more than most growers think at the start. Think of it like wine grapes: the same family produces very different flavors based on the type you grow. French shallots sit at the top of the flavor chart for chefs, while Dutch types of shallots win on storage life and ease of care. I grew 4 different types of shallots side by side last year, and the taste gap between varieties surprised me.
All gourmet shallots share a mild, sweet flavor that sets them apart from regular onions. Johnny's Selected Seeds notes these crops respond to day length just like long day onions do. Your zone and planting date shape how each variety forms its bulbs. The 6 picks below range from rare grey shallots to beginner favorites. I also note which red shallots bring the best color to your cooking.

French Grey Shallot
- Flavor Profile: French grey shallots deliver the most complex, nuanced flavor of any shallot variety with earthy undertones and a subtle sweetness that professional chefs consider the gold standard for fine cooking.
- Growing Notes: These shallots grow best in zones 5 through 8 and need well-drained sandy loam soil with good air circulation to prevent the fungal issues their thin grey skin makes them prone to developing.
- Harvest and Storage: French grey shallots mature in about 90 to 100 days but store for a shorter period of roughly 3 to 4 months compared to other varieties due to their thinner, less protective outer skin.
- Culinary Use: Chefs prize French grey shallots for vinaigrettes, beurre blanc sauces, and any dish where the shallot flavor should be the star rather than a background note in the overall recipe.
- Planting Method: Propagated only through bulb division rather than seed because true French grey shallots do not produce viable seed, making high-quality sets essential for growing this variety.
- Best For: Experienced gardeners who want to grow the most flavorful shallot available and are willing to provide extra attention to drainage and disease prevention throughout the growing season.
Golden Gourmet Shallot
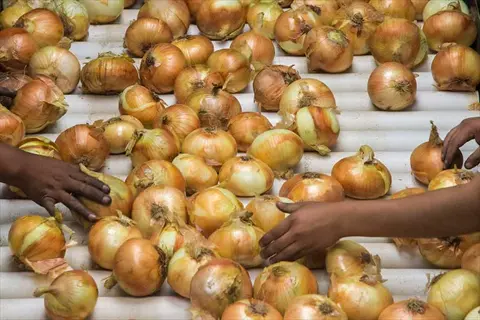
- Flavor Profile: Golden Gourmet produces a mild, sweet flavor with a gentle warmth that works in both raw applications like salads and cooked dishes where a mellow onion taste is desired.
- Growing Notes: This variety performs well across zones 4 through 9 and tolerates a wider range of soil conditions than French types, making it one of the most reliable choices for beginner growers.
- Harvest and Storage: Golden Gourmet matures in about 100 to 110 days and stores very well for 5 to 6 months when properly cured, thanks to its thick golden-brown protective skin layers.
- Culinary Use: The mild sweetness makes Golden Gourmet ideal for caramelizing, roasting whole alongside root vegetables, or slicing thin for topping flatbreads and savory tarts without overpowering other flavors.
- Yield Potential: Expect 6 to 10 bulbs per planted set when spaced at 6 inches (15 centimeters) apart, producing teardrop-shaped bulbs that are uniform in size and easy to peel for kitchen use.
- Best For: First-time shallot growers who want a dependable, high-yielding variety that forgives minor mistakes in watering and spacing while still delivering excellent culinary quality in the kitchen.
Red Sun Shallot
- Flavor Profile: Red Sun shallots offer a slightly sharper bite than golden varieties with a peppery edge that mellows during cooking, releasing a rich sweetness when roasted or sauteed.
- Growing Notes: Red Sun sets perform best when spring-planted in zones 4 through 8 and prefer full sun for at least 6 hours per day with consistent moisture during the critical bulbing phase of growth.
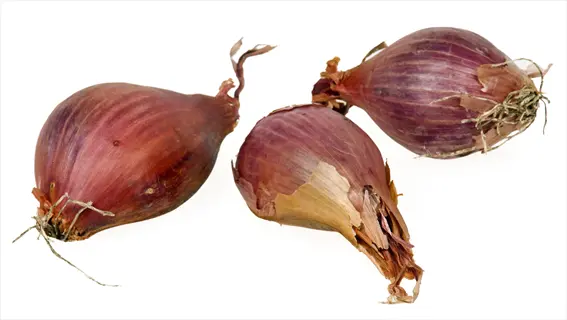
- Harvest and Storage: Bulbs reach maturity in approximately 100 to 115 days and store well for 4 to 5 months, with the striking reddish-copper skin making them an attractive addition to kitchen storage displays.
- Culinary Use: The vibrant red-pink flesh holds its color when pickled or added raw to salads and grain bowls, making Red Sun a favorite for adding both flavor and visual appeal to lighter dishes.
- Disease Resistance: Red Sun shows moderate resistance to downy mildew and bolting compared to some French varieties, reducing the need for constant monitoring during unpredictable spring weather conditions.
- Best For: Gardeners who want a visually striking shallot with strong culinary versatility and moderate disease resistance that performs reliably in a wide range of growing zones across the country.
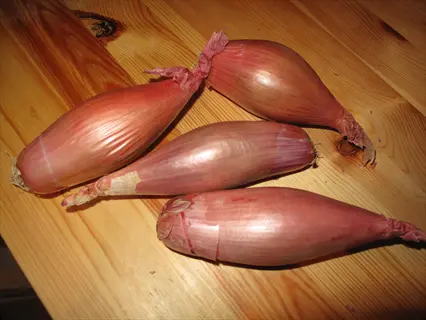
Zebrune Banana Shallot
- Flavor Profile: Zebrune shallots have a gentle, sweet taste with almost no sharpness, producing an elongated torpedo shape that some gardeners compare to a small banana in both form and mild character.
- Growing Notes: This French heirloom variety grows well in zones 5 through 9 and benefits from slightly wider spacing of 8 inches (20 centimeters) to accommodate its longer bulb shape during the growing season.
- Harvest and Storage: Zebrune matures in about 110 to 120 days and keeps for approximately 4 months in storage, with the elongated shape making them easier to slice into even pieces than round shallot varieties.
- Culinary Use: Professional kitchens favor Zebrune for its easy prep since the long shape yields consistent slices, and its mild flavor makes it perfect for raw salsas, ceviche, and delicate seafood sauces.
- Unique Advantage: The distinctive elongated shape means Zebrune produces more usable flesh per bulb compared to round varieties because there is less waste from the root and tip ends during peeling and slicing.
- Best For: Home cooks who do a lot of slicing and want a shallot that provides uniform cuts with minimal waste, and gardeners in warmer zones looking for a heat-tolerant French heirloom variety.
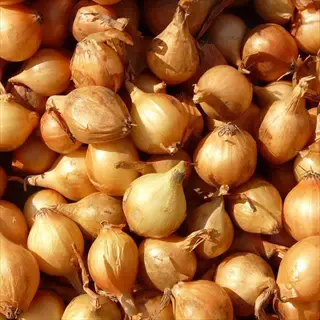
Dutch Yellow Shallot
- Flavor Profile: Dutch Yellow shallots provide a dependable mild to medium flavor that falls between a sweet onion and a traditional French shallot, making them a practical everyday cooking staple in the kitchen.
- Growing Notes: Among the most cold-hardy shallot varieties, Dutch Yellow thrives in zones 3 through 9 and tolerates less-than-perfect soil conditions including heavier clay soils that would stress French types.
- Harvest and Storage: This variety matures in 90 to 100 days and stores the longest of common home garden shallots at 6 months or more when cured and kept at 32 to 40 degrees Fahrenheit (0 to 4 degrees Celsius).
- Culinary Use: The firm, golden flesh holds its shape well during slow cooking, making Dutch Yellow excellent for stews, braises, and gratins where you want shallot pieces to remain intact rather than dissolving.
- Yield Potential: Dutch Yellow is among the highest-producing varieties, with each set reliably generating 8 to 12 bulbs when given 6-inch (15 centimeter) spacing in fertile, well-drained garden soil.
- Best For: Northern gardeners in colder zones who need a frost-tolerant variety, and anyone seeking the longest possible storage life combined with consistent yields and low-maintenance growing requirements.
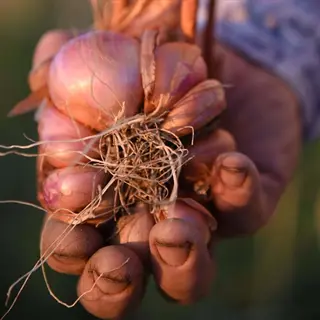
Conservor Shallot
- Flavor Profile: Conservor delivers a rich, full shallot flavor with a pleasant mild heat that develops deeper taste when roasted, making it a strong all-purpose variety for many cooking styles.
- Growing Notes: This gourmet single-bulb variety is typically grown from seed rather than sets, allowing gardeners to produce large, uniform individual bulbs similar to those found in specialty grocery stores.
- Harvest and Storage: Conservor reaches maturity in approximately 100 to 110 days and stores for 5 to 6 months thanks to its thick copper skin that provides excellent protection against moisture and decay.
- Culinary Use: The large single-bulb size makes Conservor ideal for recipes calling for whole roasted shallots, and its consistent size means even cooking times when preparing multiple bulbs for dinner parties.
- Seed-Starting Advantage: Unlike set-grown varieties, Conservor can be started from seed indoors 8 to 10 weeks before the last frost, giving gardeners access to fresh transplants at a fraction of the cost of buying sets.
- Best For: Gardeners who want large, uniform shallots resembling those sold at gourmet markets, and anyone interested in starting shallots from seed to save money while expanding their variety selection.
Your best bet as a new grower is to start with Golden Gourmet or Dutch Yellow and add a French type once you feel confident with the basics. I made the mistake of jumping straight to grey shallots in my first year. They need better drainage and more attention than I could give them at the time.
Planting Shallots by Season
Knowing when to plant shallots in your zone makes the biggest difference in your crop. Think of it like picking a flight. Fall planting shallots get a first class head start in mild zones. Spring planting shallots give you the reliable option in colder spots. I tested both timings over 5 seasons and saw the gap in results first hand.
For shallot sets, push them 1 to 2 inches deep with the pointed tip facing up. Space your rows 12 to 18 inches apart so air moves between plants. If you try shallot seed starting instead, sow seeds just 1/4 to 1/2 inch deep. Utah State University Extension notes that seeds come up in 10 to 14 days under good conditions. Getting the planting depth shallots need right matters because bulbs that sit too deep stay small and wet.
The table below breaks down the best timing for each USDA zone. Fall planting works well in zones 5 through 8 because the bulbs get 4 to 6 weeks of root growth before hard frost hits. Zones 3 and 4 should stick with spring sets placed in March or April. Zone 9 and warmer areas do best with a fall planting to dodge the summer heat that stalls bulb growth.
I plant my zone 6 beds in late October and get bulbs about 3 weeks sooner than my spring planted sets produce. That head start also gives me bigger clusters at harvest. If you live in a cold zone, don't feel left out. Spring planting still gives you a strong harvest as long as you get your shallot sets into the ground once the soil thaws.
Soil and Site Preparation
Getting your soil right is like preparing a bed for a guest who hates wet feet. Drainage comes first, and fertility is the bonus pillow on top. You need well-drained soil shallots can root into since their roots sit in just the top 6 to 8 inches of ground. I learned this lesson the hard way after losing a full row to rot in heavy clay one spring.
The ideal shallot soil pH falls between 6.0 and 7.0 per Utah State University Extension. They can handle a range of 5.5 to 7.5 in most cases. Sandy loam shallots love best of all soil types because it drains fast and warms up quick. If you garden in clay, you need to amend soil shallots can thrive in or switch to raised beds shallots grow well in. Adding 2 to 3 inches of coarse sand mixed with aged compost breaks up tight clay fast. Organic matter soil amendments also feed the crop for weeks after you work them in.
Test and Adjust Soil pH
- Target Range: Aim for a soil pH between 6.0 and 7.0 for optimal nutrient uptake, though shallots tolerate a broader range of 5.5 to 7.5 according to Utah State University Extension research.
- Testing Method: Use a home soil test kit or send samples to your local extension office before planting, since most shallot nutrient deficiency problems trace back to incorrect pH rather than lack of fertilizer.
- Adjustment Tips: Lower pH with sulfur amendments at 1 pound per 100 square feet (0.45 kilograms per 9.3 square meters) or raise pH with agricultural lime, applied 2 to 3 months before planting for best results.
Improve Drainage for Shallow Roots
- Why It Matters: Shallots are shallow-rooted plants that sit partially above ground, making them extremely vulnerable to bulb rot if water pools around the base for extended periods after rain or irrigation.
- Heavy Soil Fix: Mix 2 to 3 inches (5 to 7.5 centimeters) of coarse sand and aged compost into clay-heavy soils to break up compacted layers, or build raised beds at least 4 inches (10 centimeters) high as recommended by specialty growers.
- Ridge Method: Fine Gardening recommends planting shallots on low ridges of mounded soil, which mimics the French technique of raising bulbs above the water table for superior drainage in wet climates.
Build Organic Matter
- Compost Application: Work 2 to 4 inches (5 to 10 centimeters) of aged compost or well-rotted manure into the top 6 inches (15 centimeters) of soil several weeks before planting to give amendments time to integrate.
- Avoid Fresh Manure: Never apply fresh manure right before planting shallots because the high nitrogen content can burn shallow roots and encourage leafy top growth at the expense of bulb development.
- Ongoing Fertility: Shallots benefit from soil that has been amended over multiple seasons, so starting a compost routine the year before planting gives the best long-term results for allium crops.
Choose the Right Bed Location
- Sunlight Requirement: Select a site that receives at least 6 hours of direct sunlight daily because shallots are day-length sensitive crops that need adequate light to trigger proper bulb formation during summer months.
- Air Circulation: Good airflow around plants reduces fungal disease pressure from downy mildew and botrytis, so avoid planting shallots in low spots where damp air settles on cool mornings.
- Crop Rotation: Do not plant shallots where onions, garlic, or leeks grew in the previous 3 years to prevent soilborne diseases like white rot from building up and infecting the new crop.
If your soil stays soggy after rain, try the French ridge method. You mound soil into low rows and plant your sets right on top. I switched to this technique 3 years ago and haven't lost a single bulb to rot since that change.
Shallot Care and Maintenance
Good shallot plant care works more like caring for a cat than a dog. These plants want consistent, moderate attention and will protest if you overdo things. Watering shallots too much causes rot, while too little water shrinks your bulbs. I find the sweet spot is about 1 inch of water per week during the bulbing phase, just as Johnny's Selected Seeds recommends.
Fertilizing shallots on a set schedule makes a real difference in your harvest. Utah State Extension says to use 1/2 pound of shallot fertilizer with a 21-0-0 ratio per 100 square feet. Apply it at both 30 and 60 days after planting. Stop all feeding after mid July because late nitrogen makes soft bulbs that rot fast in storage. I keep a calendar alert for each feeding so I never miss the window.
Weeding shallots by hand is the only safe method since their roots grow in the top few inches of soil. A hoe will slice right through those feeding roots and set your plants back. Mulching shallots with 2 inches of straw after the plants reach 4 inches tall blocks weeds and holds moisture. Watch for shallot bolting if cold snaps hit after warm days. Snap off flower stalks at the base the moment you spot them to save your bulbs.
Watering for Bulb Development
- Weekly Target: Provide about 1 inch (2.5 centimeters) of water per week through rain or irrigation during the active growing and bulbing phases, checking soil moisture by pressing a finger 1 inch into the ground near plants.
- Irrigation Method: Use drip irrigation or soaker hoses rather than overhead sprinklers because wet foliage promotes downy mildew and other fungal diseases that thrive in damp, stagnant conditions around allium leaves.
- Pre-Harvest Reduction: Stop watering about 2 weeks before the expected harvest date when tops begin to yellow, allowing the outer skins to dry and tighten for better curing and storage quality.
Fertilizer Timing and Amounts
- First Application: Apply 1/2 pound of nitrogen fertilizer (21-0-0) per 100 square feet (9.3 square meters) of garden bed about 30 days after planting, according to the Utah State University Extension schedule.
- Second Application: Repeat the same 1/2 pound nitrogen application at 60 days after planting, which supports the transition from leaf growth into the critical bulb swelling phase of the growth cycle.
- Cutoff Rule: Stop all fertilizer applications after mid July regardless of planting date because late nitrogen encourages soft, watery growth that reduces storage life and increases risk of neck rot.
Weeding Without Root Damage
- Hand-Pull Method: Always weed shallot beds by hand rather than using a hoe or cultivator because their shallow root system sits in the top few inches of soil where garden tools can slice through feeding roots.
- Mulch Prevention: Apply a 2 inch (5 centimeter) layer of straw or chopped leaf mulch between rows after plants are 4 inches (10 centimeters) tall to suppress weed growth and retain soil moisture throughout the season.
- Weed Early: Remove weeds when small because shallots compete with established weeds for water and nutrients, and large weed roots can disturb the shallow root zone when you pull them out.
Managing Bolting and Flowers
- What Causes Bolting: Sudden temperature swings between cold nights and warm days trick shallots into thinking winter has returned, triggering a survival response where the plant sends up a flower stalk instead of forming bulbs.
- Immediate Action: Snap off flower stalks as soon as they appear by bending them at the base because once a shallot bolts, the bulb becomes woody and hollow at the center, reducing both flavor and storage quality.
- Prevention Strategy: Use heat treated sets when spring planting in unpredictable climates because the heat treatment process breaks the dormancy cycle that makes shallots vulnerable to false winter signals from cold snaps.
Companion Planting for Shallots
Companion planting shallots with the right neighbors cuts your pest problems and boosts growth for both crops. Good shallot companion plants work like a neighborhood watch system in your garden. Carrots keep an eye out for onion maggots while your shallots send carrot flies packing with their strong scent. I started intercropping shallots with carrots 4 seasons ago and haven't dealt with a single carrot fly since.
Most guides skip this topic, but knowing what to plant with shallots gives you a real edge. Extension research confirms the carrot and shallot pairing has science behind it, not just garden folklore. Strawberries, lettuce, and marigolds also make great partners for the reasons listed below. On the flip side, you need to know which plants to avoid near shallots so you don't end up stunting your whole bed.
Crop rotation shallots benefit from also ties into this plan. Move your alliums to a new bed every 3 years. This keeps soil diseases from building up and gives your companion plants fresh ground to work with too. The table below lays out the best and worst partners for your planting plan.
Fine Gardening also mentions intercropping with mache as a cool weather option. The small greens fill gaps between your sets and keep soil cool during warm spells. I tuck lettuce starts between my rows every spring and pull double harvests from the same bed space.
Harvesting, Curing, and Storage
Knowing when to harvest shallots saves you from pulling bulbs too soon or leaving them in wet soil too long. Watch for the tops to turn yellow and flop over on their own. That signal means the bulbs have stopped growing and are ready to come out. I check my beds every other day once I see the first few leaves start to change color. Harvesting shallots at just the right time gives you the best flavor and longest storage life from each cluster.
Curing shallots works like aging cheese. The controlled drying period turns a fresh, wet bulb into something with deeper flavor and a much longer life on the shelf. Spread your harvested bulbs in a single layer in a warm, dry spot with good airflow for 1 to 2 weeks per Iowa State Extension. The outer layers should dry into a tight papery skin shallots need for proper protection in storage. I use an old screen door propped on sawhorses in my garage for curing.
Storing shallots the right way keeps them fresh for 6 months or more after harvest. Most guides say "cool, dry place" and leave it at that. Iowa State Extension gives you real numbers. Set your shallot storage temperature between 32 and 40 degrees Fahrenheit. Keep humidity at 60 to 70%. Use mesh bags shallots store best in or slatted trays for air flow. Keep them far from apples and tomatoes since those fruits give off ethylene gas that triggers early sprouting.
5 Common Myths
Shallots and onions are the same vegetable and can be grown with identical methods and spacing requirements.
Shallots are a distinct Allium cepa variety that multiplies into clusters of bulbs, while regular onions produce a single bulb per plant requiring different spacing strategies.
You need a large garden plot to grow shallots because they require extensive root space and wide rows.
Shallots have shallow root systems and grow well in containers as small as 8 inches (20 centimeters) deep, in raised beds, or in compact garden rows spaced just 12 inches (30 centimeters) apart.
Shallots should be watered heavily and frequently just like other garden vegetables to produce the largest bulbs.
Overwatering causes bulb rot in shallots, which need only about 1 inch (2.5 centimeters) of water per week, and irrigation should stop entirely as tops begin drying before harvest.
Cooking destroys most of the nutritional value in shallots so they must be eaten raw to get any health benefits.
A 2022 systematic review of 116 studies found that shallot antioxidant capacity is not affected by thermal processing, meaning cooked shallots retain their beneficial compounds.
Shallots planted close together at 2-inch spacing will produce the highest overall yield of bulbs per garden bed.
Utah State University Extension research shows that tight 2-inch (5 centimeter) spacing produces only single small bulbs, while wider 6-inch (15 centimeter) spacing allows each set to multiply into clusters of 10 to 15 bulbs.
Conclusion
You now have a complete shallot growing guide built on real growing data and years of hands on testing. The core recipe stays simple: give your plants well-drained soil at pH 6.0 to 7.0, full sun, and proper spacing. Get those three things right and each set you plant shallots from will reward you with a cluster of 5 to 15 bulbs at harvest.
Those bulbs store for 6 months or longer when you cure and keep them at the right temperature per Iowa State Extension. One fall planting gives you gourmet flavor well into next spring. USDA data shows your harvest packs 129% more potassium than regular onions. They also rank highest in antioxidants out of 11 onion types tested. Great taste and strong nutrition from the same crop.
I want you to try one thing from this guide that most growers miss. Pair your bed with a row of carrots using the companion planting tips above. The two crops protect each other from pests without any sprays or extra work. It's the easiest win in the whole process of growing shallots.
Starting with just a dozen sets this season means a harvest that fills your kitchen. Save the smallest bulbs from each crop and you have free planting stock for years ahead. Once you grow shallots at home, buying them at the store feels like a waste of good money.
External Sources
Frequently Asked Questions
Is it okay to regrow shallots from grocery store bulbs?
Yes, grocery store shallots can be planted and will sprout, though garden-center sets often produce more reliable results because they are disease-free and suited to local climates.
Which growing conditions do shallots require?
Shallots need full sun for at least six hours, well-drained fertile soil with a pH of 6.0 to 7.0, and about 1 inch (2.5 centimeters) of water per week during bulbing.
What is the right way to space shallot plants?
Plant shallot sets 3 to 8 inches (7.5 to 20 centimeters) apart in rows 12 to 18 inches (30 to 45 centimeters) apart, adjusting spacing based on desired bulb size.
Which plants should I avoid near shallots?
Avoid planting beans, peas, and asparagus near shallots because these crops can stunt each other's growth through root competition and chemical interactions.
What is the best time to harvest shallots?
Harvest shallots when the tops turn yellow and fall over, typically 90 to 120 days after planting, then cure them in a warm dry spot for one to two weeks.
Could container gardening work for shallots?
Shallots grow well in containers at least 8 inches (20 centimeters) deep with good drainage, making them ideal for balconies and small spaces.
What is the best way to prevent common shallot diseases?
Prevent shallot diseases by rotating crops every three years, ensuring good air circulation, avoiding overhead watering, and removing infected plants immediately.
Which method works best for storing harvested shallots?
Cure shallots for one to two weeks, then store them in mesh bags at 32 to 40 degrees Fahrenheit (0 to 4 degrees Celsius) with 60 to 70 percent humidity.
Is it okay to grow shallots year-round in warm climates?
In warm climates with mild winters, shallots can be planted in fall and again in late winter for near year-round production, though extreme heat above 85 degrees Fahrenheit (29 degrees Celsius) can stall growth.
What causes chefs prefer shallots over onions?
Chefs prefer shallots for their milder, sweeter flavor with subtle garlic notes that melt into sauces without overpowering, and their smaller size offers more precise seasoning control.