
Introduction
Kale stands out as one of the most rewarding cool season vegetables you can grow at home in your backyard garden beds. This How to Grow Kale: Complete Planting and Harvesting Guide will show you how to get fresh greens for months on end. Most growers give up on this leafy green too soon because they miss the simple tricks. The right methods make plants thrive through cold weather when other crops stop producing entirely.
I started growing this leafy green over a decade ago and it became my top producer each year without fail in my garden. A single 100g serving gives you 325% of your daily Vitamin K for strong bones and proper blood clotting. That same serving packs 104% of your daily Vitamin C for immune support during cold and flu season. This vegetable ranks 15th among 47 tested for nutrient density per bite you take from your own garden beds.
Think of this crop as the marathon runner of your vegetable garden at home in the backyard for the whole season. While tomatoes quit at the first cold snap in autumn, these leaves keep going through frost and snow into winter. This kale planting guide works across USDA zones 2 through 11 with proper timing for your local climate zone. The method applies to gardens in both cold and warm regions of the country from coast to coast across North America.
You can expect 3 to 5 pounds per 10 feet of row over the growing season when you use proper timing and techniques. The sections ahead cover variety selection, soil prep, and pest control in full detail for your reference. You will learn when to plant seeds and how to feed your plants for best results. This complete growing guide teaches you all about harvesting kale.
8 Best Kale Varieties to Grow
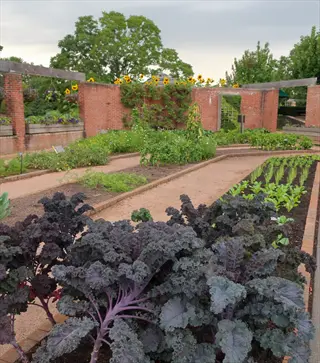
The kale varieties you choose affect everything from planting time to harvest window in your garden beds. I tested over a dozen types in my backyard plots over the years and found clear winners for home growers. The best kale to grow depends on your climate, your taste preferences, and your need for ornamental kale.
Each variety reaches harvest size in a different time frame. Lacinato kale matures in 50 to 65 days from transplant. Curly kale takes 55 to 70 days to mature while Red Russian kale sits at 50 to 60 days for first harvest. Dinosaur kale is another name for Lacinato with its bumpy leaf texture.
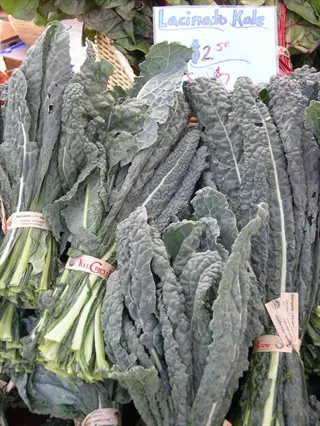
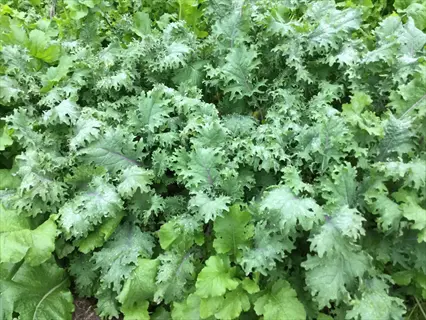
Texture matters just as much as timing when you pick your kale varieties for the garden. The silky textured types like Lacinato, Tuscan kale, and Red Russian work best for fresh salads. The sturdy textured types like curly kale and Winterbor hold up better in soups and stews. Some growers also add ornamental kale for beauty in their beds while still getting leaves safe to eat.
Lacinato Kale (Dinosaur Kale)
- Days to Maturity: Reaches harvest size in 50-65 days from transplant, making it one of the faster maturing kale varieties for impatient gardeners.
- Texture and Flavor: Features long, narrow blue-green leaves with a pebbled texture and mild, sweet flavor that becomes silkier after frost exposure.
- Best Uses: Excellent for salads when young, and the sturdy leaves hold up well in soups, stews, and traditional Italian dishes like ribollita.
- Cold Tolerance: Handles temperatures down to 10°F (-12°C) and produces sweeter leaves after multiple frost exposures in autumn.
- Growth Habit: Grows upright to 2-3 feet (60-90 centimeters) tall with leaves forming along a central stalk, making harvesting easy.
- Growing Notes: Also called Tuscan kale, Cavolo Nero, or Black Tuscan, this heirloom variety originated in Italy and performs well in containers.

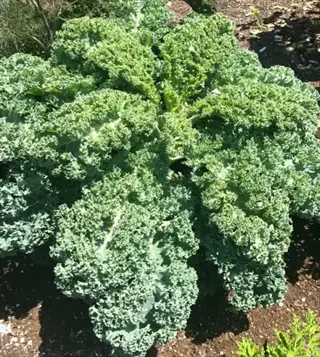
Curly Kale (Dwarf Green Curled)
- Days to Maturity: Ready for harvest in 55-70 days from transplant, with baby leaves available as early as 25 days for salad mixes.
- Texture and Flavor: Features ruffled bright green leaves with a peppery flavor that mellows after frost hits your garden.
- Best Uses: Classic choice for kale chips due to its texture, and the curly edges hold dressings and sauces well in salads and grain bowls.
- Cold Tolerance: Hardy variety that withstands temperatures down to 15°F (-9°C) without protection.
- Growth Habit: Compact plant reaching 12-18 inches (30-45 centimeters) tall, perfect for smaller gardens, containers, and raised bed edges.
- Growing Notes: The most sold variety at nurseries and grocery stores, making it familiar to beginners and available as transplants.
Red Russian Kale
- Days to Maturity: Fast producer ready in 50-60 days from transplant, often the earliest kale variety to reach harvestable size.
- Texture and Flavor: Features flat, oak-shaped gray-green leaves with purple stems and veins, offering a sweet, mild flavor even without frost.
- Best Uses: Tender enough to eat raw in salads at any stage, and the colorful leaves add visual interest to mixed green salads.
- Cold Tolerance: Survives temperatures down to 10°F (-12°C) and develops deeper purple coloring as temperatures drop.
- Growth Habit: Spreads outward rather than growing tall, reaching 18-24 inches (45-60 centimeters) in height with a wider spread.
- Growing Notes: From Russia, this variety tolerates both cold and heat better than most kale types, extending the harvest season.
Winterbor Kale
- Days to Maturity: Reaches maturity in 55-65 days from transplant, with consistent production through multiple harvests over the season.
- Texture and Flavor: Produces curled blue-green leaves with a mild flavor that sweetens after frost exposure in your garden.
- Best Uses: Bred for overwinter production, making it ideal for gardeners wanting fresh kale through cold months.
- Cold Tolerance: Among the most cold-hardy varieties, surviving temperatures down to 5°F (-15°C) with proper mulching.
- Growth Habit: Vigorous upright plant reaching 24-30 inches (60-75 centimeters) tall with uniform, attractive curled leaves.
- Growing Notes: A hybrid variety bred for commercial production that translates to reliable performance and disease resistance in home gardens.
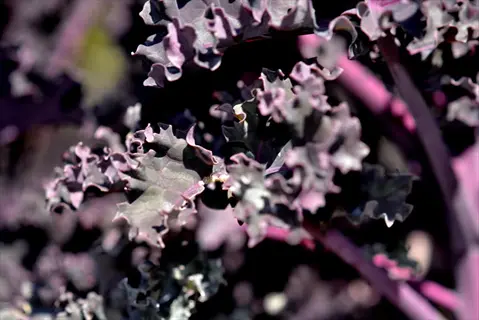
Redbor Kale
- Days to Maturity: Matures in 55-65 days from transplant, with leaves developing deeper color as the plant ages and temperatures cool.
- Texture and Flavor: Ruffled magenta to deep purple leaves with a mild, sweet flavor that works well both raw and cooked.
- Best Uses: Stunning ornamental appeal makes it perfect for edible landscaping, and the color holds when cooked unlike some purple vegetables.
- Cold Tolerance: Handles temperatures down to 10°F (-12°C) and the purple color intensifies with cold exposure.
- Growth Habit: Tall variety reaching 24-36 inches (60-90 centimeters) with dramatic curled leaves that create visual impact in garden beds.
- Growing Notes: Colors look most vibrant in cool weather, so plant for fall harvest when lower temperatures bring out the deepest purple tones.
Scarlet Kale
- Days to Maturity: Ready for harvest in 55-60 days from transplant, offering good production over an extended harvest period.
- Texture and Flavor: Features frilly leaves that emerge green and develop purple-red coloring, with a tender texture and mild sweet flavor.
- Best Uses: Young leaves are perfect for fresh salads, while mature leaves work well in cooking applications where color is desired.
- Cold Tolerance: Tolerates temperatures down to 15°F (-9°C) and the red coloring becomes more pronounced after frost.
- Growth Habit: Compact to medium height at 18-24 inches (45-60 centimeters), fitting well in containers and small garden spaces.
- Growing Notes: Listed as a recommended variety by Utah State University Extension for its combination of beauty, flavor, and reliable performance.
Vates Kale
- Days to Maturity: Produces harvestable leaves in 55-60 days from transplant with excellent yield over multiple cuttings.
- Texture and Flavor: Blue-green curly leaves with a traditional kale flavor that is mild enough for fresh eating and strong for cooking.
- Best Uses: Bred for home gardens with excellent bolt resistance, making it reliable for late spring planting.
- Cold Tolerance: Handles temperatures down to 20°F (-7°C) and maintains quality through light frosts without bolting.
- Growth Habit: Compact dwarf variety staying under 18 inches (45 centimeters) tall, requiring less staking and fitting tight spaces.
- Growing Notes: An improved selection of Dwarf Blue Curled bred by Virginia Agricultural Experiment Station for superior heat tolerance.
White Russian Kale
- Days to Maturity: Matures in 50-60 days from transplant, producing tender leaves suitable for salads earlier than most varieties.
- Texture and Flavor: Flat serrated leaves with prominent white veins and stems, offering the mildest flavor of the Russian kale types.
- Best Uses: Tender leaves are ideal for raw preparations in salads, smoothies, and wraps where gentler flavor is preferred.
- Cold Tolerance: Survives temperatures down to 10°F (-12°C) and the white veins provide attractive contrast after frost.
- Growth Habit: Low spreading habit reaching 12-18 inches (30-45 centimeters) tall, making it suitable for ground covers and bed edges.
- Growing Notes: Less common than Red Russian but cold hardy, offering variety in color while maintaining the tender texture of Russian types.
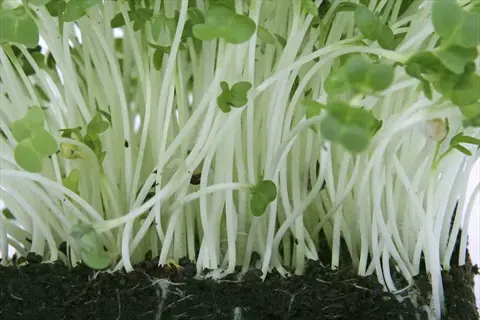
When and How to Plant Kale
Knowing when to plant kale makes all the difference for your harvest success in the garden. Kale planting time depends on your local frost dates and the season you want to harvest. I prefer fall planting kale because the cool weather brings out the best flavor in every leaf.
Kale seeds germinate best in soil between 45 and 85°F (7 to 29°C) in your garden beds. The plants grow fastest when air temps stay below 75°F (24°C) during the day. For spring planting kale, set out transplants about 4 weeks before your last expected frost date.
You can start kale indoors in seed modules about 6 weeks before you want to transplant them outside. This gives you a head start on the season and stronger seedlings to work with in your beds. When transplanting kale to the garden, space plants 12 to 18 inches apart in rows that are 18 to 24 inches apart.
Direct sow kale seeds in late summer for fall planting kale that tastes incredible after frost hits. Plant seeds about 6 weeks before your first expected fall frost for best results in the garden. Planting kale seeds this way means less effort than when you start kale indoors.
Transplants mature about 10 to 14 days faster than direct seeded plants in my experience growing this crop. This matters when you're racing against the heat in spring or the deep cold in late fall. Choose transplanting kale for faster harvests and direct sowing for larger plantings with less effort.
Succession planting works great for keeping fresh kale coming all season long in your garden. Sow new seeds or set out new transplants every 3 to 4 weeks during the cool months. This simple trick gives you a steady supply of tender young leaves instead of one big harvest all at once.
Soil, Watering and Feeding
Getting the kale soil requirements right sets up your plants for months of strong growth and tender leaves. Compost and aged manure provide the best source of organic matter kale. I add compost to my beds each year before planting to keep the soil loose and full of nutrients for strong leaves.
The ideal kale soil pH falls between 6.0 and 6.5 for best nutrient uptake in your garden beds. Plants can still grow in soil with a pH from 6.0 to 7.5 but may show some signs of stress. Test your soil before planting and add lime to raise pH or sulfur to lower it based on the results.
Watering kale on a steady schedule prevents bitter leaves and early bolting. Aim for 1 to 2 inches of water per week from rain or your hose to meet kale water requirements. Uneven watering stresses the plants and makes leaves taste harsh instead of sweet.
Fertilizing kale at the right time pushes strong leaf growth all season long in your beds. Apply half cup of 46-0-0 or one cup of 27-3-3 per 100 feet of row when plants reach 4 inches tall. The high nitrogen in these fertilizers feeds leaf production rather than flowering.
Mulching kale with 2 to 3 inches of organic material keeps soil moist and cool during warm days. Straw, shredded leaves, or wood chips all work well around your plants in the garden. This layer cuts down how often you need to water and keeps roots at the right temperature.
Container grown kale needs more frequent watering than plants in garden beds due to faster moisture loss. Check pots daily during warm weather and water when the top inch of soil feels dry to the touch. Feed container plants with a liquid fertilizer every two weeks to keep leaves coming strong.
Harvesting for Continuous Growth
Harvesting kale the right way keeps your plants producing fresh leaves for months in the garden. The cut and come again kale method works because picking kale leaves signals the plant to grow more from its central bud. I get 2 to 4 harvests from each plant over a 4 month period using this simple approach.
Knowing when to harvest kale depends on the size of leaves you want for your kitchen. Baby kale harvest starts as early as 20 to 30 days after transplant when leaves reach 3 to 4 inches long. Full size leaves at 50 to 75 days mark the typical kale days to maturity.
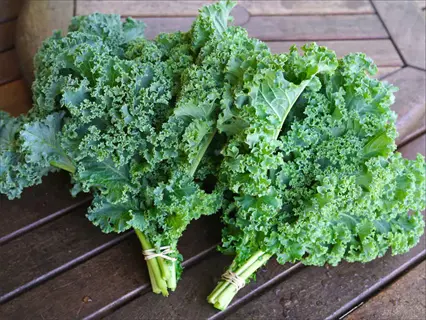
Always pick the outer leaves first and work your way toward the center of each plant. Leave at least 5 to 6 inner leaves and the growing tip intact so the plant keeps producing new growth. Harvest in the morning when leaves hold the most water and feel crisp in your hands.
Continuous kale harvest works best when you take only what you need each time from your plants. This steady picking keeps the plant in growth mode rather than shifting to seed production. I visit my kale patch twice a week during peak season and never run out of fresh leaves.
The best tasting kale comes after frost hits your garden in autumn and early winter. Cold temps trigger sugar buildup in the leaves as a natural protection against freezing damage. This process converts starches to sugars and gives you the sweet flavor that raw summer kale just cannot match.
Kale handles temps down to 10 to 20°F (-12 to -7°C) with no damage to the leaves at all. Many gardeners miss this premium eating window because they assume the cold has killed their plants. Check your beds after frost and you will find the sweetest leaves of the entire growing season.
Pest Prevention and Solutions
Protecting kale from pests starts with good prevention before problems show up in your garden beds. I learned that stopping kale pests before they arrive works far better than treating damage after the fact. Row covers for kale create a physical barrier that moths and beetles cannot get through at all.
The main kale pests you will face include cabbage worms, aphids, and flea beetles in most gardens. Cabbage worms on kale look like small green caterpillars that chew ragged holes in your leaves. Aphids on kale cluster on the undersides of leaves and suck out plant juices over time.
Flea beetles make tiny round holes that look like someone shot your leaves with a miniature shotgun. These pests attack young plants most and can stunt growth if numbers get too high. Check your plants twice a week and catch problems early before they spread through your patch.
Row covers for kale work best when you install them right after transplanting your seedlings. Use lightweight floating fabric held up by hoops made from PEX pipe and conduit clamps. This simple setup keeps moths from laying eggs on your leaves all season long.
Hand picking and companion planting form the base of organic pest control kale. Plant strong scented herbs like dill, basil, and thyme near your kale to confuse pest moths. Pick off caterpillars by hand each morning before they can do much damage to your crop.
Strong plants resist kale pest control problems better than stressed ones in your garden beds. Keep your kale well watered and fed so it can outgrow minor pest damage on its own. Prevention beats treatment every time for keeping your harvest clean and safe to eat.
5 Common Myths
Kale needs full hot sun and summer heat to grow big healthy leaves for harvesting throughout the season.
Kale actually performs best in cool temperatures between 35-75F (2-24C) and may bolt or turn bitter in summer heat above 75F.
You must wait until kale plants are fully mature before taking any leaves, or you will damage the plant permanently.
Baby kale leaves can be harvested as early as 20-30 days after planting, and regular harvesting of outer leaves actually stimulates more productive growth.
Frost kills kale plants and you need to harvest everything before the first freeze arrives in autumn.
Kale is extremely cold hardy, surviving temperatures as low as 10-20F (-12 to -7C), and frost exposure triggers sugar production that improves flavor.
All kale varieties taste the same and provide identical nutrition, so variety selection does not matter much.
Kale varieties differ significantly in flavor, texture, cold tolerance, and nutritional content, with glucosinolate levels varying from 2.25 to 93.90 micromol per gram between varieties.
Kale requires constant fertilizing and heavy feeding to produce good yields in the home garden setting.
Kale is a moderate feeder that needs one application of balanced fertilizer at 4 inches height and benefits most from soil amended with organic matter before planting.
Conclusion
Growing kale rewards your effort with months of fresh leaves from just a few plants. I learned that the key success factors include proper timing in cool weather and steady moisture. The cut and come again method keeps leaves coming. This kale planting guide covered everything you need to start with confidence.
Kale gardening stands apart from other crops because the plants keep producing when most have finished. The leaves taste sweeter after frost hits your garden. Plants handle cold down to 10°F without damage. Plan to start 4 to 5 plants per person in your household. One of my best vegetable gardening tips.
Each 100g serving of kale gives you 325% of your daily Vitamin K along with loads of other nutrients. Few crops deliver this much nutrition with so little work once plants get going in the garden. Harvesting kale the right way extends your yield for months beyond a single picking.
Kale rewards patience and proper technique with one of the longest harvest windows in the vegetable garden. Give your plants cool weather, consistent water, and regular picking from the outer leaves in. You will enjoy fresh greens from spring through winter with this one reliable crop in your beds.
External Sources
Frequently Asked Questions
What is the best way to grow kale successfully in different climates?
Kale thrives in temperatures between 35-75°F (2-24°C) and adapts well to most climates with proper timing adjustments.
Will kale regrow after its leaves are harvested?
Yes, kale regrows continuously when you harvest outer leaves first and leave the central growing point intact.
Which signs indicate overwatered kale?
Overwatered kale shows yellowing lower leaves, wilting despite wet soil, and potentially root rot with mushy stems.
Could kale survive in partial shade?
Kale can grow in partial shade with 4-6 hours of sunlight, though it produces smaller leaves than in full sun.
What is the best way to protect kale from pests naturally?
Use floating row covers, companion planting with aromatic herbs, hand-picking caterpillars, and strong water sprays for aphids.
Which soil pH is best for kale?
Kale grows best in soil pH between 6.0-7.5, with optimal growth occurring in the 6.0-6.5 range.
Does kale grow as a perennial or annual?
Kale is technically a biennial that produces leaves the first year, then flowers and sets seed the second year before dying.
Could kale grow indoors year-round?
Yes, kale can grow indoors with 6-8 hours of bright light daily, cool temperatures, and containers at least 12 inches deep.
What causes my kale to taste bitter?
Kale tastes bitter from heat stress above 75°F (24°C), insufficient water, or harvesting before frost sweetens the leaves.
What is the best way to store fresh kale after harvesting?
Store unwashed kale in a sealed bag in the refrigerator at 32°F (0°C) for 2-3 weeks maximum freshness.