
Introduction
Nothing beats that first bite of sweet corn picked fresh from your own garden on a warm summer evening. The sugars start turning to starch the moment you pull an ear from the stalk in your garden plot. Grocery store produce can never match the taste and texture of what you raise yourself at home in your backyard. This guide titled How to Grow Corn: 9 Essential Steps for Sweet Success shows you what works.
I learned that growing corn at home takes more than tossing seeds in the dirt and hoping for good results at harvest time. My first attempts gave me spotty ears with half the kernels missing and a lot of wasted effort during that season in the garden. Purdue research shows that uneven soil moisture causes 8% to 10% yield losses in these plants. Small mistakes add up fast when you skip the basics that matter most for this hungry crop that needs care.
Farmers in North America have raised this grain for over 4,000 years. They grew crops across many climates and growing zones over that time. They passed down careful methods through many family lines over the ages. Those ancient techniques now work in backyard plots of all sizes for anyone who wants to try them. Modern sweet corn types give gardeners options that fit every taste and storage need. Interest in backyard food has surged since 2020. This remains a favorite summer crop for many families around the country today.
You will learn 9 key steps that lead to better harvests in your garden year after year with less wasted time and fewer failed attempts. These corn planting steps show you soil temp timing, block planting methods, and feeding schedules for strong plants that bear full ears. Each step builds on the one before it to create a system that works for any gardener at any level. You will harvest full, sweet ears instead of the spotty cobs that leave growers feeling let down each season in gardens everywhere.
9 Essential Steps to Grow Corn
These 9 steps take you from planting corn seeds in spring all the way through harvesting corn in late summer. Each step builds on the one before to create a clear path to full ears. Follow them in order and you will avoid the common mistakes that leave most first time growers with spotty results.
Pay close attention to soil temperature before you plant and corn spacing once your seeds go in the ground. Block planting makes all the difference for proper pollination. Your plants will also need nitrogen fertilizer through side-dressing during the growing season to produce strong stalks and full ears.
For a longer harvest window, plant new blocks every 10 to 14 days after your first planting. Keep going until about 12 weeks before your area's first fall frost. I use this method and it gives me fresh ears over 6 to 8 weeks instead of all at once.

Test and Prepare Your Soil
- Why It Matters: Corn thrives in well-drained soil with pH between 6.0 and 6.8. Testing before planting reveals nutrient deficiencies that cause stunted growth and poor yields.
- How To Do It: Use a home soil test kit or send samples to your local extension office. Add lime to raise pH or sulfur to lower it based on results.
- Compost Addition: Work 1 inch (2.5 cm) of compost into the top 6 inches (15 cm) of soil. This improves drainage in clay soils and water retention in sandy soils.
- Fertilizer Base: Apply 25 lbs (11.3 kg) of 10-10-10 fertilizer per 1,000 square feet (93 square meters) before planting, or use organic alternatives like aged manure.
- Timing Tip: Prepare beds 2-3 weeks before planting to allow amendments to integrate and soil temperatures to stabilize.
- Pro Insight: Dark soils warm faster than light-colored soils, giving earlier planting opportunities in marginal spring conditions.

Wait for Proper Soil Temperature
- Critical Threshold: Corn seeds require soil temperatures of at least 50°F (10°C) to germinate, but 60-65°F (15.5-18°C) produces optimal uniform emergence.
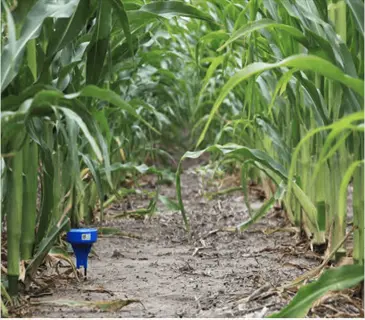
- Temperature Testing: Use a soil thermometer inserted 2 inches (5 cm) deep in the morning for 3 consecutive days. Plant when readings consistently meet the threshold.
- Cold Soil Risks: Seeds planted in cold soil absorb water but fail to sprout, remaining vulnerable to rot, insects, and fungal diseases for weeks.
- Super-Sweet Varieties: Shrunken-2 (sh2) varieties need warmer soil at 65°F (18°C) minimum because their thinner seed coats provide less protection.
- Regional Timing: In most US zones, this means waiting until 2-3 weeks after the last frost date when soil has had time to warm.
- Speed Secret: Black plastic mulch can raise soil temperature by 5-10°F (3-6°C), allowing earlier planting in cooler climates.
Choose the Right Corn Variety
- Genetic Types: Traditional (su) offers classic corn flavor but converts sugar to starch quickly. Sugary-enhanced (se) balances sweetness with tender texture. Super-sweet (sh2) stays sweet longest.
- Maturity Range: Early varieties mature in 60-70 days, mid-season in 70-85 days, and late varieties in 85-100 days. Mix types for extended harvest.
- Fresh Eating vs Storage: Choose sh2 varieties if you cannot eat corn immediately after harvest. They retain sweetness 10 times longer than su types when refrigerated.
- Climate Match: Short-season gardeners benefit from early varieties like Early Sunglow (63 days). Warm climate gardeners can grow longer-season types with deeper flavor.
- Isolation Needs: Super-sweet varieties cross-pollinating with standard corn produces starchy, tough kernels. Separate by 400 yards (366 meters) or 2 weeks planting time.
- Beginner Picks: Golden Bantam (su, heirloom), Honey Select (synergistic), and Silver Queen (se) offer reliable performance for first-time growers.

Plant in Blocks, Not Rows
- Pollination Science: Corn relies on wind to carry pollen from tassels to silks. Block planting creates a dense pollen cloud that ensures every silk receives pollen for kernel development.
- Minimum Block Size: Plant at least 3-4 rows of corn in a block formation. A 4x4 grid of 16 plants works better than a single row of 16 plants.
- Spacing Guidelines: Place seeds 8-12 inches (20-30 cm) apart within rows and keep rows 24-36 inches (61-91 cm) apart for adequate air circulation and root space.
- Planting Depth: Sow seeds 1-1.5 inches (2.5-4 cm) deep in normal conditions. Increase to 2 inches (5 cm) in sandy soil or during dry conditions to reach consistent moisture.
- High-Density Option: For intensive gardens, plant in a grid pattern with 15 inches (38 cm) between plants in all directions instead of traditional rows.
- Seed Rate: Plan for 3-4 ounces (85-113 grams) of seed per 100 feet (30 meters) of row, accounting for typical germination rates of 85-95%.
Water Consistently and Deeply
- Weekly Amount: Provide 1 inch (2.5 cm) of water per week through rainfall or irrigation. Sandy soils may need more frequent watering due to faster drainage.
- Critical Period: The 2 weeks before and after silk emergence represent the most water-sensitive stage. Drought stress during silking causes incomplete pollination and missing kernels.
- Penetration Depth: One inch of water penetrates 10 inches (25 cm) in sandy soil but only 6 inches (15 cm) in clay soil. Adjust frequency based on your soil type.
- Morning Watering: Water early in the day to allow foliage to dry before evening, reducing disease pressure from fungal pathogens that thrive in moisture.
- Drip Irrigation: Drip lines along rows deliver water directly to root zones, reducing waste and keeping foliage dry compared to overhead sprinklers.
- Mulch Benefits: Apply 2-3 inches (5-8 cm) of straw or shredded leaves around plants after they reach 6 inches (15 cm) tall to conserve soil moisture and suppress weeds.
Side-Dress with Nitrogen Fertilizer
- Heavy Feeder Status: Corn requires more nitrogen than most garden vegetables. The rapid growth from knee-high to tassel stage demands supplemental feeding beyond initial fertilization.
- First Application: When plants reach 8-10 leaves (approximately 12-18 inches or 30-46 cm tall), apply nitrogen fertilizer in a band 6 inches (15 cm) from plant stems.
- Second Application: Apply again when tassels begin to emerge. This supports ear development and kernel filling during the final growth phase.
- Application Rate: Use about 2.5 lbs (1.1 kg) of 10% nitrogen fertilizer per 100 feet (30 meters) of row, or equivalent organic alternatives.
- Split Application Benefit: University of Florida research shows split applications increase yields by 14% compared to single applications while reducing nutrient loss.
- Organic Options: Fish emulsion, blood meal, and composted manure provide nitrogen without synthetic fertilizers. Apply more frequently at lower concentrations.
Monitor for Pests and Diseases
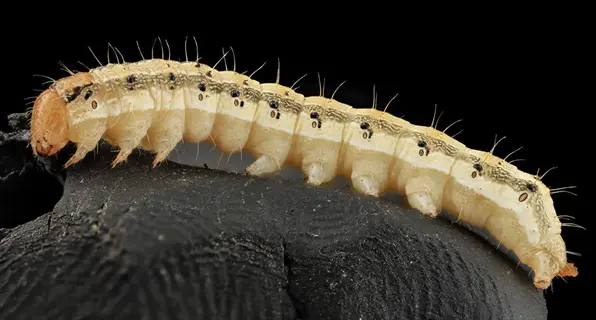
- Common Pests: Corn earworm, European corn borer, cutworms, and corn rootworm cause the most damage in home gardens. Raccoons and birds target mature ears close to harvest.
- Early Detection: Inspect plants weekly for holes in leaves, frass (insect droppings) in leaf whorls, and damaged silks that indicate pest presence before major damage occurs.
- Organic Controls: Apply Bacillus thuringiensis (Bt) spray when caterpillars are small. Drop mineral oil on silks 3-5 days after silk emergence to suffocate earworm eggs.
- Physical Barriers: Floating row covers protect young plants from flea beetles and early-season pests. Remove covers when tassels emerge to allow pollination.
- Disease Prevention: Rotate corn to different garden areas yearly to break disease cycles. Remove and destroy infected plant debris rather than composting it.
- Wildlife Deterrents: Install motion-activated sprinklers or cover ears with paper bags after pollination to discourage raccoons and birds from raiding your crop.
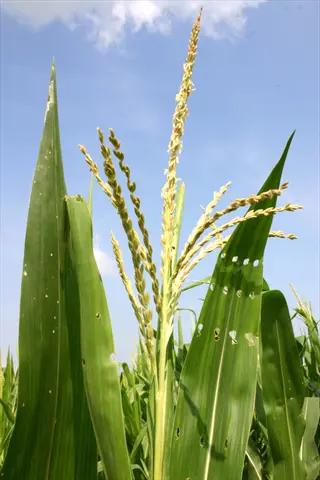
Ensure Complete Pollination
- How Pollination Works: Each silk connects to one potential kernel. Pollen grains must land on each silk within 2-3 days of silk emergence for that kernel to develop.
- Block Advantage: Dense block plantings allow pollen from all directions to reach silks. Single rows rely on wind from only two directions, missing many silks.
- Heat Stress Effects: Temperatures above 86°F (30°C) during pollen shed can kill pollen before it reaches silks, causing gaps in kernel development.
- Hand Pollination Option: Shake tassels into a bag in morning, then sprinkle collected pollen directly onto silks. This ensures pollination in small gardens or during poor weather.
- Timing Window: Tassels release pollen for about 1-2 weeks. Silks remain receptive for up to 10 days. Overlapping these windows ensures successful pollination.
- Troubleshooting Poor Fill: Ears with missing kernels at the tip indicate late-emerging silks missed the pollen window. Consistent watering helps silks emerge uniformly.
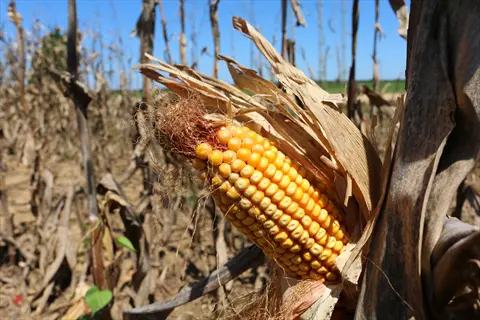
Harvest at Peak Sweetness
- Timing Indicator: Harvest 17-24 days after silks first appear. The exact timing depends on variety and growing conditions, so test rather than counting days alone.
- Visual Cues: Silks turn brown and dry at the tips while the husk remains green. Ears feel plump and rounded when squeezed gently through the husk.
- Milk Test: Puncture a kernel with your fingernail. Milky white juice indicates peak ripeness. Clear juice means too early; pasty or doughy means too late.
- Harvest Technique: Grasp the ear firmly, pull downward and twist in one motion. This detaches the ear cleanly without damaging the stalk or neighboring ears.
- Best Time of Day: Harvest in early morning when sugars are highest and temperatures are cool. Sugar-to-starch conversion accelerates rapidly in warm conditions.
- Immediate Cooling: Place harvested ears in the refrigerator within 30 minutes. At 70°F (21°C), corn loses sweetness 10 times faster than at 32°F (0°C).
Sweet Corn Variety Guide
Seed catalogs list over 100 sweet corn types, and the choices can feel endless when you start looking. I spent my first year picking based on pretty pictures and fancy names. It took me three seasons to learn that corn varieties fall into just a few genetic groups that matter much more than the name on the packet.
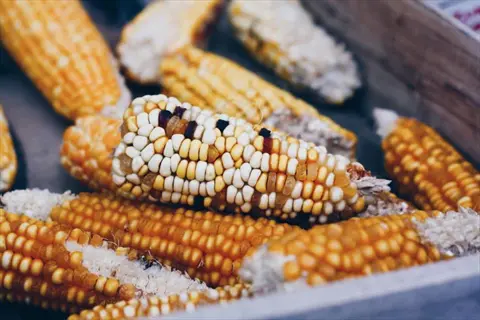
The main sweet corn types are su se sh2 corn categories. Traditional su corn gives you that classic corn flavor but turns starchy fast after picking. Sugar enhanced corn marked as se stays sweet longer and has a tender bite. Super sweet corn labeled sh2 holds its sugar for 2 to 3 weeks in the fridge while su types lose half their sweetness in just 24 hours at room temp.
Match your variety choice to how you plan to use your harvest. If you want heirloom corn varieties for that old time taste, go with su types like Golden Bantam. For freezing, sh2 super sweet holds up best. Most backyard growers do well with se types that balance flavor, texture, and storage.
Soil Temperature and Site Setup
Soil temperature corn success depends on waiting for the ground to warm up before you plant. I used to rush my seeds into cold dirt each spring and lost half my stand to rot every time. Now I use a soil thermometer and wait for the right growing conditions for corn. This gives me nearly perfect germination each season.
Think of soil temp like water temp for swimming. You can jump in a cold pool, but you won't enjoy it and might cramp up. Corn seeds work the same way. Iowa State research shows seeds absorb 30% of their weight in water no matter the temp. But below 50°F (10°C) they sit there and rot instead of sprouting.
Knowing when to plant corn matters more than following calendar dates. Climate shifts mean last frost dates change from year to year in most areas. A $10 soil thermometer tells you the real corn planting time based on actual ground conditions. Check it at 2 inches deep in the morning for 3 days in a row to get a true reading.
Good corn soil requirements go beyond just temperature. Purdue research shows uneven soil moisture causes 8% to 10% yield losses in crops. Prep your beds 2 to 3 weeks early so amendments settle and moisture levels even out before seeds go in the ground.
Watering and Fertilizer Schedule
Watering corn and fertilizing corn on the right schedule sets full ears apart from spotty ones. I track both on my garden calendar because timing matters as much as amounts. Miss the key windows and even perfect technique won't save your harvest.
Most guides say give corn 1 inch of water per week, but they skip the most important detail. The corn water requirements jump during the 2 weeks before and after silking. Drought stress during this window causes poor pollination and missing kernels that you can't fix later in the season.
Corn needs more nitrogen than most garden crops. The nitrogen requirements are high. Side-dressing corn twice during the season beats putting all fertilizer down at planting time. UF research shows split applications boost yields by 14% and reduce runoff waste.
How much water does corn need in different soils? One inch of water soaks 10 inches deep in sandy soil but only 6 inches in clay. Sandy ground needs more frequent watering while clay holds moisture longer between sessions. Know your soil type and adjust your schedule to match it.
Pollination Science Explained
Corn pollination trips up more home growers than any other step in the process. I grew three seasons of spotty ears before I learned how wind pollinated crops like corn work. Once you grasp the science behind tassels and silks, you can fix most problems before they ruin your harvest.
Block planting creates a dense cloud of pollen that reaches silks from all directions. Single rows leave half your silks without pollen because wind only blows from two sides. Plant at least 3 to 4 rows in a block shape for proper kernel development on every ear.
Poor pollination shows up as missing kernels in patterns that tell you what went wrong. Tips missing? Your silks came out late and missed the pollen window. Scattered gaps across the whole ear? Not enough pollen reached the silks at all. Both problems have fixes you can use next season.
Cross pollination between corn types can ruin super sweet varieties by making kernels starchy and tough. Keep types 400 yards apart or stagger planting by 2 weeks. This keeps pollen release windows from overlapping. Most backyard gardeners pick one type per season to avoid this issue.
Missing Kernels at Ear Tips
- Cause: Silks at the tip emerge last and may miss the pollen window if tassels finish shedding before all silks are exposed.
- Prevention: Consistent watering during silk emergence ensures all silks emerge within the same 2-3 day window rather than staggering over a week.
- Solution: Hand-pollinate by collecting fresh pollen from tassels in a paper bag during morning hours and dusting it directly onto newly emerged silks.
Scattered Kernels Across Entire Ear
- Cause: Inadequate pollen reaching silks, typically from planting in single rows instead of blocks or from low plant population.
- Prevention: Plant in blocks of at least 4 rows with plants spaced 8-12 inches (20-30 cm) apart to create a dense pollen cloud around all plants.
- Solution: For small gardens, group containers together or plant in a square grid pattern rather than traditional rows to maximize pollen distribution.
No Ears Developing Despite Healthy Tassels
- Cause: Extreme heat above 86°F (30°C) kills pollen before it can reach silks, or severe drought stress prevents silk emergence entirely.
- Prevention: Provide afternoon shade during heat waves if possible and increase watering to 1.5 inches (4 cm) weekly during the 2 weeks around silking.
- Solution: Water silks directly in early morning to keep them receptive and reduce temperature stress during the critical pollination window.
Cross-Pollination Quality Issues
- Cause: Super-sweet (sh2) varieties pollinated by standard sweet corn produce starchy, tough kernels that ruin both crops.
- Prevention: Isolate different corn types by 400 yards (366 meters) or stagger planting dates by at least 2 weeks so pollen release periods do not overlap.
- Solution: In small gardens, grow only one corn type or choose synergistic (sy) varieties that tolerate some cross-pollination without major quality loss.
Uneven Kernel Development Patterns
- Cause: Pollen reaching silks unevenly due to prevailing wind direction in row plantings, or from pest damage to silks before pollination completes.
- Prevention: Block planting allows pollen to reach silks from all directions. Protect emerging silks from earworm damage with timely Bt applications.
- Solution: Hand-pollinate during calm morning conditions when pollen is freshest and most viable, ensuring coverage across all silk surfaces.
Companion Planting Strategies
Companion plants for corn boost your harvest while cutting down on work and inputs. I started using the Three Sisters planting method five years ago and cut my fertilizer use in half. This 3,000 year old system pairs beans and corn with squash to create a garden that feeds itself.
What to plant with corn depends on your goals and garden size. Beans fix nitrogen in the soil that hungry corn stalks need to grow tall and strong. Squash and corn make good partners because the big leaves shade out weeds and hold moisture in the ground.
Corn in small garden spaces or containers needs extra planning for good pollination. Group at least 4 to 6 containers together to create enough pollen cloud for full ears. Pick dwarf types that top out at 4 to 5 feet instead of the 7 to 8 foot standard ones.
I rotate my corn to a different spot each year to break pest and disease cycles. In my experience, rootworm and other pests build up in soil where you grow corn year after year. Moving your block around the garden keeps these problems in check without sprays or other controls.
The Three Sisters Method
- Components: Corn provides vertical structure for beans to climb. Beans fix nitrogen that feeds hungry corn. Squash shades soil, suppressing weeds and retaining moisture.
- Spacing: Plant corn first in blocks, then add pole beans 2-3 weeks later when corn reaches 6 inches (15 cm). Add squash around the perimeter 1 week after beans.
- Modern Adaptation: Use compact bush beans and smaller squash varieties if space is limited. The principle works in raised beds as small as 4 x 4 feet (1.2 x 1.2 meters).
Beneficial Companion Plants
- Legumes: Pole beans, runner beans, and peas add nitrogen to soil through root nodules. Plant climbing types to use corn stalks as natural trellises.
- Ground Covers: Winter squash, pumpkins, cucumbers, and melons shade soil, reduce evaporation, and suppress weeds without competing for the vertical space corn occupies.
- Flower Allies: Sunflowers attract pollinators and provide additional wind protection. Marigolds and nasturtiums repel some pest insects and add visual interest.
Plants to Avoid Near Corn
- Tomatoes: Both crops attract the same pests, particularly corn earworm (also called tomato fruitworm). Planting together concentrates pest pressure.
- Brassicas: Cabbage, broccoli, and cauliflower are also heavy nitrogen feeders that compete directly with corn for this crucial nutrient.
- Other Grasses: Avoid planting near ornamental grasses or lawn edges where corn rootworm and other corn-specific pests may overwinter.
Small Space and Container Options
- Container Requirements: Use containers at least 12 inches (30 cm) deep and 12 inches (30 cm) wide. Each container holds 1-2 stalks maximum with adequate soil volume.
- Pollination Solution: Group at least 4-6 containers together to create a pollination block. Hand-pollinate to ensure kernel development in isolated container plantings.
- Variety Selection: Choose dwarf varieties like On Deck, Chires Baby Sweet, or Tom Thumb that reach 4-5 feet (1.2-1.5 meters) rather than standard 7-8 foot (2.1-2.4 meter) types.
Succession Planting for Extended Harvest
- Timing Strategy: Plant new blocks every 10-14 days from when soil reaches minimum temperature until 12 weeks before first fall frost.
- Variety Staggering: Alternatively, plant early (60-day), mid (75-day), and late (90-day) varieties on the same date for harvest spread across 6-8 weeks.
- Yield Planning: Expect 1-2 ears per plant. For fresh eating, plan 10-15 feet (3-4.5 meters) of row per person. For freezing, increase to 30-40 feet (9-12 meters) per person.
5 Common Myths
Corn needs to be planted in long single rows to grow properly and produce a good harvest.
Corn must be planted in blocks of at least 3-4 rows for wind pollination. Single rows result in poor kernel development because pollen fails to reach silks.
You should plant corn seeds as soon as the ground thaws in early spring for the earliest harvest.
Corn seeds planted in cold soil below 50F (10C) absorb water but fail to germinate, becoming vulnerable to rot and disease. Wait until soil reaches 60F (15.5C).
All sweet corn varieties taste the same and differ only in color.
Sweet corn varieties have distinct genetic types (su, se, sh2) that dramatically affect sweetness, texture, and storage life. Super-sweet sh2 varieties retain sugar 10 times longer than traditional su types.
Corn plants only need water during the first few weeks after germination.
The most critical watering period is 2 weeks before and after silk emergence. Drought stress during silking causes poor kernel fill and reduced yields of up to 8-10 percent.
Removing suckers or side shoots from corn stalks improves ear production and plant health.
University research shows removing suckers provides no benefit and may reduce yields. Suckers contribute photosynthesis energy to the plant and rarely produce competing ears.
Conclusion
Growing corn well comes down to a few key steps that most gardeners skip or rush through. Wait for proper soil temperature before planting. Use block planting instead of single rows for better pollination. Feed your plants nitrogen at the right times through the season. These basics lead to full ears of sweet corn instead of spotty failures.
I've grown home garden corn for over eight years now using these same methods. Block planting alone changed everything for me. My ears went from half filled to packed with kernels from tip to base. The difference in corn planting success showed up in my first season after making that one switch.
These techniques work for all types from heirloom su varieties to modern super sweet sh2 hybrids. They scale from container setups to large garden plots. Whether you want how to grow corn for fresh eating or freezing, the same core steps apply to your situation.
Nothing matches the taste of sweet corn harvest eaten within hours of picking when the sugars are at their peak. You can't buy that flavor at any store because it starts fading the moment you pick the ear. Growing your own connects you to thousands of years of tradition while filling your table with the best corn you've ever tasted.
External Sources
Frequently Asked Questions
Which basic requirements matter for growing corn successfully?
Corn needs full sun with 6-8 hours daily, soil temperature above 60°F (15.5°C), consistent moisture of 1 inch (2.5 cm) weekly, nitrogen-rich fertilizer, and block planting with minimum 4 rows for wind pollination.
Does corn grow as a perennial, or require yearly planting?
Corn is an annual plant that requires yearly planting. Each plant completes its lifecycle in one growing season of 60-100 days, producing 1-2 ears before dying. You must plant fresh seeds each spring after the last frost date.
What shows sweet corn is ready to harvest?
Sweet corn is ready to harvest when these indicators align:
- Silks have turned brown and dried at the tips
- Ears feel full and firm when squeezed through the husk
- Kernels release milky white juice when punctured with a fingernail
- The ear has been on the stalk 17-24 days after silks first appeared
Which common mistakes should I avoid when cultivating corn?
Common corn growing mistakes include:
- Planting in single rows instead of blocks, causing poor pollination
- Sowing seeds in cold soil below 50°F (10°C)
- Underwatering during the critical silking period
- Skipping nitrogen fertilizer side-dressing
- Harvesting too late when kernels become starchy
What might cause my corn plants to develop tassels but fail to produce ears?
Corn plants that tassel without producing ears typically suffer from pollination failure, drought stress during silking, extreme heat above 86°F (30°C) during pollen shed, planting in single rows instead of blocks, or severe nitrogen deficiency.
Which companion plants benefit corn growth and which should be avoided?
Beneficial corn companions include beans (fix nitrogen), squash (shade soil), cucumbers, melons, and sunflowers. Avoid planting corn near tomatoes (compete for nutrients), brassicas like cabbage, and other heavy nitrogen feeders that compete for the same resources.
How can planting corn in blocks improve crop success?
Corn relies on wind for pollination. Block planting with minimum 4 rows creates a dense pollen cloud that ensures each silk receives pollen for kernel development. Single-row planting causes poor pollination resulting in ears with missing kernels and bare tips.
Which organic methods effectively protect corn from pests?
Effective organic corn pest control methods include:
- Applying Bacillus thuringiensis (Bt) spray for corn earworm and borers
- Dropping mineral oil on silks 3-5 days after silks appear
- Using floating row covers during early growth
- Releasing beneficial insects like parasitic wasps and ladybugs
- Rotating crops yearly to break pest cycles
Could corn be grown in containers or small garden spaces?
Corn can grow in containers but requires careful planning. Use containers at least 12 inches (30 cm) deep and wide, plant 4-6 stalks per container minimum for pollination, and group multiple containers together. Dwarf varieties like On Deck or Chires Baby work best.
What is the best way for soil to be prepared before planting corn seeds?
Prepare soil for corn by testing and adjusting pH to 6.0-6.8, incorporating 1-2 inches (2.5-5 cm) of compost, adding balanced fertilizer at 25 lbs (11.3 kg) per 1,000 square feet (93 square meters), and ensuring soil drains well while retaining moisture.