
Introduction
People have grown turnips for over 4,000 years, and this root vegetable has stuck around for good reason. This guide on How to Grow Turnips: A Step-by-Step Planting Guide covers one of the fastest crops you can start in your garden. Most root vegetables take months to fill out. Turnips go from seed to harvest in just 30 to 60 days during cool weather.
I started growing turnips about 8 years ago when I needed a quick crop to fill empty fall garden beds. What caught me off guard was how much food one planting produces. Growing turnips is like getting two vegetables for the price of one seed. You harvest both the roots and the leafy greens from every single plant. The greens pack even more vitamins and minerals than the roots do. That means you get a full plate of food from just one row in your garden.
Raw turnips hold just 28 calories per 100 grams with 23% of your daily vitamin C based on USDA data. They rank among the best cool season vegetables you can grow at home. This turnip planting guide walks you through every step from soil prep to storage. You will learn how to pull crisp, sweet root vegetables from your own dirt this season.
Whether you garden in raised beds, containers, or a full backyard plot, turnips fit right in. They handle frost down to 25°F and thrive when most other crops have quit for the season. You can tuck in a fall crop after your summer tomatoes and peppers wrap up. New growers and long time gardeners alike will find good value in this fast, simple crop.
5 Best Turnip Varieties to Grow
Picking the right turnip variety makes a big difference in what ends up on your plate. Some turnip varieties grow fast for quick salads while others store well for months in a cool cellar. I've tested over a dozen types in my garden beds and these 5 best turnip varieties stood out for taste, speed, and ease of growing.
If you're just starting out, match your pick to what you want most from the crop. The best turnip varieties for beginners forgive small mistakes and still give you a solid harvest. Salad turnip varieties like Hakurei taste sweet and mild right off the plant. You don't even need to cook them, which is why so many new growers choose these first.
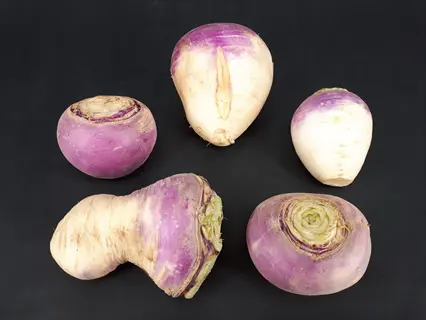
Purple Top White Globe
- Days to Harvest: This classic heirloom variety matures in 45 to 60 days from seed, producing roots with a distinctive purple and white appearance that signals readiness.
- Best For: Purple Top White Globe turnip is the most popular all-purpose turnip for both cooking and fresh eating, with firm white flesh ideal for roasting, mashing, and soups.
- Root Size: Harvest roots when they reach 3 inches (7.5 centimeters) in diameter for the mildest flavor, though they can grow larger for storage purposes.
- Greens Quality: The leafy tops of this variety produce abundant, tender greens that are rich in vitamins and can be harvested before the roots are fully mature.
- Growing Notes: This variety performs well in both spring and fall plantings, tolerating light frost that actually sweetens the flavor of the roots.
- Storage: Purple Top White Globe stores exceptionally well for 1 to 2 months in a cool root cellar at 32 to 40°F (0 to 4°C).
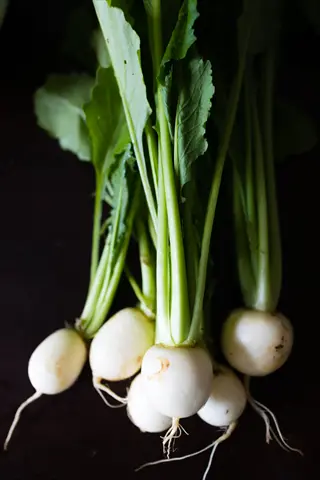
Hakurei
- Days to Harvest: Hakurei turnip is the fastest variety available, maturing in just 38 days from seed and producing smooth, pure white roots ready for immediate eating.
- Best For: This Japanese salad turnip is prized for its sweet, fruity flavor and crispy texture when eaten raw in salads, slaws, or simply sliced with salt.
- Root Size: Harvest Hakurei turnips at 2 inches (5 centimeters) in diameter for the sweetest flavor, as larger roots begin losing their signature delicate taste.
- Greens Quality: Hakurei greens are exceptionally tender and mild, suitable for raw salads or quick wilting, unlike the stronger flavored greens of traditional varieties.
- Growing Notes: This variety prefers cooler temperatures between 50 to 70°F (10 to 21°C) and bolts fast in heat, making it ideal for spring and fall only.
- Storage: Hakurei turnips are best eaten fresh within one week of harvest because their thin skin does not protect against moisture loss during extended storage.
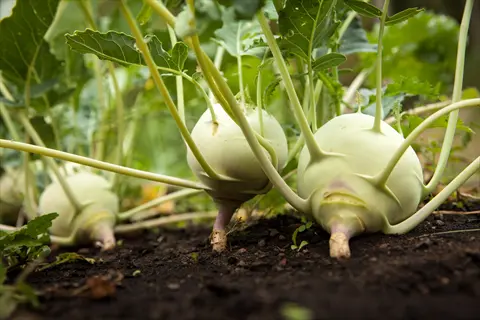
Just Right
- Days to Harvest: Just Right turnips reach maturity in 40 to 50 days, offering a good balance between the speed of Hakurei and the storage life of Purple Top varieties.
- Best For: This hybrid variety produces pure white, globe shaped roots with mild flavor that works great eaten raw, steamed, roasted, or added to stews.
- Root Size: Harvest at 3 to 4 inches (7.5 to 10 centimeters) in diameter without sacrificing tenderness, giving you a larger yield per plant than smaller salad types.
- Greens Quality: Just Right produces smooth, dark green tops that are excellent for cooking, with a milder flavor than traditional turnip greens from heirloom varieties.
- Growing Notes: This variety shows strong resistance to bolting and tolerates a wider temperature range, making it more forgiving for gardeners who miss the ideal planting window.
- Storage: Roots store well for 2 to 4 weeks in the refrigerator, longer than salad turnips but shorter than heirloom varieties bred for winter keeping.
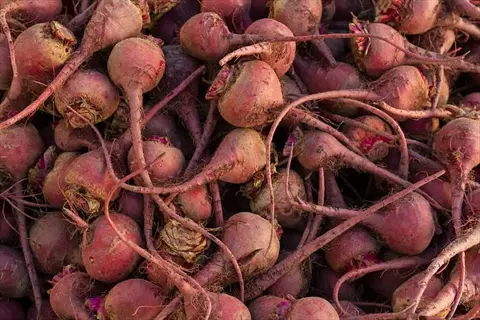
Scarlet Queen
- Days to Harvest: Scarlet Queen matures in 45 to 55 days, producing red skinned roots with white and red interior flesh that brightens up any dish.
- Best For: This colorful variety is outstanding for fresh eating and pickling, adding vibrant red color to salads and fermented vegetable mixes alongside its mild taste.
- Root Size: Harvest at 2 to 3 inches (5 to 7.5 centimeters) in diameter for the most striking color contrast and the crispest texture in raw preparations.
- Greens Quality: Scarlet Queen produces attractive red veined greens that add visual interest to salads and contain the same nutritional benefits as standard green turnip tops.
- Growing Notes: Plant this variety in full sun for the most vivid root coloring, as partial shade can reduce the intensity of the red color on the skin.
- Storage: Red skinned turnips store for 1 to 2 weeks refrigerated and maintain their color well, though they are best enjoyed fresh for maximum visual appeal.
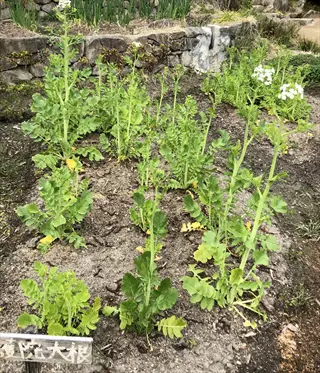
Shogoin
- Days to Harvest: Shogoin reaches greens harvesting size in just 30 days and full root maturity in 70 days, giving gardeners flexibility in how they use this variety.
- Best For: Shogoin is the top greens production turnip recommended by UIUC Extension, producing large, tender leaves perfect for braising, sauteing, or adding to soups.
- Root Size: Roots can grow up to 6 inches (15 centimeters) in diameter, though they are milder and more tender when harvested at 3 to 4 inches (7.5 to 10 centimeters).
- Greens Quality: This variety produces the most abundant and tender greens of any turnip, with large, smooth leaves that are less pungent than other varieties when cooked.
- Growing Notes: Shogoin tolerates warm weather better than most turnip varieties, making it a reasonable choice for gardeners in warmer zones who want to extend the growing season.
- Storage: The large roots store for 3 to 4 weeks at cool temperatures, while the greens should be harvested and used within a few days for the best flavor.
Your best bet as a beginner is to start with Purple Top White Globe or Hakurei since both are easy to find at garden centers. Try planting 2 varieties side by side so you can taste the difference and figure out which one fits your kitchen best.
Preparing Soil for Turnips
Good soil is the foundation of every great turnip crop. Think of turnip roots like underground balloons. They need soft, crumb like soil to expand evenly in all directions. Any hard clump or rock in the way forces the root to fork or twist into odd shapes. I learned this the hard way my first year when I pulled up crooked turnips from a bed I hadn't prepared well enough.
The good news about turnip soil requirements is that these plants are quite flexible. USDA research shows turnips adapt to a turnip soil pH range from 4.8 to 8.5, though they grow best between 6.0 and 7.5. You need well-drained soil turnips can push their roots through without sitting in water. Preparing soil for turnips also means adding plenty of organic matter. Add compost for turnips to boost drainage in heavy clay and hold moisture in sandy ground. The right soil amendments for turnips set you up for smooth, round roots every time.
Test and Adjust Soil pH
- Target Range: Turnips grow best in soil with a pH between 6.0 and 7.5, which is slightly acidic to neutral, though USDA research shows they tolerate a range from 4.8 to 8.5.
- How to Test: Purchase an inexpensive soil test kit from a garden center or send a sample to your local cooperative extension office for a detailed analysis of pH and nutrient levels.
- Adjusting Acidic Soil: If your soil pH falls below 6.0, work garden lime into the top 6 inches (15 centimeters) of soil at least two weeks before planting to raise the pH gradually.
- Adjusting Alkaline Soil: If soil pH exceeds 7.5, incorporate elemental sulfur or peat moss into the planting area to lower the pH over the course of several weeks before sowing seeds.
Loosen and Amend the Soil
- Depth Requirement: Loosen soil to a depth of at least 8 to 10 inches (20 to 25 centimeters) using a garden fork or broadfork to allow turnip roots to expand evenly without forking.
- Remove Obstacles: Pick out rocks, sticks, and hard soil clumps from the planting area because any obstruction forces developing roots to grow crooked, forked, or misshapen.
- Add Organic Matter: Mix 2 to 3 inches (5 to 7.5 centimeters) of well aged compost into the top layer to improve drainage in clay soils and water retention in sandy soils.
- Avoid Fresh Manure: Never add fresh manure or high nitrogen amendments before planting turnips because excess nitrogen promotes leafy top growth at the expense of root development.
Ensure Good Drainage
- Why Drainage Matters: Turnips develop root rot and fungal diseases like clubroot in waterlogged soil, making proper drainage the single most important soil condition for healthy plants.
- Test Drainage: Dig a hole 6 inches (15 centimeters) deep, fill it with water, and time how long it takes to drain completely; ideal soil drains within 1 to 2 hours.
- Improving Heavy Clay: Work coarse sand and compost into clay soils at a ratio of one part amendment to two parts native soil to break up dense structure and improve water flow.
- Raised Bed Option: If native soil drains poorly, build a raised bed at least 10 inches (25 centimeters) tall and fill with a mix of topsoil, compost, and perlite for ideal turnip conditions.
Create a Smooth Seedbed
- Surface Preparation: Rake the soil surface until it is smooth and free of large clumps, creating a fine, crumbly texture that allows tiny turnip seeds to make good soil contact for germination.
- Firm the Bed Lightly: After raking, press the surface gently with the flat side of a hoe or board to create a firm but not compacted seedbed that holds moisture evenly around seeds.
- Pre-Moisten the Soil: Water the prepared bed lightly one day before planting to ensure even moisture throughout the top 2 inches (5 centimeters) where seeds will germinate in about 5 days.
- Plan Row Layout: Mark rows 12 to 18 inches (30 to 45 centimeters) apart using string lines or a garden rake handle to keep spacing consistent and leave room for you to access plants.
Raised bed and container gardeners have a big edge here since you control the soil mix from the start. Fill your bed with a blend of topsoil, compost, and perlite and you skip most of the prep work that in ground gardeners deal with. Turnips make an ideal first root crop for any new raised bed garden because they reward good soil with fast, even growth.
Planting Turnips Step by Step
When you plant turnips, you always want to grow turnips from seed and direct sow turnip seeds right into the garden soil. Don't bother starting them in pots because transplanting damages the tap root and gives you stunted, forked results. The turnip seed depth is thin at just 1/4 to 1/2 inch deep. Press your seeds into the soil and cover them with a light layer of dirt. I drag a groove in the bed with a stick and drop seeds in 1 to 2 inches apart down the row.
Your planting window depends on your climate zone. Spring turnip planting works best 2 to 4 weeks before your last frost once soil hits at least 50°F according to USDA data. Fall turnip planting gives you even better flavor since cool nights sweeten the roots. Count back 8 to 10 weeks from your first fall frost and sow then. Gardeners in warmer zones like Florida can sow from August through February for a long harvest window.
Keep your turnip spacing at 12 to 18 inches between rows so you can reach each plant. UIUC Extension says succession planting turnips every 10 days gives you a steady crop all season. I use this method and always have fresh roots ready. Seeds sprout in about 5 to 7 days at the right soil temps. That fast growth makes turnips a great pick for new gardeners who want quick results in the garden.
Turnip Care and Maintenance
Good turnip care comes down to one big idea: keep things steady. Think of turnips as sprinters, not marathon runners. They need consistent support for a short burst of growth, and any gap shows up as poor flavor or texture in your roots. UMN Extension warns that drought stress can make turnips bitter or woody. That means preventing woody turnips starts with your watering routine above all else.
I've found that keeping turnips from going bitter is all about not skipping water days. Watering turnips on a set schedule matters more than almost any other step in turnip care. You also need to thin turnip seedlings on time and add mulching turnips into your routine. The turnip water requirements are simple but strict, so pay close attention to the checklist below.
Watering for Quality Roots
- Weekly Target: Provide turnips with 1 inch (2.5 centimeters) of water per week from rain or irrigation, measured using a rain gauge placed at soil level near your turnip rows.
- Consistency is Critical: Irregular watering causes turnip roots to crack, split, or develop a bitter, woody texture because the root expands unevenly when moisture levels fluctuate.
- Sandy Soil Adjustment: Gardens with sandy soil need watering twice per week in smaller amounts because sand drains fast and cannot hold moisture long enough between weekly sessions.
- Best Time to Water: Water turnips in the early morning so foliage dries before evening, reducing the risk of fungal diseases like downy mildew that thrive on wet leaves overnight.
Thinning Seedlings Properly
- When to Thin: Thin turnip seedlings when they reach 4 inches (10 centimeters) tall, which happens about 10 to 14 days after germination depending on growing conditions.
- Spacing Target: Remove extra seedlings to leave 4 to 6 inches (10 to 15 centimeters) between remaining plants, giving each root enough space to expand to full harvest size.
- Technique: Snip unwanted seedlings at soil level with scissors instead of pulling them out, which can disturb the roots of neighboring plants you want to keep growing.
- Bonus Harvest: Thinned seedlings are edible microgreens according to UF/IFAS Extension, so rinse them and add to salads rather than tossing them in the compost bin.
Feeding and Fertilizing
- Pre-Planting Amendment: Work a balanced granular fertilizer with a 5-10-10 NPK ratio into the soil before planting to support root development without pushing excessive leafy growth.
- Side Dressing: Apply a light side dressing of compost or balanced fertilizer when plants are 6 inches (15 centimeters) tall, placing it 3 inches (7.5 centimeters) away from plant stems.
- Avoid High Nitrogen: Fertilizers heavy in nitrogen produce lush, abundant greens but small, undeveloped roots, so always choose formulas where the first number is lower than the second.
- Organic Option: Bone meal and wood ash are effective organic alternatives that provide phosphorus and potassium for root growth while keeping nitrogen levels moderate for balanced development.
Mulching and Weed Control
- Mulch Benefits: Apply 2 to 3 inches (5 to 7.5 centimeters) of straw or shredded leaf mulch around turnip plants to retain soil moisture, regulate temperature, and suppress competing weeds.
- Timing: Wait until seedlings are 4 inches (10 centimeters) tall and thinning is complete before applying mulch, so you can see which plants to keep and which to remove first.
- Weed Strategy: Pull weeds by hand when they are small rather than hoeing deep, because turnip roots grow near the soil surface and deep cultivation can slice or damage developing roots.
- Winter Extension: For fall planted turnips, apply a thick 6 inch (15 centimeter) layer of straw mulch before the first hard freeze to insulate roots and extend your harvest window through early winter.
When you do succession planting, you end up caring for turnips at multiple growth stages at the same time. I keep a simple chart on the fridge that tracks which row needs thinning and which needs extra water that week. A little planning keeps everything on track.
Turnip Pests and Diseases
The best turnip pest control starts before any bugs show up. Most turnip pests do their damage underground where you can't see it until harvest day. I lost an entire fall crop to cabbage root maggot turnips my second year because I didn't know what to look for. UMN Extension lists flea beetles turnips face and root maggots as the top 2 insect threats. On the disease side, clubroot turnips get and black rot cause the most crop damage.
Prevention beats treatment every time with this crop. Using a floating row cover turnips can hide behind is your first line of defense. Crop rotation turnips growers follow should run on a 4 year cycle so pests and turnip diseases don't build up in the same soil. Move your turnips to a new bed each year and avoid planting any Brassica family crops in that spot for at least 4 seasons.
Check your plants every few days for early signs of trouble. Catching a pest problem in the first week is far easier than fighting a full invasion later. Most of these issues are simple to prevent if you stay on top of them from planting day forward.
Harvesting and Storing Turnips
Knowing when to harvest turnips is one of the most important skills you can build as a grower. The ideal turnip harvest size is 2 to 3 inches across the top of the root. Larger roots turn pungent, pithy, and stringy according to UF/IFAS data. I check my turnips by brushing soil away from the top and looking for the root shoulder poking above the dirt line. If it feels firm when you squeeze it, it's ready to pull.
One thing most guides skip is that harvesting turnip greens can start weeks before the roots are done. You can cut outer leaves when plants reach 6 to 8 inches tall, which happens about 4 weeks after planting. The root keeps growing while you enjoy fresh greens. Fall crops taste sweeter than spring ones because light frost turns the starch in the roots into sugar.
Harvesting Turnip Greens
- First Greens Harvest: Begin picking outer leaves when plants reach 6 to 8 inches (15 to 20 centimeters) tall, about 4 weeks after planting, leaving the center leaves to continue growing.
- Cutting Technique: Snip leaves at the base of each stem using clean scissors or garden shears, taking no more than one third of the plant's foliage at a time to avoid stressing the root.
- Nutritional Value: Turnip greens contain more vitamins and minerals than the roots according to UF/IFAS Extension, including high levels of calcium, vitamin C, and folic acid.
- Continuous Harvest: Greens regrow after cutting, so you can harvest leaves every 7 to 10 days from the same plant while the root continues developing underground for a later harvest.
Harvesting Turnip Roots
- Ideal Size: Pull turnip roots when they reach 2 to 3 inches (5 to 7.5 centimeters) in diameter, which you can check by brushing soil away from the top of the root at the soil line.
- Texture Test: Squeeze the exposed top of the root gently and it should feel firm and solid, not spongy, which would mean the root is past its prime and becoming pithy inside.
- Pulling Method: Grasp the base of the leaves where they meet the root and pull straight up with a steady motion; loosen soil around the root first with a garden fork if the ground is hard.
- Timing Tip: Harvest in the morning when soil is cool and moist for the easiest pulling and the crispest root texture, as afternoon heat can make roots go limp.
Short Term Storage
- Preparation: Remove greens by cutting them 1 inch (2.5 centimeters) above the root crown right after harvest because attached leaves keep drawing moisture from the root.
- Refrigerator Storage: Store unwashed turnip roots in a perforated plastic bag in the vegetable crisper drawer where they will keep fresh for 1 to 2 weeks at standard refrigerator temperature.
- Greens Storage: Wrap fresh cut greens in a damp paper towel inside a sealed plastic bag and refrigerate; use within 3 to 5 days for the best flavor and nutritional content.
- Do Not Wash Early: Wait to wash turnip roots until you are ready to use them because moisture on the skin promotes bacterial growth and cuts turnip shelf life fast.
Long Term Winter Storage
- Root Cellar Method: Storing turnips in a root cellar or unheated garage at a turnip storage temperature of 32 to 40°F (0 to 4°C) with high humidity lets them last up to 4 months.
- Sand Box Storage: Layer turnips in a wooden box with damp sand between each layer, making sure roots do not touch each other, and check monthly for any signs of softening or rot.
- In Ground Storage: Leave fall turnips in the ground under a 6 inch (15 centimeter) layer of straw mulch and harvest as needed through winter, as light frost sweetens the roots.
- Wax Coating Option: UIUC Extension notes that roots can be waxed to prevent moisture loss during storage, which helps if you cannot maintain high humidity conditions.
Harvesting turnips at the right size gives you the best taste every time. I've made the mistake of leaving them too long in the ground and ended up with tough, bitter roots that nobody wanted to eat. Pull them on time and you'll love the results.
5 Common Myths
Turnips only grow well in large garden plots and require a lot of space to produce good roots.
Turnips thrive in containers as small as 8 inches (20 centimeters) deep, and you can grow 9 plants per square foot in raised beds or pots.
You should start turnip seeds indoors and transplant seedlings into the garden for the best results.
Turnips are direct-sown crops that perform poorly when transplanted because their taproots are easily damaged during the move, causing stunted or forked roots.
Turnips are a warm-season vegetable that should be planted in the middle of summer for the largest harvest.
Turnips are cool-season crops that grow best at 60 to 65F (15 to 18C) and actually produce bitter, woody roots during hot summer weather.
Bigger turnip roots always taste better than smaller ones, so you should let them grow as large as possible.
Turnip roots harvested at 2 to 3 inches (5 to 7.5 centimeters) in diameter have the mildest, sweetest flavor, while larger roots become pungent, pithy, and stringy.
Turnip greens are not worth eating and should be discarded after you pull the roots from the ground.
Turnip greens contain significantly more vitamins and minerals than the roots, including high levels of vitamin C, calcium, and folic acid according to university sources.
Conclusion
You now have every step you need to grow turnips from bare soil to a full harvest basket. This turnip planting guide took you through soil prep, seed spacing, watering, pest control, and storage. Turnips stand out among root vegetables because they mature in just 30 to 60 days and handle frost down to 25°F. Few other cool season vegetables give you that kind of speed and toughness in one crop.
One of my favorite turnip growing tips is to think of every plant as a double harvest. You get nutrient rich greens and crisp roots from the same seed. Each 100 grams of raw turnip packs 23% of your daily vitamin C at just 28 calories based on USDA data. That dual value makes turnips one of the most space smart vegetables you can grow at home.
In my experience, the biggest mistake new growers make is waiting too long to start. Don't let the perfect plan hold you back from putting seeds in the ground. A small trial run of 10 plants sown every 10 days during your next cool season will teach you more than reading ever could.
Grab a packet of seeds, prep a short row, and see how fast these roots fill out for you. Once you pull your first batch of sweet, fresh turnips from the dirt, you'll want to grow them every season after that.
External Sources
Frequently Asked Questions
Which month do you plant turnips?
Plant turnips in March or April for a spring crop and again in August or September for a fall harvest, depending on your climate zone.
Do turnips require full sun?
Turnips grow best with at least 6 to 8 hours of direct sunlight each day, though they can tolerate partial shade.
Could turnips survive frost?
Turnips tolerate frost and can survive temperatures as low as 25°F (-4°C) without protection.
Which plants should stay away from turnips?
Avoid planting other Brassica family members, potatoes, and heavy-feeding root vegetables near turnips.
How frequently should I water turnips?
Water turnips to provide about 1 inch (2.5 centimeters) of moisture per week, keeping the soil consistently damp.
Which fertilizer is best for turnips?
A balanced fertilizer with a 5-10-10 NPK ratio supports strong root development without excessive leaf growth.
Could turnips grow in containers?
Turnips grow well in containers that are at least 8 to 10 inches (20 to 25 centimeters) deep with good drainage.
What causes turnip roots to become woody?
Woody turnip roots result from drought stress, high temperatures, or leaving roots in the ground past their ideal harvest size.
Can deer eat turnip plants?
Deer do eat turnip greens and roots, especially in fall and winter when other food sources become scarce.
How long do turnips usually take to grow?
Most turnip varieties mature in 30 to 60 days from seed, with Japanese varieties like Hakurei ready in as few as 38 days.