
Introduction
I wrote this How to Grow Peas: The Complete Guide after one amazing season in my own backyard changed everything. A single trellis of sugar snaps gave me over $50 worth of fresh pods in about 8 weeks. Those plants kept producing more pods every single time I went out to pick a handful for dinner.
Peas are a true cool season vegetable that people have grown for over 10,000 years with good reason. They thrive between 55 and 70°F and handle light frost without a problem. Peas are also nitrogen fixing plants that pull this key nutrient from the air and store it in their roots. Growing them is like getting free fertilizer for your garden because they feed the soil for whatever you plant after them.
Below you'll find every pea varieties option worth trying in your space. That includes tall climbers and compact bush types that fit in a pot on your porch. I cover planting methods for traditional rows, raised beds, and containers so your space won't limit what you can harvest. In my experience, the soil, watering, pest, and harvest tips in these pages took me years of mistakes to learn on my own.
Whether you want crisp snap peas for snacking or shelling types for the freezer, these steps will get you there fast. You'll spend less time guessing and grow more pods on every plant you put in the ground this spring or fall.
Planting Peas Step by Step
Planting peas works best when you direct sow peas right into the garden 4 to 6 weeks before your last spring frost. Pea seeds don't transplant well because their roots hate being moved around. I learned this the hard way when I tried starting them indoors and lost half my seedlings during the move outside.
Get your pea planting depth right by pushing each seed 1 to 2 inches deep into moist soil. Space your seeds 1.5 to 3 inches apart for good pea seed spacing that gives each plant room to grow. Seeds take about 6 to 17 days to sprout without any soaking at all. You can also inoculate pea seeds with Rhizobium powder before you sow them. This simple step gives your plants stronger nitrogen fixing right from day one.
The secret to a long harvest is succession planting peas every 2 to 3 weeks through spring. Most gardeners plant once and get a short 2 week harvest window. In my experience, staggering your plantings gives you fresh pods for 2 to 3 months straight instead of just a quick burst. Each method below tells you the best way to set up your planting space.
Traditional Row Planting
- Spacing: Sow seeds 1 to 3 inches (2.5 to 8 cm) apart in rows spaced 18 to 30 inches (46 to 76 cm) apart, pressing each seed 1 to 2 inches (2.5 to 5 cm) deep into moist soil.
- Best For: Large gardens with room for multiple rows and easy trellis installation along each row, giving you clear pathways for harvesting and plant maintenance.
- Advantages: Simple to trellis with a single support line per row, allows good air circulation between rows, and makes succession planting straightforward by adding new rows every 2 to 3 weeks.
- Key Tip: Install your trellis or support stakes at the same time you plant seeds to avoid disturbing the delicate root system once pea plants begin growing actively.
Wide-Row or Block Planting
- Spacing: Scatter seeds 2 to 3 inches (5 to 8 cm) apart in all directions within a band 12 to 18 inches (30 to 46 cm) wide, creating a dense block of pea plants.
- Best For: Gardeners looking to maximize yield in a compact space, as plants in blocks support each other and shade the soil to retain moisture and suppress weeds.
- Advantages: Inner plants use each other for support, reducing the need for trellising with bush varieties, and dense planting can increase yield per square foot compared to single rows.
- Key Tip: Use bush or semi-leafless varieties for block planting because their tendrils grip neighboring plants for mutual support without requiring external trellis structures.
Raised Bed Planting
- Spacing: Plant pea seeds 2 to 3 inches (5 to 8 cm) apart in grid patterns within the raised bed, using the bed edges to anchor trellis netting or support structures securely.
- Best For: Gardens with poor native soil or drainage problems, because raised beds allow full control over soil mix, pH (aim for 6.0 to 7.0), and organic matter content.
- Advantages: Soil warms faster in spring, drainage is naturally improved, and the elevated height makes planting, weeding, and harvesting more comfortable for gardeners with mobility concerns.
- Key Tip: Fill beds with a loose mix of compost, garden soil, and perlite to create the well-drained conditions peas need, avoiding heavy clay that retains too much moisture.
Container and Pot Planting
- Spacing: Use containers at least 12 inches (30 cm) deep and 18 inches (46 cm) wide, sowing 6 to 9 seeds per container with a small trellis or stakes inserted at planting time.
- Best For: Apartment balconies, patios, and small spaces where garden beds are not available, allowing anyone to grow fresh peas with just a pot and some sunlight.
- Advantages: Full control over soil quality and watering schedule, easy to move containers to follow sunlight, and dwarf bush varieties like Sugar Ann produce well in limited space.
- Key Tip: Choose bush or dwarf pea varieties that stay under 2 feet (61 cm) tall for containers, and water more frequently than in-ground plants because pots dry out faster.
No matter which method you choose, water your seeds in with a gentle spray right after planting. Heavy streams will wash seeds out of place and ruin your spacing. A 3 to 4 inch layer of mulch around your seedlings keeps the soil cool and moist as your peas get started.
8 Best Pea Varieties to Grow
Picking the right pea varieties makes all the difference between a great harvest and a weak one. I tested dozens of types over the years and narrowed it down to these 8 winners for you. You'll find shelling peas, snap peas, snow peas, and bush peas below so you can pick the best match for your space and goals.
Most pea varieties mature in 50 to 70 days from direct seeding. One thing I wish I knew sooner is that wrinkled seeds are sweeter but need warmer soil to sprout. Smooth seeds handle cold, wet ground much better for those early spring plantings. Look for disease resistant peas if your area gets humid springs, and choose dwarf pea varieties if you garden in containers or tight spots.
Sugar Snap Peas
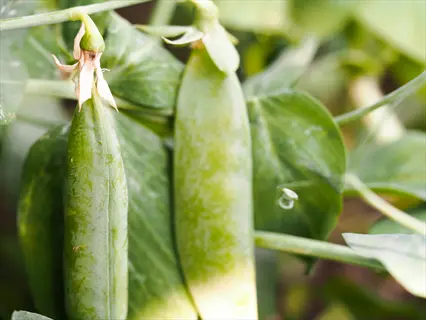
- Type: Snap pea with thick, edible pods that are sweet and crunchy, perfect for eating fresh off the vine or adding to stir-fries and salads.
- Days to Harvest: Matures in 58 to 70 days from direct seeding, producing plump pods on vigorous vining plants that grow up to 6 feet (1.8 m) tall.
- Growing Tips: Requires a sturdy trellis or support system, and plants produce best when harvested every one to two days once pods begin to fill out.
- Disease Resistance: Shows moderate resistance to powdery mildew and performs well across most growing zones when planted in cool spring conditions.
- Best For: Gardeners who want a classic snap pea with high yields and sweet flavor, and who have space for a trellis or vertical support structure.
- Yield Potential: Each plant produces 20 to 30 or more pods, with snap and snow types yielding 3 to 4 lb (1.4 to 1.8 kg) of pods per 10 feet (3 m) of row.
Green Arrow Shelling Peas
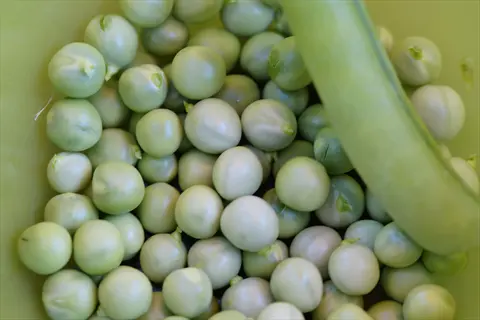
- Type: Classic shelling (English) pea variety prized for its long pods, each containing 8 to 11 tender, sweet peas ideal for fresh eating and freezing.
- Days to Harvest: Reaches maturity in 62 to 70 days, producing on compact vines that grow 24 to 28 inches (61 to 71 cm) tall with minimal staking needed.
- Growing Tips: Performs best when direct sown in cool soil at 40 to 65°F (4 to 18°C) and benefits from a low trellis or pea sticks for support.
- Disease Resistance: Strong resistance to Fusarium wilt and moderate resistance to downy mildew, making it a reliable performer in humid spring conditions.
- Best For: Gardeners who prefer traditional shelling peas for freezing, canning, or fresh bowls and want a compact plant that does not need tall support.
- Yield Potential: Garden peas yield 2 to 3 lb (0.9 to 1.4 kg) of shelled peas per 10 feet (3 m) of row, with steady production over a 2 to 3 week window.
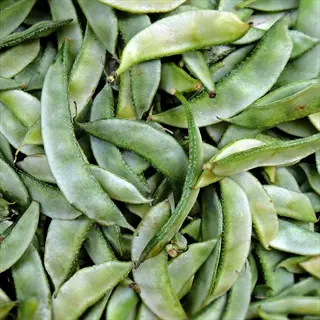
Oregon Sugar Pod II Snow Peas
- Type: Snow pea with flat, tender pods harvested before the peas inside fully develop, widely used in Asian cooking, salads, and light sautes.
- Days to Harvest: Ready in 60 to 70 days from seeding, growing on bushy vines that reach 28 to 36 inches (71 to 91 cm) in height with moderate support.
- Growing Tips: Pick pods when they are still flat and the peas inside are barely visible for the best texture and sweetest flavor in every bite.
- Disease Resistance: Excellent resistance to powdery mildew, downy mildew, and Pea Enation Mosaic Virus (PEMV), making it one of the most dependable snow pea options.
- Best For: Gardeners who enjoy snow peas in stir-fries and salads, and who want a disease-resistant variety that performs consistently in variable spring weather.
- Yield Potential: Produces 3 to 4 lb (1.4 to 1.8 kg) of flat pods per 10 feet (3 m) of row, with extended picking when harvested frequently every other day.
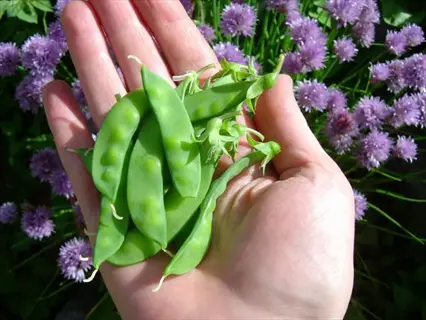
Cascadia Snap Peas
- Type: Compact snap pea variety producing sweet, stringless pods that are perfect for snacking raw, cooking lightly, or tossing into fresh spring salads.
- Days to Harvest: Matures in 58 to 65 days on bushy vines that grow only 30 to 36 inches (76 to 91 cm) tall, needing only light support.
- Growing Tips: Ideal for succession planting every 2 to 3 weeks because of its compact size and short maturity, allowing multiple harvests per season.
- Disease Resistance: Strong resistance to Pea Enation Mosaic Virus and powdery mildew, two of the most common pea diseases that reduce garden harvests significantly.
- Best For: Gardeners with limited space, small raised beds, or containers who want snap pea sweetness without needing a tall trellis or large garden area.
- Yield Potential: Produces generously for its compact size, with frequent picking every 1 to 2 days extending the harvest window to 3 or more weeks.
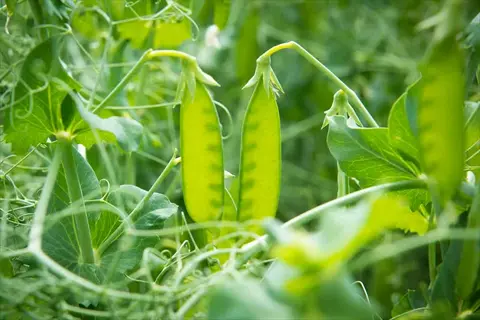
Sugar Ann Snap Peas
- Type: Early-maturing dwarf snap pea that produces sweet, crunchy pods on very short plants, making it one of the best choices for new gardeners.
- Days to Harvest: One of the fastest peas to mature at just 52 to 56 days, giving gardeners an early reward when spring weather is still cool.
- Growing Tips: Bush habit means no trellis is needed, though a short support of 18 inches (46 cm) keeps plants upright and makes picking easier.
- Disease Resistance: Moderate resistance to common pea diseases and tolerates cool, damp spring conditions better than many taller snap pea varieties in the garden.
- Best For: Beginners, container gardeners, and anyone who wants the earliest possible snap pea harvest without the effort of building or installing trellis supports.
- Yield Potential: Despite its small size, Sugar Ann produces a concentrated flush of sweet pods over 2 to 3 weeks, making it ideal for fresh eating.
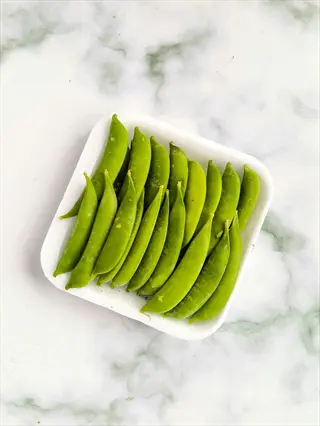
Wando Shelling Peas
- Type: Heat-tolerant shelling pea specifically bred to produce in warmer conditions, filling a gap where standard varieties stop flowering and setting pods.
- Days to Harvest: Matures in 65 to 70 days, growing on sturdy vines that reach 24 to 30 inches (61 to 76 cm) tall in both spring and late-summer plantings.
- Growing Tips: Plant in late spring for harvests that extend into early summer, or use as a fall crop planted 8 to 10 weeks before the first expected frost date.
- Disease Resistance: Good overall disease tolerance with moderate resistance to Fusarium wilt, which becomes more problematic in soils above 70°F (21°C).
- Best For: Gardeners in warmer zones or those who miss the early spring planting window and still want a productive shelling pea harvest from their garden.
- Yield Potential: Yields 2 to 3 lb (0.9 to 1.4 kg) of shelled peas per 10 feet (3 m) of row, holding production longer in heat than other shelling types.
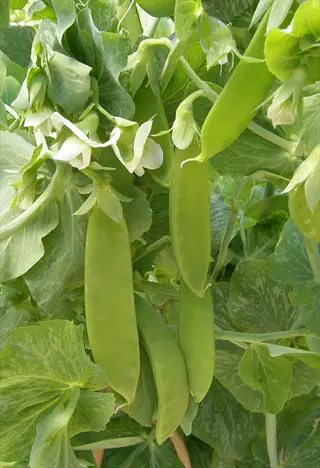
Mammoth Melting Sugar Snow Peas
- Type: Large-podded snow pea producing broad, flat pods up to 5 inches (13 cm) long, prized for their tender texture and mild sweetness in cooked dishes.
- Days to Harvest: Reaches harvest stage in 65 to 75 days on tall vines that grow 4 to 5 feet (1.2 to 1.5 m), requiring a solid trellis for support.
- Growing Tips: Harvest when pods are full-sized but still flat and translucent for the best eating quality, before the seeds inside begin to swell noticeably.
- Disease Resistance: Moderate disease resistance; benefits from good air circulation provided by trellis growing and proper row spacing of 18 to 30 inches (46 to 76 cm).
- Best For: Gardeners who love snow peas in stir-fries and want the largest possible pods, and who have garden space for tall trellises or vertical structures.
- Yield Potential: Tall vines produce heavy crops of oversized snow pea pods, with frequent harvesting every 1 to 2 days maximizing total production per plant.
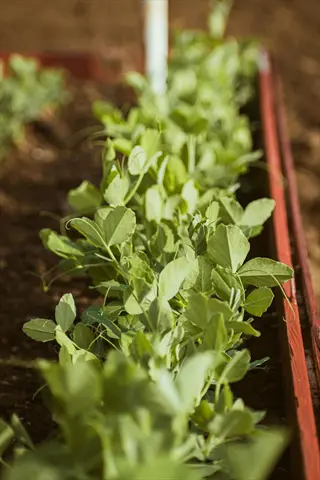
Alaska Shelling Peas
- Type: Ultra-early shelling pea with smooth, round seeds that tolerate cold, wet soil conditions better than wrinkled-seed varieties, perfect for the earliest plantings.
- Days to Harvest: Among the fastest-maturing shelling peas at just 50 to 57 days, producing reliable harvests from compact 2-foot (61 cm) tall plants.
- Growing Tips: Smooth seeds can be planted in colder soil than wrinkled types, making Alaska ideal for the very first sowing 6 weeks before the last frost.
- Disease Resistance: Solid resistance to Fusarium wilt and tolerates cold, wet conditions where other varieties may rot, making it the hardiest early-season option available.
- Best For: Cold-climate gardeners in zones 3 to 5 who want the earliest possible harvest, and anyone looking for a reliable first-planting pea to get the season started.
- Yield Potential: Produces 2 to 3 lb (0.9 to 1.4 kg) of shelled peas per 10 feet (3 m) of row, with a concentrated harvest window of about 2 weeks.
My best advice for you is to grow at least 2 or 3 different varieties at the same time. Mix a fast bush peas type like Sugar Ann with a tall climber like Sugar Snap. You'll get early pods from one and a longer harvest window from the other to keep your kitchen stocked.
Soil, Water, and Fertilizer
Getting your pea soil requirements right from the start saves you a lot of trouble down the road. Peas want loose, well drained soil with a soil pH for peas between 6.0 and 7.0 for the best growth. I test my soil every spring with a cheap kit from the garden center. When my pH ran too low one year, a bit of garden lime fixed it in about 2 weeks.
The biggest surprise for new growers is that fertilizing peas takes less effort than almost any other crop. Peas form a bond with Rhizobium bacteria in the soil that handles nitrogen fixing on its own. This means you can skip heavy nitrogen feeds and use a low phosphorus blend like 27-3-3 or 32-3-10 instead. Stay away from any product labeled as a weed and feed because these products can damage your pea plants fast.
Watering peas changes as your plants grow through each stage. During germination you just keep the soil moist without flooding it. Once flowering starts, your plants need 1 to 1.5 inches of water per week to set pods. I lay down 3 to 4 inches of mulch with straw or grass clippings around my plants. Mulching peas this way keeps the roots cool and cuts my watering time in half during warm stretches.
The table above shows you how water and fertilizer needs shift at each stage of growth. Pay close attention during flowering and pod fill because those 2 stages determine your final harvest size. Cut back on water too soon and your pods will come out flat and small.
Trellis and Support Systems
A good pea trellis does more than just hold your plants up. Vertical gardening peas with proper support for peas boosts air flow around the vines. This cuts down on disease and makes picking pods much easier on your back. I always set up my DIY pea trellis at planting time because adding support later can damage the roots of growing plants.
One trick I picked up after losing a crop to powdery mildew is to face your pea trellis toward the east. Your plants get strong morning light and then some shade during the hot afternoon hours. This simple move keeps your vines cooler during late spring heat waves. The netting for peas and pea sticks options below work for gardens of every size and budget.
String or Twine Trellis
- Height Range: Works well for vining peas growing 4 to 6 feet (1.2 to 1.8 m) tall, with vertical strings tied between a top rail and ground stakes at 4-inch (10 cm) intervals.
- Construction: Drive two sturdy posts at each end of the row, run a top bar or wire between them, and tie lengths of garden twine from the bar to ground-level pegs or a bottom wire.
- Best Varieties: Tall vining types like Sugar Snap and Mammoth Melting Sugar that need continuous vertical support as they climb throughout the growing season.
- Advantages: Inexpensive to build, easy to remove at the end of the season, and allows you to compost the old twine along with spent pea vines for a clean garden reset.
Garden Netting on Posts
- Height Range: Available in various widths, installed at 4 to 6 feet (1.2 to 1.8 m) height, providing a flat mesh surface that pea tendrils grip with ease and hold on to.
- Construction: Attach plastic or natural fiber netting between two posts using cable ties or staples, pulling the mesh taut so plants can reach and grab it as they grow upward.
- Best Varieties: Any vining or semi-vining pea variety, and those with strong tendrils that can weave through the mesh squares for self-supporting vertical growth.
- Advantages: Reusable for multiple seasons, provides uniform support across the entire row, and the open mesh design improves air circulation to reduce powdery mildew and other diseases.
Pea Sticks and Brush
- Height Range: Natural branching sticks pushed into the soil at 6-inch (15 cm) intervals, supporting plants from 2 to 4 feet (61 cm to 1.2 m) tall depending on stick height.
- Construction: Collect pruned branches with multiple side twigs and push them into the soil beside pea rows before seeds germinate, creating a natural climbing framework.
- Best Varieties: Medium-height bush and semi-vining peas that need light support but do not climb as hard as full vining types like Telephone or Mammoth Melting Sugar.
- Advantages: Free if you have pruning material available, breaks down on its own, and adds a natural look to the garden while providing effective support with minimal setup effort.
A-Frame or Teepee Structure
- Height Range: Built 5 to 6 feet (1.5 to 1.8 m) tall using bamboo poles, wooden stakes, or metal conduit, allowing peas to climb both sides of the frame.
- Construction: Lean poles together in an A-shape or teepee pattern, securing the tops with twine or wire, and wrap netting or string around the frame for tendrils to grip.
- Best Varieties: Tall vining snap and snow peas that reach 5 to 6 feet (1.5 to 1.8 m), maximizing the vertical growing space on both sides of the freestanding structure.
- Advantages: Freestanding design means no wall or fence is needed, the double-sided growing surface doubles production per ground area, and the structure creates shaded space beneath.
You don't need to spend a fortune on your support setup. In my experience, a simple string trellis costs under $10 and lasts a full season with no trouble at all. The key is to get it in place on planting day so your peas have something to grab from the moment they sprout.
Pea Pests and Diseases
Knowing the most common pea pests and pea diseases helps you act fast before you lose your crop. I've dealt with aphids on peas more times than I can count. Powdery mildew peas gave me fits until I learned to pick disease resistant pea varieties instead. Most of these problems are easy to prevent once you know what to watch for in your garden.
Fusarium wilt becomes a real threat when your soil temperature rises above 70°F. Early planting gives your peas a head start before the heat brings this fungus to life. Practice crop rotation peas on a 4 year cycle so diseases don't build up in the same soil. Aphids are also dangerous because they spread Pea Enation Mosaic Virus from plant to plant.
When you shop for seeds, look for disease resistance codes on the packet. DM means resistance to downy mildew. F stands for Fusarium wilt resistance. PEMV covers Pea Enation Mosaic Virus, and PM means powdery mildew resistance. Picking seeds with these codes gives you a built in defense before you even put them in the ground.
Harvesting and Storing Peas
Getting your pea harvest timing right is the difference between sweet, tender pods and tough, starchy ones. Harvesting peas at the wrong stage ruined my first crop because I waited too long and all the sugars turned to starch. The key rule for when to harvest peas is to pick every 1 to 2 days once pods start forming. This continuous harvest peas approach tells the plant to keep making more pods for you.
Snap peas are ready 5 to 8 days after flowers appear and should feel firm with an audible crunch when you bite one. Garden peas take longer at 18 to 21 days after flowering. Pick snow peas while the pods are still flat and you can barely see the seeds through the pod wall. Each type below gives you the exact signs to look for so you never miss your perfect picking window.
Shelling Peas (Garden Peas)
- When to Pick: Harvest 18 to 21 days after flowers appear, when pods are plump and round with visible pea shapes pressing against the pod walls from the inside.
- How to Pick: Hold the vine with one hand and pull the pod with the other to avoid tearing the plant, and pick every 1 to 2 days to keep production going.
- Taste Test: Open one pod and taste a pea. It should be sweet and tender, not starchy. If peas taste starchy, you have waited too long and future pods should be picked earlier.
- Storage: Refrigerate unshelled pods for up to 5 days, or shell right away and blanch in boiling water for 90 seconds then freeze for up to 12 months of storage.
Snap Peas (Sugar Snap)
- When to Pick: Harvest 5 to 8 days after flowers appear, when pods are plump and firm but the peas inside have not yet expanded to fill every gap within the pod wall.
- How to Pick: Snap the pod from the stem by bending it sideways at the attachment point, being careful not to pull the entire vine away from its trellis support.
- Taste Test: A ripe snap pea should crunch when bitten and taste sweet. If the pod is tough or fibrous, harvest remaining pods earlier for the best texture.
- Storage: Eat fresh for the best flavor, refrigerate unwashed in a breathable bag for up to 7 days, or blanch and freeze for up to 10 months of freezer storage.
Snow Peas (Flat Pods)
- When to Pick: Harvest when pods reach full length but remain flat and thin, with tiny pea seeds just visible through the translucent pod wall before they begin to swell.
- How to Pick: Pinch or snip the stem just above the pod connection point using your thumbnail or small scissors to avoid yanking and damaging the delicate vine structure.
- Taste Test: The best snow peas are tender enough to bend a bit without snapping. If pods are stiff and lumpy with swollen seeds, they are overripe for snow pea use.
- Storage: Use fresh within 3 to 4 days for best texture, store unwashed in the refrigerator, or blanch for 60 seconds and freeze flat on trays for long-term use.
Dry Peas (Seed Saving)
- When to Pick: Leave pods on the vine until they turn brown, dry, and papery, and the peas inside rattle when you shake the pod between your fingers.
- How to Pick: Cut the entire dried vine and hang it upside down in a dry, well-ventilated area to finish drying for 1 to 2 weeks before removing peas from the pods.
- Quality Check: Dried peas should be hard, smooth, and uniform in color without signs of mold, insect damage, or discoloration that would indicate poor storage potential.
- Storage: Store dried peas in airtight glass jars or sealed containers in a cool, dark place for up to 3 years, or plant them as seed for next season's pea garden crop.
Here's a tip most guides skip: peas convert their sugar to starch very fast after you pick them. I tested this myself and found that dunking your harvest in cold water right after picking locks in the sweetness. Storing peas this way, then freezing peas within a few hours, gives you pods that taste almost as good as fresh ones months later. Drying peas is another great option if you want to save seeds or stock your pantry for soups.
5 Common Myths
Peas need heavy nitrogen fertilizer applications to grow well and produce large harvests in the home garden.
Peas create their own nitrogen through a symbiotic relationship with Rhizobium bacteria in the soil, and adding extra nitrogen fertilizer can actually reduce flowering and pod set.
You must soak pea seeds overnight before planting or they will fail to germinate properly in the garden soil.
Pea seeds germinate reliably in 6 to 17 days without soaking when planted in moist soil at 40F or warmer, though soaking up to 24 hours can speed the process slightly.
Peas only grow well in spring and cannot be planted again once warm summer weather arrives each year.
Peas can also be planted as a fall crop 8 to 10 weeks before the first fall frost, and in mild climates they can grow through winter months for extended harvests.
All pea varieties grow tall vines that require a trellis or other climbing structure for proper growth and production.
Bush and dwarf pea varieties grow only 1 to 2 feet (30 to 61 cm) tall and produce well without any trellis support, making them ideal for small gardens and containers.
Pea plants are extremely sensitive to cold weather and must be protected from any frost exposure during the growing season.
Peas are frost-tolerant cool-season crops that handle heavy spring and fall frosts well, and mature plants can survive temperatures as low as 28F (-2C).
Conclusion
You now have everything you need to grow peas in your home garden this season. From choosing the right cool season vegetable variety to picking pods at peak sweetness, this guide covers the full journey. Peas mature in just 50 to 70 days, thrive between 55 and 70°F, and fix their own nitrogen so your soil gets better every time you plant them.
I wanted this guide to give you what most others skip. You now know how to grow peas in containers on a balcony. You learned succession planting schedules that stretch your harvest to 2 or 3 months. You also got seed packet codes that help you pick disease resistant types. Whether you grow one pot or rows in your pea garden, these tips work.
Think about which setup fits your space best right now. A single container of Sugar Ann snap peas gives you fresh peas in under 8 weeks with almost no effort. A full backyard row of Sugar Snap and Green Arrow can yield 2 to 5 pounds per 10 feet of row and fill your freezer for the winter months ahead.
In my experience, peas are the best crop to start with if you want quick results and healthy soil in your home garden. Get your seeds in the ground a few weeks before the last frost and you'll be eating fresh peas before most of your neighbors even start planting. Your pea garden will reward you with one of the tastiest harvests of the whole growing season.
External Sources
Frequently Asked Questions
What is the best way to start growing peas as a beginner?
Start by direct sowing pea seeds outdoors 4 to 6 weeks before the last spring frost, planting them 1 to 2 inches deep in well-drained soil with a pH between 6.0 and 7.0.
Will all pea plants require climbing support?
Not all pea plants need climbing support. Bush varieties grow only 1 to 2 feet tall and are self-supporting, while vining types can reach 6 feet and need a trellis.
Which plants harm pea growth?
Garlic, onions, and potatoes are known to inhibit pea growth when planted nearby because alliums can stunt legume development.
What is the best time to plant peas?
The ideal time to plant peas is 4 to 6 weeks before the last spring frost, when soil temperatures reach at least 40°F.
How frequently should I water pea plants?
Water pea plants deeply once or twice per week to provide about 1 inch of water, increasing frequency during flowering and pod formation.
Can peppers be compatible with peas in gardens?
Peppers and peas have different temperature preferences, making them difficult to grow together at the same time, though peas can benefit the soil before peppers are planted.
Which sunlight conditions do peas need?
Peas need a minimum of 6 hours of direct sunlight daily, with 8 to 10 hours being optimal for maximum pod production.
What can happen when pea plants are overcrowded?
Overcrowded pea plants suffer from poor air circulation, increased disease risk, reduced sunlight, and smaller yields due to competition for nutrients.
Can pea plants survive winter frost?
Pea plants tolerate light frost and temperatures down to about 28°F, but hard freezes below 20°F will damage or kill them.
How many peas can a single plant produce?
A single pea plant can produce 20 to 30 or more pods over its growing season, with each pod containing 5 to 8 individual peas.